Slice
form jingle bell is composed of 8 center folded shapes
which join back to back
around vertical axis,
with punched hole tab at top.
Embellish with holly sprig
and layered berries accent.
Measures approx. 1” diameter x 1.4” tall.
Add to
packages or other seasonal decorations.
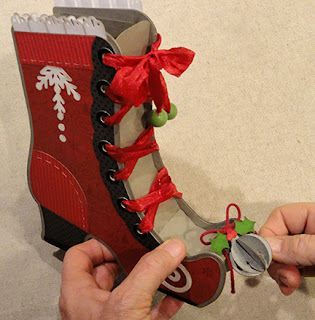
“Boot 3D Vessel Mrs. Kringle” design.
ASSEMBLY: 1. Lay out the 8 shapes as identified
in order from the cut file. Bend each as "valley" fold
along the vertical center perforation line.
For shapes #1and #5 with hang hole tab,
carefully separate the right half
connection to body circle so that the tab can be
aligned and joined later in the assembly.
circles that fall next to each other back to back
with outer curved edges aligned, and perforation folds
"stacked" next to each other. Glue halves ONLY together.
3. Position shape 3 in order in the sequence,
3. Position shape 3 in order in the sequence,
with two halves adjoining that include the sound holes,
then place back to back, adjust and join halves ONLY.
4. NOTE: to ensure accurate alignment, it will be
4. NOTE: to ensure accurate alignment, it will be
helpful to bend each added shape back into
the "stacked halves" configuration, ensure accurate
perforation bends alignment and stacking, and
to apply fingertip pressure at each new addition.
6. Continue adding shapes, such as shape 5
shown here, until all 8 shapes are connected in an array
with halves joined to neighboring shapes
except the first and final shapes.
7. As the final joining begins, apply glue to the backside
of one of the hang tab extensions, then . . .
. . . bring the backsides of two halves together,taking care that hang tabs at top are disconnected
at partial cuts so that they end up back to back as well,
then press all layers being joined together,
including the top tabs, with hang holes and edges aligned.
Here is the top view of the completed 3D jingle bell.
Here is the bottom view.
8. Prepare the holly assembly by attaching individual berry
circles onto the welded trio base, then placing
and attaching at holly center.
then position and attach holly assembly onto tab.
10. To include the jingle bell in the 3D boot assembly,
thread the twine through boot toe holes,
knot and bow, then attach holly assembly.


No comments:
Post a Comment