Simple lid and base box components fit together
to form a shelf-sitting Halloween decoration
that appears to be one solid form.
Front "wrappings" overlays are built up with
glued-together layers with single-layer eyes wedge.
Form measures approx. 3" wide 6" tall x 1.5" deep
when fully assembled.
Front "wrappings" overlays are built up with
glued-together layers with single-layer eyes wedge.
Form measures approx. 3" wide 6" tall x 1.5" deep
when fully assembled.
ASSEMBLY: 1. Identify and cut the shapes:
A hull LID front panel
B upper LID boxing strip
C lower LID boxing strip
D wrapping shape overlays (4-5 ea.) plus eyes wedge
E hull BASE back panel
F upper BASE boxing strip
G lower BASE boxing strip
H interior "neck" cross strip support
I interior mid lower hull cross strip support

shapes and gluing together, taking care to align all
edges as precisely as possible. Then . . .
 . . . press under a flat heavy weight such as a thick

book volume or a fabric-wrapped repurposed weight
machine bar such as the one shown here.
Leave weight in place until the stack is thoroughly dried,
for several hours or overnight. Pressing will help
stacks stay flat and minimize warping or curling.
Repeat for ALL of the 5 wrapping overlay shapes.
 FRONT HULL ASSEMBLY

3. To build the front hull LID, three shapes are needed,
including upper and lower boxing strips and body shaped
front panel, as shown here.
 The body front panel can be identified by locating

the diagonal dashed guide line (for one of the wrappings)
and the single pinhole guide mark at center top.
The BASE boxing strips can be identified by
the two tiny "bite mark" edge cuts on the end tabs
or center long flange; LID tabs have plain edges.
 Prepare the upper boxing strip by adding back curl

to the full length of strip using a rod tool such as
this 1/2" (or equivalent) wooden dowel.
 Also add curl to the end portions only of the bottom

boxing strip where the multiple small tabs are --
NOT to the solid longer flange tab.
 4. Bend the end tabs of upper boxing forward and . . .


perpendicular.
 5. Also bend the bottom long flange tab back and . . .
 . . . the side plain and multiple small tabs back.
 6. Locate the center top front panel single pinhole


guide mark, and with panel face side up . . .
 . . . position it at the center tab of the upper boxing strip

where there is a matching pinhole guide mark.
 Overlap body straight edge over tab to bend edge

and glue in place. Hold until secure, with no other
tabs attaching.
 7. Form the first half of boxing to the hull "head" shape . . .
 . . . with the end tab perforation bend exactly aligned


at the valley transition between body and head,
pushing inward or outward to adjust boxing tabs
bend edges to align as precisely as possible.
 Once the best alignment has been achieved,

turn the assembly face side down on flat surface
and apply fingertip pressure all along the tabs seam
to secure it.
 8. Repeat step 7 for the second half of boxing strip.
 9. Position the bottom boxing strip at lower straight edge


of front hull shape, align at edge, then overlap and glue.
 10. Form the first side half along panel edge, matching

straight portions of boxing and panel edge, then
shaping curving boxing edge to hull in similar manner
as was done previously with upper curve edge.
 11. Re-bend the upper strip's end tab back so that

adhesive can be applied, then . . .
 . . . bend back into position. Tuck straight end edge of

lower boxing strip into the angle at tab perf line,
adjust and apply pressure until fully secured.
12. Repeat for the second half of lower boxing strip,
to align, form and join end.
 WRAPPING DECORATION

13. Begin to position and add the wrapping stack
components by positioning the middle shape exactly
along the dashed guide line on front hull. Adjust so
that side shapes edges of wrap shape and hull align
as precisely as possible.

Turn the LID face down to
apply fingertip pressure to secure in place.

above middle wrap so that abutting edges come together,
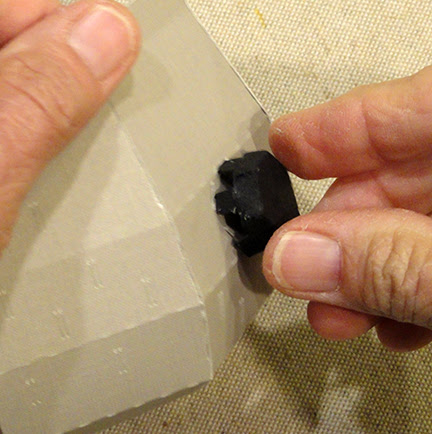
then glue in place. Also position and attach the eyes wedge.

15. Position and attach the lower two wrap shapes
in similar manner. Turn over and press from back.

NOTE If possible, find objects such as these multiple
thread spools of matched height to place inside
the glued-up hull that are taller than the 1.5" wall
height upon which a heavy object such as
a book can be placed to apply pressure to drying
overlays until they are fully secure. This will
help join shapes more fully and minimize warping
of hull front panel.
 16. Repeat the hull assembly steps for the back BASE.

17. Prepare the interior support shapes by bending
back the side flanges and top, bottom attachment tabs.
Apply glue to side flanges and bottom tab.
Position the shorter neck cross brace at the narrowest
span, with flange bend aligned exactly at boxing corner.
Adjust so the brace is standing straight up, then apply
pressure to attach the side and bottom tabs in place.

placed at the transition point between straight
and curved portions where the solid flange ends.

glue to the upper tab of the interior cross braces.
Then fit the LID over the BASE, and . . .
 . . . pushing the two together fully. NOTE that

this is a fairly close fit.


20. To help the LID conform more fully to the BASE,
add a bit of glue between the walls all around, then . . .
 . . . apply fingertip pressure all around, and especially

at the "neck" angles, bottom and top.
 Here is the completed mummy form.