Now you have some experience if you have worked through the Basics with the Log Cabin and Square In A Square blocks tutorials. This post will explain a move advanced positioning concept for foundation piecing. This time the shapes are not "log" rectangles, or half square triangles. They can be random polygons, large and small. The paper folding to view the reversed shape "trick" illustrated here is also helpful if you wish to control how pattern or grainline ends up in your patchwork.
FOLD THE PAPER
Use a straight edge (postcard, bookmark, etc.) to align along EACH interior stitching line, one by one, and fold foundation back. Notice the paper is being folded PRINT side to PRINT side.
IDENTIFY PATCH #1
Patch #1 will be background. It's boundaries are two stitching lines, and a long and short outer edge of the foundation paper diagram.
POSITION & ATTACH PATCH #1
Step 1. On paper backside, place a dab of fabric glue stick in center of area #1. You can see its shape by viewing the creases that are visibly from the back.
Step 2. Turn paper over, position BACKSIDE of paper to BACKSIDE of fabric. Notice that the outer straight paper edges that meet at the right angle corner lay with the two fabric straight grains. Since this diagram is a rectangle, and this patch has the corner shape as a boundary, this is BEST practice to follow.
TRIM PATCH #1
Step 3A. Fold paper diagram back on left crease/stitching line that bounds area #1. Trim 1/4" beyond paper edge. Here the "Add A Quarter" ruler with raised seam allow. edge assists the rotary cutter.
Step 3C. Trim fabric just beyond paper edges that define the outer dimensions of area #1.
Here is how patch #1 looks, in position and trimmed.
 IDENTIFY PATCH #2
Step 4. With paper diagram unfolded and flat, identify patch #2. I am pointing to the line separating #2 from #1. (As assembly proceeds, the target line will be the one between what is being added & what was joined previously and now is in place). This patch will represent the elf's arm from elbow to wrist. NOTE the stripe direction line notation, here parallel to the 2-to-3 stitching line. Once you know which one, fold the diagram on that target line.
Step 5. The top layer should be the top, most visible layer. The creases defining area #2 are here highlighted with pencil, and the stripe guideline has been transferred to the backside, too. Position the area over the fabric which is FACE side up on the table. Rotate the diagram until the guide arrow is in line with the fabric stripes. Adjust toward fabric section edges to reduce wasted fabric.
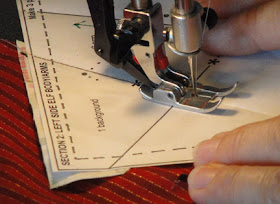
Step 6. Carefully unfold the paper, hold the layers to avoid any shifting, move to the sewing machine. Adjust stitch length to 12 stitches per inch, or about HALF the length of regular piecing. Use neutral thread color. Begin stitching from the cut edge of paper (interior patches will start 2 stitches only before the line). Stitch along and EXACTLY on target line, and stop 2 stitches beyond end of the line.
TRIM PATCH #2
Step 8. Re-fold diagram at the stitched seamline. Trim excess fabric 1/4" beyond fold.
Step 11 and beyond: Identify the next patch to be added. In this case, it would be Patch #3. I have added a stripe direction line because for this project I want the sleeve stripes to be parallel to the outer edge of the line, as shown. Follow the folding-back, guideline transfer to backside (if desired), positioning on fabric #3, unfolding, stitching, trimming, etc., steps as previously illustrated.
With each new patch added through the rest of the assembly, pay attention to:
1. which foundation lines are stitching lines or outer trim lines; 2. which lines will be CROSSED by following stitching lines (2 stitches before and 2 after the line), or which will not (at edge of foundation, complete stitches FROM or TO edge.)
When all patches are added correctly, make final trim at outer solid lines of the foundation. Remove paper at stitching perforations, working in reverse order.


No comments:
Post a Comment