(available for purchase from SnapDragon Snippets
through SVG Attic or Silhouette America's online store)
to cut and assemble 7 different runway panels
to configure a child's airport for hours or imaginative play.
ASSEMBLY
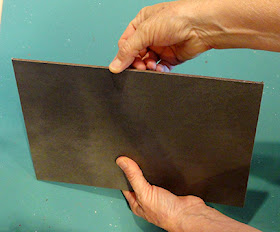
1. Assemble materials for the runway panels. Here you can see the adhesive vinyl rolls (upper right), and masonite panels cut to size (mine are cut 7.5" x 11.5"), and the upholstery vinyl oversize pieces.
MASONITE is a manufactured wood project often used as drilled peg boards. It is available from large home improvement stores, and they will usually cut it to size for the customer on site, for little or no fee.
My project has 7 panels, but if you want a longer runway, add more of the plain straights, or configure the way you wish.
2. Use an appropriate strong spreadable adhesive to attach upholstery vinyl to the top/face side of each masonite panel.

3. Position and smooth the vinyl in place. Use a roller tool of some kind to help the vinyl adhere in a smooth, even, complete manner.
4. Use straight edge, mat and utility knife to neatly trim away the excess upholstery vinyl at edges so that it is even with masonite edges.
5. Working quickly while glue may still be malleable, press fingers along each edge of the vinyl and masonite to ensure that edges are well attached, and to press a slight bevel into vinyl edge, if possible.
6. Cut the white base shapes from vinyl using your digital cutting tool. Trim if necessary to almost finished size, and weed the edges so you have only the panel remaining.
7. Prepare a positioning to help mark the panel edges. Here you see my template which is a piece of scrap card stock. The top edge has a cutout that matches the side-to-side width of the white base panel from Step 6.
I have positioned the template at the masonite upper edge, visually centered it, then I am temp marking the width positions to help me place the vinyl base shape. Repeat the process at the bottom of the panel.
8. Release a portion of the vinyl at top edge, place the vinyl as indicated by the guide marks from Step 7.
9. Begin to pull the backing away while using a scraper/squeegee tool to help the vinyl carefully be placed onto the upholstery surface and panel. Take care to make sure the vinyl is being applied exactly straight, and that the air bubbles are being pushed out as it is being applied.
NOTE: it can be repositioned carefully, as needed, but the vinyl does have quite a bit of grab. If there are air bubbles that can't be worked out to the edges to release, scrape to get them as small as possible, then prick with a pin and press the trapped air out.
10. Repeat the process for the black tarmack panel, taking care to center the panel side to side, align top (then bottom presumeably), so that an even margin of white panel is visible at side edges.
(This is the trickiest part of this assembly.)

11. Cut the lights positioning template from a piece of waste 12x12 paper. Position it, centered, over the panel and transfer runway lights positions. NOTE that the hole cut outs are smaller than the finished light sizes, so marks will be covered by the attached vinyl circles.
12. Cut and attach the white base circles over marks ...
... then place a yellow rim ring over each white base circle.
13. Repeat the process to place remaining shapes in their appropriate locations: A) arrow bars at runway entrance; B) the barrier light bar base red and yellow overlay shape, and C) the runway light yellow base with red lamp shape on top.
Here is the 7 panel layout in one configuration.
You can see how the main straight panel could be
replicated to make a long straight away connected to the upper end here.
HAPPY LANDINGS!


No comments:
Post a Comment