Imitating take-away sandwich packaging, this triangular box
hull
is cut in one shape which bends to join at corners,
forming a
wedge compartment measuring approx.
3.25” tall x 3.5” wide x 1.5” deep.
Angled wall panel includes a rectangular window to provide
sneak peek at
loose goodies inside,
with a “window” panel to cut from clear vinyl material.
At apex,
large tab extends upward, containing
punch holes for ribbon
tying.
Accent shapes are included to decorate
triangle wall panels
and end upright panel.
Customize the box for selected celebration:
with "cut & print” accent shapes:
with "cut & print” accent shapes:
Christmas Dec. 25 ticket and “cool Yule” flag;
hanukkah shine bright”
ticket and “shalom!” flag.
(Instructions begin with Christmas box.
Hanukkah box follows, beginning in Step 7.)
ASSEMBLY: 1. Identify and cut the shapes
CHRISTMAS BOX
A main hull B clear vinyl or acetate window panel
C triangle outer box accent shapes
D spine box outer back accent panel
E holly accent: leaves base, berries pair welded, berry
F print & cut "cool Yule!" flag phrase
G flag base
H Christmas Dec. 25 accent stamp print & cut
A main hull B clear vinyl or acetate window panel
C triangle outer box accent shapes
(NOTE this two sided paper was reversed for
the final design assembly to be deep blue with stars)
D spine box outer back accent panel
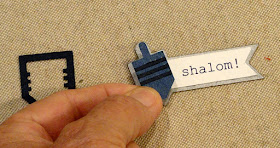
E dreidel base with stripes "place & trim" overlay
F print & cut "shalom!" flag phrase
G flag base
H hanukkah shine bright stamp print & cut
prepare the print & cut operation for stamp(s) and
printed words flag overlay, then print onto 65 lb. white card stock.
Send printed page to the cutter. (The samples were prepared
at the same time, so both stamps are shown here as
attaching the print & cut overlay onto the base shape
with narrow margin on long straight top and bottom
edges, and at "forked tongue" end. Then assemble
the holly berries onto the leaf base. Finally . . .
. . . position the leaves unit onto the flag base.
4. Follow this LINK to find the remaining assembly steps
. . . position the leaves unit onto the flag base.
4. Follow this LINK to find the remaining assembly steps
for a similar sandwich wedge box project,
specifically Steps 2-10. Then return here to complete
the Christmas box project.
5. Position and attach the flag accent assembly above
window, and the stamp accent below window.
6. Add ribbons with twine bow (or other decoration)
at top hole - NOTE that the sample uses the "large"
tie hole variation.
Here is the completed box filled with loose candy.
HANUKKAH BOX
7. Position and attach the flag print & cut overlay onto
the base with narrow margin at straight edges.
8. Prepare the mini dreidel accent by applying glueto backside of stripes ONLY, then position over dreidel
base, with bottom point of "window" aligned at tip,
and attach in place.
carefully trim the excess overlay even with
dreidel base edges.
of the flag assembly with tiny margin at edges.
10. Follow this LINK to find the remaining assembly steps
10. Follow this LINK to find the remaining assembly steps
for a similar sandwich wedge box project,
specifically Steps 2-10. Then return here to complete
the Hanukkah box project.
11. Position and attach the flag accent assembly above
window, and the stamp accent below window.
12. Add ribbons with twine bow (or other decoration)
at top hole - NOTE that the sample uses the "large"
tie hole variation.
Here is the completed box filled with loose candy.


No comments:
Post a Comment