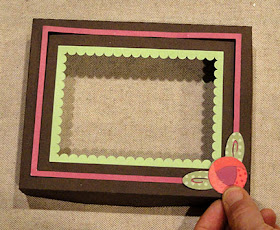
Gift box with window lid measuring 6” x 4.75” x 2” deep
is now available for purchase and download from
SnapDragon Snippets
through SVG Attic (part of an ensemble)
and Silhouette America's online store.
CONSTRUCTION:
1. Identify and cut the pieces. You will need:
lid
base/bottom of box
insert (to hold gift card; optional)
lid frame accent
scallop window liner
flower layer pieces: 4 base circles, 4 sets of three crescent pieces, 4 leaf base circle
2. Fold lid flanges, sides and end (corner) tabs inward on perforations.
3. Insert corner tabs of end sections behind adjacent side sections, align perforation with box edge, and glue in place.
4. Fold flanges to inside of lid and glue securely in place.
5. Working from the inside of the box, center and glue the scallop window "liner" shape in place. BEFORE glue dries, turn the lid over to check that the margins of the scallop liner are evenly exposed at all four sides. Make adjustments as necessary, then apply pressure to make sure it adheres well.
6. Use the template in the cut file to rotary or scissors cut the rectangle of clear vinyl plastic for the window. If this material is not available from your paper supplier, check with a full service copy store, and ask for transparency plastic. Position and glue in the inside of the lid.
7. Center and glue the frame shape in place on lid.
8. Pre-assemble the circle flower units by placing the leaf base face side up, then gluing the circle base in place (the color that shows through in the center), then place and glue each of the 3 crescent pieces onto the circle base, taking care to align the curves of all pieces, and crescent shape edges.
9. Position and glue a circle flower unit at each corner with the leaf extensions aligned at the frame.
10. Fold the box base (bottom) inward on perforations. Align and glue the side tabs under the edges of adjacent end sections.
11. Fold optional gift card insert inward on perforations. Align the small end tabs under the edges of adjacent side sections and glue in place.
12. If using the insert, slide it into the bot bottom.
13. Place the gift card in position by lifting the half-circle tabs of the insert and sliding the card between. (Use a sticky dot to assist the card to stay in place.)
Here is the finished box as viewed from the front.


No comments:
Post a Comment