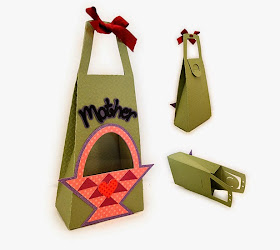
A uniquely-shaped gift "sack" just in time for
Mother's Day or springtime gift giving
is now available from SnapDragon Snippets
through SVG Attic (part of an ensemble)
and the Silhouette America online store.
Container dimensions are 6” tall, 3” wide and 1.75” deep at base.
ASSEMBLY:
1. Fold the tote body as shown:
a) fold inward at side(s) of front and back, and bottom flanges, latch tab
b) fold outward at angled side perforations
2. Cut the window template, then use rotary cutter (or scissors) to cut the window shape.
3. Position the clear window shape behind the window on the backside of the tote front. The bottom of the window will extend to the bottom of the tote front section.
4. Bring the side tab and front edge together, align perforation of tab and edge of front and glue securely. It may be helpful to insert a long object like a pencil or dowel to provide a press-against surface as pressure is applied along the front/tab joint.
(This image - and the following two images - shows a different tote under construction, hence the change in tote body color.)
5. Finish the tote bottom by folding in sides, then slot tab, then folding latch tab over until it slides into the slot. Square up the bottom and apply a few glue dots between the layers, if desired.
6. To close the latch (now or later), fold the latch tab over to the back, press the half-circle tab back until it slides into the slot.
7. Pre-assemble the front decorations. Layer the basket base and basket, then glue the triangle rows in place. It may be easiest for aligning to begin with the bottom triangle between the basket side angled, then the row above and so forth. Light perforations give row positioning guidance for the base edges of the triangles. Add the heart over the center of the triangles.
Also layer the "Mother" and base "Mother" shapes.

8. Place the basket on the tote front with the inner handle shape aligned with the tote window cutout edges, and glue in place. Position and glue the optional "Mother" shapes above the handle.
9. Fill the tote, then close the latch, align the handles and punch holes. Thread sheer or lightweight ribbon (about 9" or so) through the holes and tie in a bow, if desired.
YOUR GIFT TOTE IS FINISHED!


No comments:
Post a Comment