This patriotic canister character is an updated version
of a previously-released design.
Now the cut file comes with the card stock canister
to build and decorate.
Also new to the design are the layered pointing hand and sleeve,
and the "YOU!" plaque.
This assembly guide will provide the assembly steps
to create this newer version.

ASSEMBLY:
1. Identify and cut the shapes:
The shapes layout here is for the original canister. The NEW canister will NOT include A or B, but will substitute the canister shape, with two angular oval "rim" rings, and one whole angular oval to build the canister. All other shapes (C-N) are the same as pictured.
Here are the additional shapes needed for the "NEW" design.
These include:
(left column, top to bottom): fingers
index finger with under lay "nail"
thumb underlay
sleeve
(right column) YOU! letters,
optional letters placement template cut
inner plaque
outer plaque

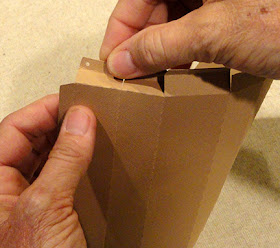
2. Refer to this LINK to build the canister tube from recommended blue card stock that coordinates to Sam's suit. Complete steps 2-6 from the linked tutorial, then return here to continue to follow this post.
 3. Refer to previous Uncle Sam canister wrap tutorial (here) to follow assembly steps 2 thru 29 to assemble torso, face/head and 3d hat, then return to this "NEW" tutorial to complete the new features.
4. Assemble the pointing finger/hand. Attach the fingers unit to the thumb base shape with edges that match up aligned.
Layer the index finger over the underlay that will show through as the finger nail.
Position the index finger assembly over the fingers/thumb assemble to create the hand unit.
5. Attach the hand to the top area of the sleeve shape in the approximate positioning as shown here.
6. Position and attach the hand/sleeve unit at the lower left (as facing it) corner of the main "jacket" assembly.
7. Layer the inner and outer plaque rounded rectangle shapes.
Position and attach the "YOU!" shapes. One way to do this is to cut the included positioning template, position and temp-tape secure it over the inner plaque shape, then apply glue in the stencil openings. Position and press to attach each letter shape, then . . .
. . . carefully peel away the template shape leaving the letters and figures in their desired positions.

8. Attach the plaque on the right side (facing it) in the approximate area shown.
Your "new" Uncle Sam character should now be complete!


No comments:
Post a Comment