Cut multiple “thankful” word
shapes and glue into
a thick stack so it appears as a wrought iron cut-out.
Construct the “plank” box lid, then base and add
built-up platform for thickness and
weight.
Square tube “posts” extend from plank to attach
to backside of word
letters.
Display measures approx. 11.7” long (word) x
2.5” deep (plank) x 6”
tall.
Optional taller post shape can increase overall height to 8”.)
(Requires 12x12 cutting capacity and
4-5 sheets of cardstock plus accent paper.)
ASSEMBLY: 1. Identify and cut the shapes:
A thankful word cuts (6-7 to stack for thickness)
B post shapes C collar post anchors (2 sets 4-5 ea.)
D box LID E box BASE
F base bottom platform stack (4 to stack for thickness)
G accent panels for LID
H interior "strut" supports (attach inside base)
adding them one by one to form a stack, taking care
to align ALL cut edges as precisely as possible.
HINT: It may be helpful to stack and glue up 3-4
to begin with, then press and cure for 1-2 hours. Then
adjusting and confirming most precise positioning
of glue-up, press under a heavy, flat weight, such
as one large wood plank as shown here, or
several large book volumes, etc., until thoroughly
dried - this may require several hours or over night.
3. Position and glue platform rectangles into a stack,
3. Position and glue platform rectangles into a stack,
then press flat under weight until thoroughly dried.
perforation lines, including the top end "cap" square
and tiny wedge tabs. NOTE that the post shape
includes a diagonal interior flange to provide strength
and help keep the post straight - marked with
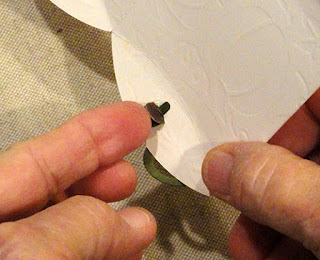
into final position to close the tube. Hold until secure.
Bend top tabs inward, apply glue and bend top
Bend top tabs inward, apply glue and bend top
"cap" into position, square up with walls, and hold
and glue together, taking care that interior square
cut out edges are aligned as precisely as possible.
One way to ensure the collar opening is precise
is to use one of the assembled posts to insert
through the opening.
Then press flat with weight until thoroughly dried.7. Prepare the BASE "tray" by bending back on
all perforation lines for center panel, side walls and
end tabs. NOTE that the BASE tray is distinguishable
from LID tray by a 'B' cut into one end flange.
8. Turn the tray face down, then position and attach
the post end collars so that the interior squares of
collars and base align precisely. Press until dried.
9. Turn the base tray face up again, then position the bottom
platform assembly on bottom with edges aligned with
center panel perforations, and glue in place.
Press under heavy weight until thoroughly dried.
10. When glued up assembly of base is completed
and dried, complete the corner seams by bending
adjacent walls into position, with straight edge
overlapping tab to perf line, then gluing.
11. Prepare the LID shape by bending back on
all perforation lines in similar manner to BASE.
12. Position and attach accent shapes offset slightly
from panel edges centered with even narrow margins
all around. For center panel, take care that post holes
of LID panel are centered within accent hole cut outs.
Press flat until dried.
13. Bend adjacent walls back to join corner seams.
14. Prepare internal support "strut" sections by
bending tabs forward, and bending back at
vertical short perforation lines within strips,
and forward at end tab of left strips.
NOTE that pairs of strips will be joined into one longer
strut, one strip that includes the inward end tab.
One of the pairs is the upward slot strut, shown below
with the circle cut outs within end tab and bottom tab;
and the other pair for the downward slot strut.
15. Join the pairs into their longer forms by overlapping
the straight end across the opposite end tab to
perforation, adjusting so that top and bottom edges
align, then joining seam.
16. Rotate one of the strut assemblies so that the two
create a 'W' (top) and mirror image 'M' as shown,
with tabs at bottom resting on work surface.
17. Position the upward slot strut (with circle cutouts)
above the other strut, adjust so that slots align,
then carefully slot the two together so that they
both sit flat on work surface.
18. Apply glue to the downward surface of strut tabs,
then position inside BASE tray with ends extended
into corners, "window" openings surrounding collars.
FINISHING
19. "Fill" each of the collar wells (center square cutouts)
with adhesive - quick grab glue is recommended.
Then immediately . . .
. . . place the LID over the BASE to close the plank.
(This should be a tight fit, so maneuver lid straight on.)
Push down completely into position, and quickly . . .
. . . add adhesive between each LID wall and
BASE wall. Press together to true up wall layers.
Finally, insert each post "open" end through lid top
panel down so that the bottom end seats within
the collar "well" inside and at bottom of BASE.
Repeat for second post.
SUGGESTION: at this point in assembly, it may
be helpful to place straight edge props such as
heavy book volume spines or flat-sided household
items against walls to help with joining of wall layers
and leave in place until wall joints are dry.
20. "Dry fit" the positioning of thankful word cut assembly
over the post ends, so that front post is hidden behind
back 'leg' of 'h' and back post is hidden behind
back 'leg' of 'u', as shown below.
Posts should be approx. generous 1/4" below top edges
of letters. Apply quick grab glue to top portion of posts
where word will overlap, then position and attach.
Adjust final positioning so that the word cut is
"parallel" to plank (as well as uneven nature of
word shape may suggest), then prop or hold in place
until secure.
Here is the final word on posts & plank display.


