Showing posts with label Crow. Show all posts

Tuesday, September 11, 2018

Rooster Fancy Feathers CROW Card

"Patchwork" feathers create this fancy fellow 
who can "crow" about someone or something special. 
Focal point rooster is composed of more than 18 different shapes 
(composed onto section and whole silhouettes) 
with a rounded corner plaque that declares" CROW". 
Great for sending congratulations, encouragement, 
wishes for a a happy day, and other sentiments. 
Shaped card top has mirror image back base panel 
with perforation line near top to allow back to 
bend outward in self-easel style display card. 
Measures approx. 5.6" x 7" when closed. 

ASSEMBLY: 1. Identify and cut the shapes:
A card base front   B card base back (with perforation)
C offset base for rooster
D rooster building silhouette (shows thru as feet)
E head shapes
F chest shapes
G tail feather shapes
H CROW letters and arrow base
I plaque front, contrast (show-thru for punch dots)
and contrast offset base layer
J plaque end build up layers (6)

To help identify where the cut shapes will SHOW,
refer to this numbered diagram.
NOTE that some shapes are "base" shapes
to build other shapes onto or sections for assembly
(2 is head base; 9 is chest base; 12 is tail base;
10 has 11 added to it; 13 has 14 & 15 added to it.)


This layout shows corresponding numbers to
compare the model card colors to the diagram above.
2. Prepare the head component shapes and
the assembly silhouette.
Layer #3 head over #2 wattle/comb shape . . . 
. . . then add #5 eye circle and #4 beak 
to head assembly . . . 
. . . then position and attach head assembly
to #1 silhouette shape.
3. Prepare the chest assembly shapes.
Position #6 chest front shape over 
the #9 base shape . . .
. . . add the #7 narrow feather to the assembly. . . 
. . . add  #8 next to #7, and #11 onto #10,
then add the 10/11 unit onto #9 (a portion of
#9 will show thru).
Position the chest assembly onto the #1 silhouette,
tucking the matching-shaped edge next to
lower head assembly.
4. Prepare the tail feather shapes.
Position #14 onto lower edge curve of #13,
and in the same process . . . 
. . . add #15 along the top of #13.
Add the 13-15 unit onto the #12 base.
Add #16 on right side curve, then . . . 
. . . add #17 along top.
Position and attach the tail assembly unit
onto the #1 base, tucking it up next to right side
of chest section.
5. Add the #18 crescent over the two adjoining
assemblies at the top between head and tail sections.
6. Prepare the card back base shape by bending
along the perforation line as a "valley" fold.
17. Position and attach the upper portion of
backside of the back base card to
the corresponding portion of the card front base
backside. 
18. Position and attach the rooster assembly
to the rooster offset shape with equal margins
all around as shown. 
19. Position the rooster/offset base unit onto
the front card base, and attach.
20. Position and attach the contrast plaque panel,
then  . . . 
. . . then center and attach to the contrast offset
base shape.
21. Prepare a plaque ends riser by layering
the partial (end) cut shapes into two stacks of 3,
with edges aligned well as shown.
22. Position the contrast colored letters on top
of the arrow/CROW base. 
23. Center the Crow/Arrow shape onto the front
of the plaque assembly, and attach.

24. Position one stack underneath the plaque layers
on each end of the plaque assembly, with outer
edges matched up, and attach in place.
25. Position and attach the plaque assembly onto
the front of the card.
(Riser stacks will raise the plaque slightly above
the rooster shapes and feet.)

Here's the completed card, using
the back card as a self-easel.

Saturday, September 7, 2013

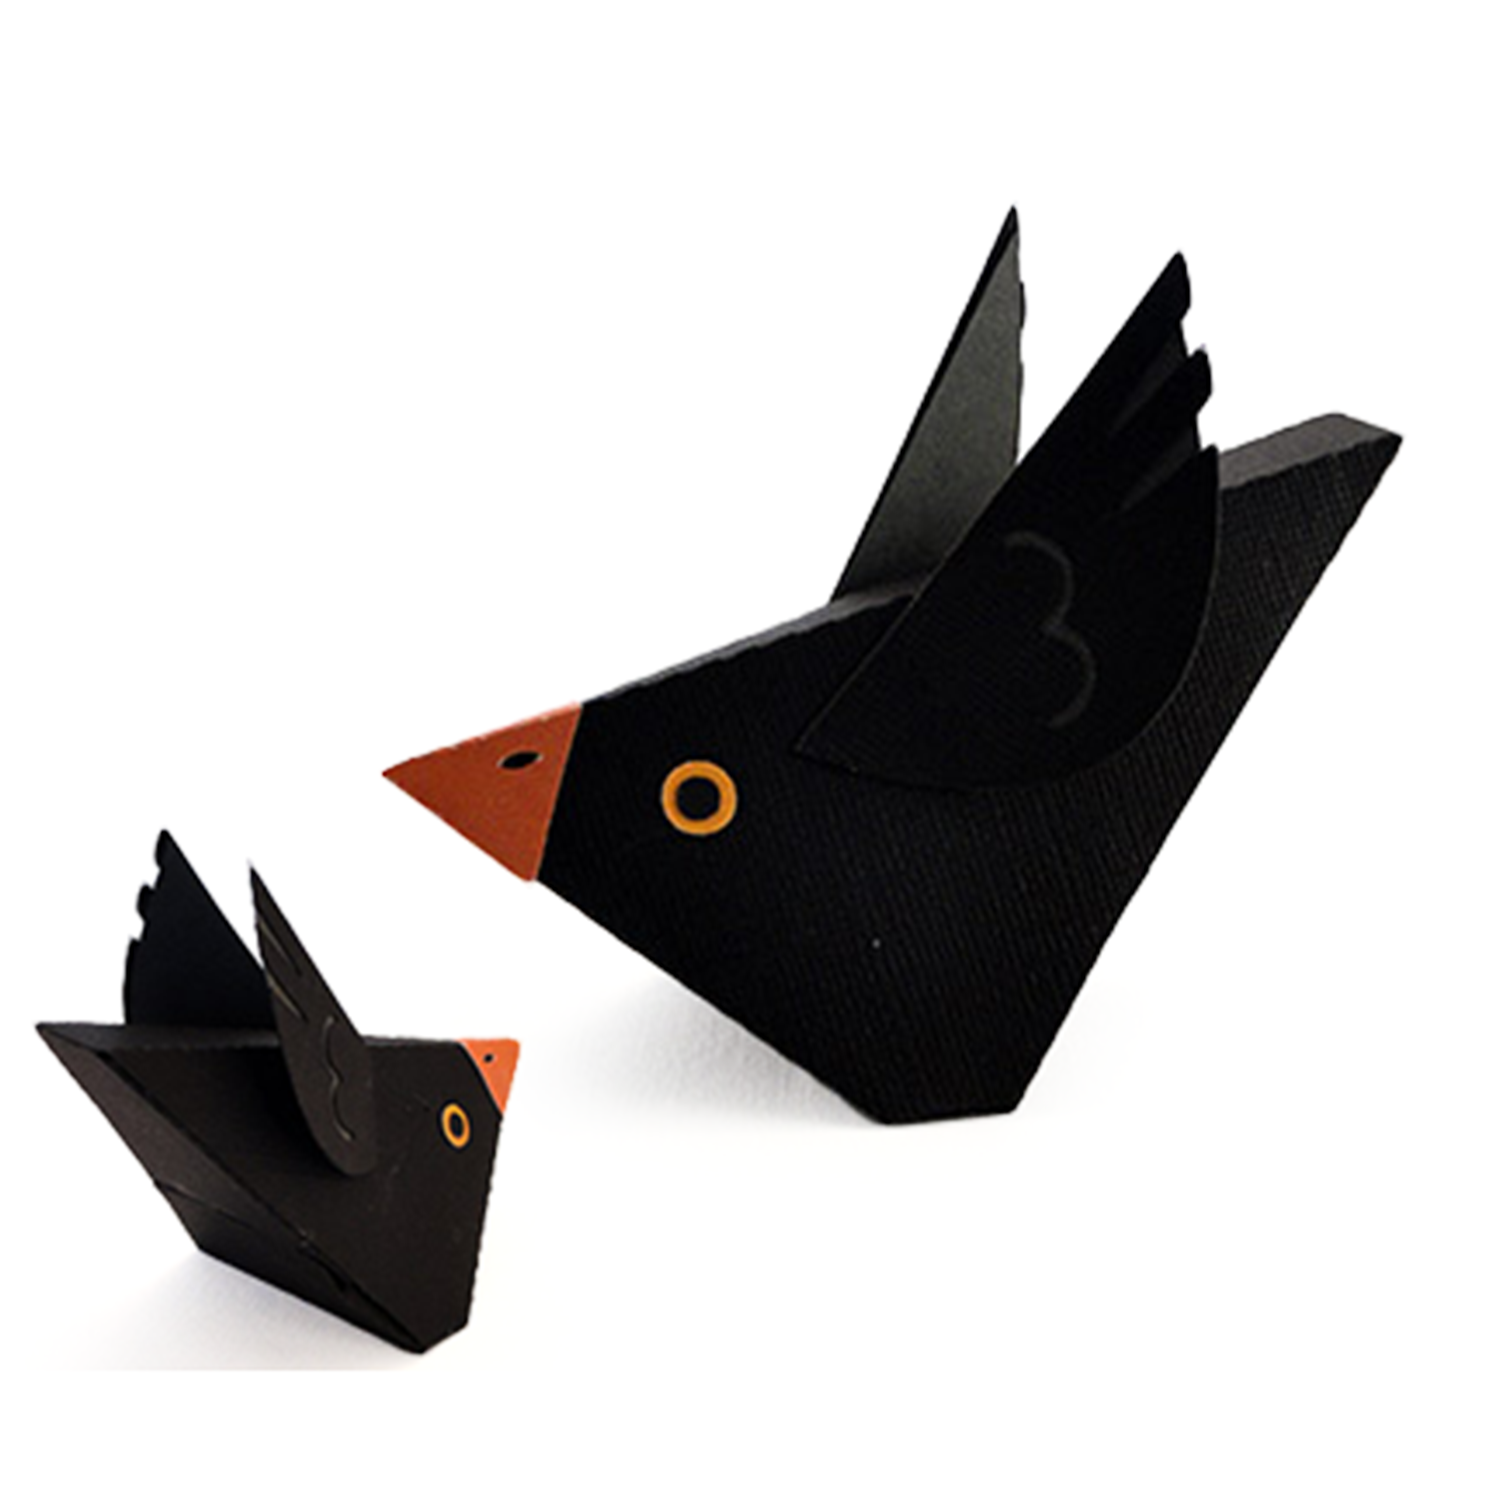
3d Wedgy Crow Tutorial


This little crow doesn't look like the menace that Mr. Scarecrow thinks he is!
Made of card stock, his body is one piece with just the basic additions
of double circle eyes, pyramidal shaped beak, layered wings.
Assemble one to sit on an artificial pumpkin (or even a real one),
place him with other autumn decorations on a shelf,
or pair him up with the 3d scarecrow shelf sitter.
He is made to fit and sit neatly on the scarecrow's "shoulder".

CONSTRUCTION
1. These are the cut pieces that go together to create the 3d crow. NOTE the one-piece body, and the contrast wing base pieces.

(Missing from this layout is the pair of smaller black circle inner eyes.)


2. Begin by folding the body at all the perforations. Fold all the tab and body perforation lines as "mountain" folds (i.e., back-to-back folds).


3. Fold the front  body area into a triangle shape so that the near-eye edge overlaps the front lower body tab. Apply glue to the tab, re-align, and apply pressure until glue is secure.


4. Swing the under-tail section containing the slots down so that tab perforations align with side body lower edges. Apply glue, re-align and hold edges and tabs in place, applying pressure, until the glue is secure.


5. Apply glue to the tabs on each side of the narrow base section. 


6. Reposition base section so bottom center side edges of body align with tab perf edges. Hold in place until glue is secure.


7. For weight and to help the crow sit on his base surface and not fall backwards toward his tail, use strong glue such as Fabri-Tack to securely glue a couple of chunky bolts inside the body cavity on each side, on the base rectangle surface.


8. Apply glue to lower under tail surface, below slots. 


9. Slide tabs into slots and apply pressure to make a good glued bond between the two pieces.


10. Examine beak piece. Note that one of the four triangle sections has a small circle symbol. This triangle surface is the "inside" layer of the base. Apply glue to the front surface in that triangle area.


 11. Fold the shape into a pyramid so that the symbol-containing triangle is under the opposite end triangle shape surface. Hold in place until glue is holding.l


12. Apply glue to the inside surfaces of the beak, then slide in place with the nostril holes at the top and in line with the long narrow front-to-back surface that is the top of the crow.


13. Apply the larger eye circle so that it conceals the cut guide circle in the crow body.
Repeat for the opposite side. Also glue the smaller black inner eye, centered, on the larger eye circle.


14. Glue the wing layers together. Repeat for both wings. Fold the layered wing at the perforation line in a "valley" fold.


 15. Apply glue to the wing underside in the triangle area on the triangle end beyond perforation.

16. Position wing front tip at the tiny triangle guide mark on the body. Repeat for both wings. Tip the wings at a matching angle.


Your FIRST crow is done.
Now that you know how quickly he goes together, you may want to create 
a whole "murder" of crows!

Here is this wedgy crow bird sitting on the shoulder of the scarecrow mantle sitter: