Showing posts with label YW values quilt. Show all posts

Thursday, January 10, 2013

"Act Upon These Values": Piecing the Blocks


 To understand the block, lay out the pieces as shown, taking care to rotate the triangle square units so that the color corners "point" inward.
Position the short B and long C background strips between.

The first stitching steps will join the triangle square units to the B strips.

Separate the patches into two rows, with C between.


Fold a scrap of fabric (called a "Harry" because of all the clipped thread build up) to begin and end the piecing. 


Place an B strip FACE sides together over adjacent edge of triangle square unit. Stitch from one edge across to the other cut edge. Before stitching off, pause, then prepare and stitch across onto and across the next unit.
This is called chain piecing of CHAINING. It saves time, waste thread between, and bothersome lint.


When you have stitched stitched across the lasty unit seam in the sequence, reach to the beginning, clip off the Harry, then place and stitch onto it so that the patchwork units are safely beyond the needle.

Park the machine there with needle down.
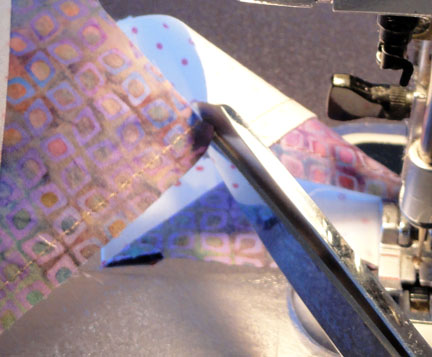


Clip threads to separate the stitched units.


Press the B patch AWAY from the triangle square patch. 


Join the corresponding triangle square unit to complete the upper and lower rows. Press the B patch AWAY from the second triangle square patch.


Join one row to a long edge of C.

Press seam toward the C.

Join the other row to remaining side of C.

Press seam toward the C.


"Act Upon These Values": Printing Text Fabric Panel

 The text strips for this project can be printed onto fabric using many high-quality home inkjet printers. Select a good weight white or off-white solid cotton fabric. Cut a letter size fabric rectangle (8.5x11"). Layer backside of fabric over "plastic" side of freezer paper. Use appropriate high iron setting to "fuse" layers. Take care NOT to allow iron to touch plastic layer.
 Use rotary equipment to trim excess paper to match cut fabric size. This finished size should be IDENTICAL to a regular printing paper sheet.
Explore and test your printer so that you know how it loads a sheet of paper, specifically, if paper is FACE DOWN or UP when placed in the paper supply tray.

Once you know how this is to be done, load your fabric and carrier paper sheet into the tray so that ink will print onto fabric face side. Place the pattern print master sheet on the glass for a regular print. Program settings for highest quality black print, single copy, then hit "enter". The sheet should feed through the printer normally.

This image shows the master being unloaded from the glass, along with the printed fabric page ejecting from the printing process.


 As a precaution, treat the printed page with a solution of vinegar and water, applied with a fine spray. Allow to dry, then heat set by pressing with a hot iron and press cloth before proceeding with trimming and other construction steps.

"Act Upon These Values": Preparing Text Strips

 Use rotary cutting equipment to trim and separate strips on solid lines. Leave excess on ends as printed. (These will be trimmed later.)
Cut a pressing guide from waste card stock that is a scant 5/8" wide.

Place trimmed fabric strip, face down on the ironing surface. Center strip edges between pressing guide marks at each end of fabric strip (seen through fabric). Use edge of iron to fold and press fabric edges over card stock. Raw edges should meet or almost meet in the center.


Move the pressing strip along until the fabric is pressed the entire length.

Remove the strip by pulling it out the end.


Rotary-cut 1/2" wide strips of paper-backed fusible web. Carefully press the fusing side to the backside of the pressed text strip. Trim fusing even with fabric ends.


 Peel away paper backing to expose fusing "glue".
Position prepared text strip down the center of the beige twill tape length which has been cut to match text strip. Iron to fuse in place.


Press under both ends of text strip, with writing centered, to a fold-to-fold measurement of 5".

For eyelets: use tool to punch specified hole size approx. 1/4" in (centered) from each end (through front strip layer and folded-back layer). Use tool to attach black eyelets through punched holes.

For beads: skip pattern instruction step for eyelets, then attach beads in place of eyelets in positions noted in paragraph above, once strips are secure in place on each block.