Gift a spending card for a wintertime birthday
or other celebration. Fun to display,
but underneath
is concealed an attached "envelope" that holds
the
standard-size plastic gift card.
Disc-n-twine closure keeps it in place.
Add nail heads
for more authenticity
(or use cut circle shapes included in file.
For extra
fun, add the "smooth sledding layered tag".
Measures approx.
4.5" w x 8" l (runner tips) x .75" d.
ASSEMBLY: 1. Identify and cut the shapes:
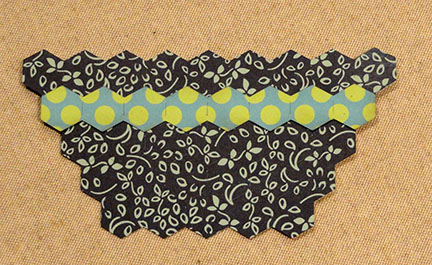
A main slats base (with corner guide marks)
B main slats reinforcement
C slats with duplicates for build up (5 each)
D runners left & right
E steering bar and build up (3)
F runner accent shapes
G card holder frames and build up (4)
H card "release" tab
I & J card cover flaps l & r with
closure discs (4 large, 4 small)
K optional tag elements
NOT SHOWN: nail heads positioning guide
(see step 19)


 4. Position each slat onto the base reinforcement,
matching corresponding edges as accurately
as possible.


 7. Position the plain end of tab under the frame
at one end, centered in the cutout window,
with end even with frame outer edge,
and glue in place.
NOTE that the tab end should overlap
the opposite end of the frame,
and line up with the notch on the inner frame edge.

 . . . then layer the large discs
and glue together. Layer and
attach smaller discs on the back.

 . . . then push through to backside with
a short tail exposed behind.

 11. Position the frame assembly side edge over
flap tab flange, frame edge at first perf line,
and glue in place.
Repeat for the second flap.
NOTE that the "thickness" area created by
the double perforation lines should remain exposed.


 15. Apply glue to one half of backside, then fold
each runner in half and apply pressure to attach.


 NOTE that the steering bar can pivot
as if steering somewhat realistically.

 BACK RUNNERS place nail heads (or punch dots
from cut file) over the punch holes on the
runner side tabs.


A main slats base (with corner guide marks)
B main slats reinforcement
C slats with duplicates for build up (5 each)
D runners left & right
E steering bar and build up (3)
F runner accent shapes
G card holder frames and build up (4)
H card "release" tab
I & J card cover flaps l & r with
closure discs (4 large, 4 small)
K optional tag elements
NOT SHOWN: nail heads positioning guide
(see step 19)

2. Identify the slats main base by locating
the corner (frame) positioning guide marks,
then . . .

. . . layer the reinforcement shape on top
and attach.
NOTE: as this shape, and others, are
layered for build up or reinforcement,
it will be helpful to flatten with large flat
weights to help avoid curling or warping
as liquid adhesive dries.

3. Layer each of the five slat shapes with
duplicate shapes, glue to attach,
and flatten while glue dries.

matching corresponding edges as accurately
as possible.

5. Layer and align the card frame shapes,
taking care that outer and especially inner edges
align as precisely as possible.
Flatten with weights while glue dries.

6. Prepare the card release tab by bending
ends back as shown, then glue the end "tab"
to the corresponding end portion.

at one end, centered in the cutout window,
with end even with frame outer edge,
and glue in place.
NOTE that the tab end should overlap
the opposite end of the frame,
and line up with the notch on the inner frame edge.

8. Identify the closure discs -
shown below for one disc . . .

and glue together. Layer and
attach smaller discs on the back.

9. Prepare each of the card covering
flaps by bending back on each of
the pair of tab and "thickness" edge
perforations (shown at left of flap here).
10. Cut a 6-7 length of twine or string.
Lay one end over the punch hole on
the pointed flap . . .

a short tail exposed behind.

Position a disc assembly over the punch hole,
with hole aligned, glue a narrow margin at
hole edge in place, then attach a rivet shape
to secure disc and twine in place.
Also apply disc to the other flap.

flap tab flange, frame edge at first perf line,
and glue in place.
Repeat for the second flap.
NOTE that the "thickness" area created by
the double perforation lines should remain exposed.

12. Test the closure mechanism, if desired,
by folding flaps into position,
wrapping twine around discs in figure-8 fashion.

13. Prepare the runner shape by bending back
at the center, bending long flange and
punch tab flanges forward, as shown.

14. Position and attach the accent shapes
on corresponding left and right runners,
offset within the edges of the runner, except
that squared-off peaks align near tab perforation lines.

each runner in half and apply pressure to attach.

16. Position each runner along side the flap/frame
assembly with accent side outward, long flange
under the bottom edge of frame, center, then
glue long flange in place.

17. Locate again the corner guide marks
on the underside of the slats base . . .

. . . apply glue to the underside of flaps/frame
assembly, including exposed surface of
long flange, then position frame corners
at guide marks and apply pressure until secure.

Also apply adhesive between the side
of the runner structure and the
"thickness" edge of the flaps/frame,
in three places, then apply pressure
to attach.

18. Prepare the steering bar by layering
build up shapes together and gluing, pressing flat.
Apply rivet eyelets to ends, if desired.
Insert a regular size brad at the center bottom hole . . .

. . . then insert prongs through the corresponding
hole at top of the center slat, and secure in place.

as if steering somewhat realistically.

19. Add finishing embellishments as desired:
FRONT nail heads, use positioning guide
placed with wide margin side aligned at bottom
to mark dots through punch holes,
then rotate to align at top sides to mark
positions there, as shown.

from cut file) over the punch holes on the
runner side tabs.

TO INSERT CARD: open flaps, place card into
recess with removal tab end exposed
(concealed behind fingers in this shot).
Remove by pulling up slightly on tab.

Here is the sled viewed from the backside.

For a coordinated design sentiment tag,
consider using the "smooth sledding"
layered tag, assembled as shown.

Here is completed project shown from front
with tag attached, cord strung through
rivets of steering bar.