Round
card has layered under-lid panel that bends
to prop up the attached pilgrim’s
hat.
(Assemble the hat, attach pleated “ruffle” strips around
cylinder
platform, attach hat on top to conceal platform.)
Attach the double layer
sentiment panel with “Harvest Blessed”
and wishbone with hearts to provide the
“stop”
for the easel mechanism. Decorate with included hat band
and layered
buckle shapes, then add purchased
floral blossom, sprigs, berries, leaves or
ribbon tails
as desired for this extra special card suitable for
Thanksgiving
giving and display.

Card measures approx. 5” x 5” x 2.75” tall when closed.
Companion “Turkey Feathers Round 3D Box” design
provides a stylish, unique
package for gifting
this dimensional card.

ASSEMBLY: 1. Identify and cut the shapes:
A card base (attached front & back)
B front whole circle overlay
C back whole circle overlay
D & E interior accent offset shapes
F 'stop' panel shapes (3) for build-up layering
with 'Harvest Blessed' words, hearts & wishbone
H pleating platform boxing strip G platform top circle
I pleating strips (3) J accent scalloped circle
K hat brim L hat crown M hat band
N buckle inner & outer layers

center short perforation, then forward at center
long perforation across center of top circle.
(NOTE: this is slightly different than previous
easel card designs have been presented;
if preferred, follow this LINK to see the other option,
beginning in Step 2.).

3. Position and attach the reinforcement whole circle
onto the backside of base assemble, with edges aligned.

4. Position and attach the front whole circle onto
half ONLY of the front card, as shown.
This attachment and hinges create the 'easel' effect.

5. Position and attach the interior whole offset circle
onto the inside base, and the interior half offset circle
onto the lower half of the upper base with straight
edge aligned AT perforation line, as shown.

6. Layer the 'stop' panels for thickness, to hold
the easel edge in upright position, taking care
to align all shape edges as precisely as possible.

NOTE that is will be helpful when gluing up layers
using liquid adhesive to press the assembly under a flat
heavy weight such as this fabric covered flat weight
until completely dry (hours) to avoid warping and curling.

7. Position and attach the 'Harvest Blessed' word cuts
(take care where 'Harv' and 'est' are separated)
just above the lower rounded edge of the panel,
test for placement, then adjust as needed and attach.
Also position wishbone at vertical centerline with
hearts on either side,

8. Position and attach the stop assembly at the interior
base circle near bottom of accent circle as shown.

This image shows how the easel function works.

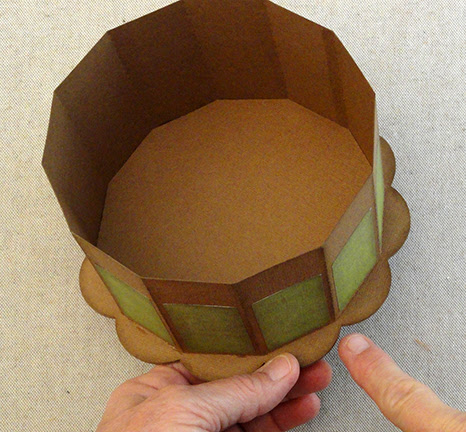
9. Prepare the pleating platform side wall boxing strip
by adding curl along its length, using a rod-like tool
such as this pencil, applying pressure between thumb
and pencil as strip is drawn across. (Think curling ribbon.)

10. Bend the upper edge set of small tabs inward
(and the lower edge tabs outward).
NOTE that the end tab IS NOT bent; guide marks only.

11. Form the strip into a tube to bring straight end edge
to overlap opposite tab to perf guide marks,
and glue side seam.

12. With top tabs all bent inward at 90 degrees,
invert the ring/tube and apply adhesive along the back
surfaces of tabs, then . . .

. . . insert the platform top disc into the ring . . .

. . . and push down til it touches all tabs flush.
Apply fingertip pressure around the inside repeatedly
until ALL the tabs attach completely.

13. With bottom tabs bent outward at 90 degrees,
insert the platform assembly through the bottom of
the accent scalloped circle shape center opening . . .

. . . and push through the opening until bottom tabs
touch the backside of the scallop circle, then
glue the tabs in place.

Apply fingertip pressure all around the base of
the platform to fully attach tabs in place.

14. Prepare the pleating strips by bending the end
tab forward, then . . .

. . . continue the accordion folding sequence
(back, forward, back, etc) across the strip until
the entire width is pleated.
Repeat for the other two strips.

15. Join the strips into a ring by aligning and positioning
the straight (left here) end of one strip over end tab
to perforation of second strip, aligning top and bottom edges,
and gluing seam. Repeat to join the third strip, then . . .

. . . form the strips into a ring to align and join
the final seam.

16. The pleating strips ring will eventually be
condensed . . .

. . . and flattened into the pleats ring that will
be positioned and attached around the platform wall.

Using a quick-grab glue such as Fabri-Tac or hot melt glue,
apply bead around base of platform and up the wall
sides approx. 1/8", then quickly . . .

. . . condense and flatten the pleating circle around
the platform to evenly arrange the pleats and
join in place.

While adhesive is still pliable, push inward all around
the ring to force the pleats in toward platform
and cause to attach in place. Hold until fully dry.

17. Position and attach the scallop accent circle
and pleating/platform assembly onto the front of card.

18. Prepare the hat crown shape by bending back
along each vertical perforation line, top platform hexagon,
end seam flange, and top tabs. Bend bottom tabs
forward.

19. Form the crown into a tube to bring the straight side edge
to overlap the opposite flange to perforation line,
and join the seam.

20. Bend top tabs inward, apply glue to surfaces,
then bend the top down into position, adjust so that
straight edges align at perforation lines as precisely
as possible, then hold in place until attached.

Invert and apply pressure to the edges from inside.

21. Apply glue to the face surfaces of the bottom crown tabs,
then slip the brim circle opening over the crown . . .

. . . until it is fully seated, then apply fingertip pressure
all around until attached completely.

22. Prepare the hat band single shape by bending
back slightly at each of the vertical short perf lines,
then form a ring and complete the side seam.
NOTE: if print pattern dictates best presentation by
cutting 6 individual band portions, join those
together first, then proceed with the joining into a ring.

23. Position the hat band over the crown, then . . .

. . . slide down into position. Apply glue between band
and crown to attach in place where it fits snugly.

24. Layer the two hat buckle shapes and join,
then position and attach over band at selected 'front'.

25. Apply glue to backside surface of brim, then
slip the hat over the platform, center it, and attach
to the pleating layer.

26. Audition, then attach selected ribbon loops,
leaf wands, sprigs, berry stems, blossom, etc.
as desired, using the sample as a guide.
This image shows how the hat will present in
easel-erected position . . .

. . . with front upper base edge catching and holding
at top edge of 'stop' panel.

Consider constructing the companion
Turkey Feathers 3D Box as card's gifting or
storage container.