
Sturdy box is created with multi-layers thick
walls.
Base with fitted lift-off lid is sized to fit
4x6 recipe cards. Dress up
the tray with
optional offset round corner accent overlays.
Box measures
approx. 6.375” wide x 4.75” tall
x 3.125” deep when closed.

Companion design
“Dividers for Recipe Cards 4x6”
will fit inside box base to help organize
a
recipe collection.
(Box tray can also accept the jar insert assembly
from “Box
Tote 3D Jars Pair”,
to create a box with lid to enclose jars pair.)

Other
coordinated designs to enhance the box:
“Label Recipes Lrg” and “Labels Pair
From Kitchen Of”.
Requires 12x12 cutting capacity and stock.
ASSEMBLY: 1. Identify and cut the shapes for
the base "tray" of the box:
A main hull shape + C end add-on wall
B (2) and D (2) add-on fold-over interior walls
E (2) front/back offset accents & F (2) end offset accents
G bottom platform (4-5 shapes to stack and glue together)

H multiple layer front/back interior thickness build up
I multiple layer end interior thickness build up
2. Identify and cut the shapes for
the lid of box:
J main lid hull
K, L (2) & M(2) offset accent shapes
N accordion fold front/back interior wall thickness stack
O accordion fold ends interior wall thickness stack
P wall interior thickness quantity test slot & strips

3. Identify and cut the shapes for the "liner" insert:
Q side front/back hull sections (2)
R bottom panel.

4. To test your card stock for hull of base and lid
to determine how many thicknesses to cut to insert
between outer and inner walls, use the slot test shape
and strips.

5. Stack 5 strips of textured cardstock (suggested) weight
and see if they fit through slot. Gluing strips together
will give an even more accurate calculations.
Design was created based on using 5 strips.
If your paper uses 6, or 4, adjust the cutting quantity
instructions included in the cut file.

6. Begin assembly by stacking and gluing up the components
that require this, in order to have them drying while other
assembly continues.
A) prepare to glue up the base interior wall thicknesses
for front/back and end walls, which can be identified
with the cut-in star shape, which is near the TOP edge.

Apply glue to one face, then layer two shapes together,
taking care to line up all cut edges as precisely as
possible. Continue to apply glue and stack wall shapes until
the target quantity is glued up (5 is the target for sample).

Immediately place the glued stack under a heavy flat weight
such as this thick book volume, with a heavy weight
set on top, and let the shape be pressed until it is
completely dried. This will require several hours or
preferably over night, to prevent or minimize curling
or warping of shaped glued with liquid adhesive.
NOTE that some cardstocks shrink and warp more
than others.

B) Prepare the four lid interior wall stack shapes by
bending on perforation lines in accordion fashion.

Apply glue between the sections - one of the faces only -
first on one side, then the other, so that the shape
can be stacked into a neat rectangle.
Take care to adjust the edges so that folds or
cut edges are aligned as precisely as possible.
Press under heavy flat weight until completely dry.

C) Prepare to stack the base platform layers by
first identifying the corner guide marks that will assist
to position and attach the bottom of hull base later.

Then, layer and stack the platform rectangles
precisely and glue together. Stack until completely dry.

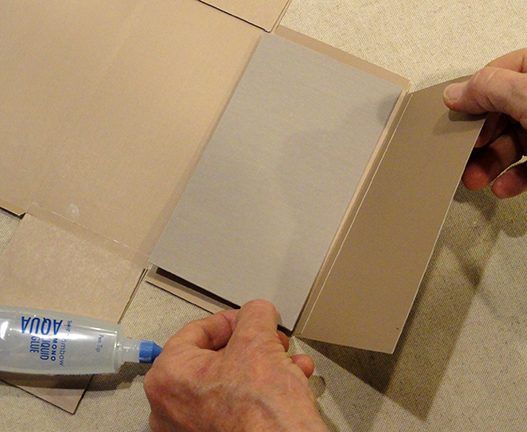
7. Prepare the base hull main and add-on shapes by
bending back on all perforation lines for panels
and long tabs, taking particular care . . .

. . . where the "rim" closely-spaced perforation lines
are at tops of front, back and end walls.

To understand why these "double" lines are included,
this is the spacing that will accept the interior wall
thickness to make the box sturdy. In this image,
the build-up thickness is shown as it will later
be tucked into the space between walls.

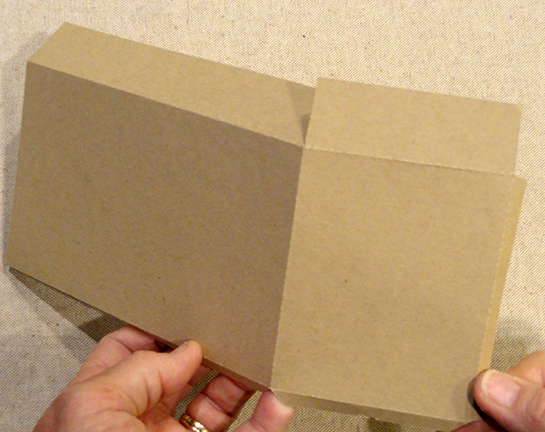
8. Complete the hull main shape by positioning
the add-on end wall to the correct position shown here,
underlapping end wall tab at the center section of
main hull shape (tab will be on the inside of base).

9. Position and attach the front, back and end wall
offset accents. NOTE: for the sample, double-sided
"dry" adhesive tape was used instead of liquid glue
which has a tendency to warp or curl.

10. Position and attach the front, back and end wall
interior shapes at long tabs.

11. Once the interior wall build-up stacks are completely
dry, hull assembly can be completed.
Apply glue to one face (inward face) of stack,
leaving the edges free of glue a generous 1/4" in,
as indicated in this image by added dashed lines.

Position over the backside of the hull main end wall
shape, between the bottom perforation (where end wall
attaches to bottom panel) and the double line perforations.
Adjust side to side, then "test" fold the inward wall into
place, and further assist stack to be in correct alignment
by using a thickened straight edge such as this acrylic
ruler to push against the double perforation rim area.

12. Bend interior hull wall back to apply glue to exposed
face of stack, then return inward wall layer into place
and adhere.

13. Repeat the process for the front & back walls
and interior thickness stack, placing and gluing stack
behind outer wall between side tabs, then . . .
. . . bending wrap-over wall into place so that . . .

. . . top of stack settles snuggly against the narrow rim
margin, assisting with thick straight edge.
But leave inner wall extension flat and free at this stage.
14. The next step of BASE assembly to join corner seams
by tucking side long tabs of front or back wall behind
thickness stack of end walls will follow the similar steps
for the LID. (Refer to Steps 19-21 to see this explained.)

15. Prepare lid main shape by bending back on all
perforation lines for panels, tabs, inner walls, etc.

NOTE that the lid has double perforation lines on
wall extensions that form rim, exactly like base hull.

To avoid any confusion about which hull shape is
for LID, a tiny 'L' symbol is cut into one of the tabs.

16. Position accent shapes, offset within lid and walls
perforations that define those rectangle areas,
and attach in place. (Dry adhesive such as
double-sided tape is suggested to avoid warping.)

17. As with the base wall build up assembly, first
apply glue to the front or back build up stack, leaving
the generous 1/4" margin at each end free of glue.

Position stack behind the outer wall space,
adjust for side to side, then . . .

. . . wrap inner wall over into position, taking care that
stack stays snug against rim double-perfs edge,
using thick straight edge to assist. Then apply glue
edge to edge to second stack face . . .

. . . re-position inner wall and glue.

18. Position end thickness stacks onto inside of lid hull
in manner similar to what was done for base.
But leave inner wall extension flat and free at this stage.

19. To join the lid's corner seams, bend walls inward
at 90 degree angle while tucking side tabs -- which have
glue on both faces -- behind the front or back wall
hull edge. Push tabs in fully to that straight edge
aligns at tab perforation, and press to adhere.
Repeat for opposite end corner seam.

20. Apply glue to backside of end wrap-over wall,
then wrap wall snugly to inside of lid . . .

. . . taking care that the miter edges of narrow rim
wrap over the adjacent wall rims, and glue inner wall
in place.

21. As noted in step 14, for box base, similar wrap over
steps are completed so that front or back walls
overlap adjacent rims with miter edge on top.

22. Prepare insert liner by identifying the double "bite"
cut outs on floor and wall shapes (included to avoid
confusion, if necessary), then . . .

. . . bend back on all perforations for walls,
top flanges, and edge long tabs.
23. Join the liner hull at both side seams.

24. Apply glue to backside of top rim flanges,
then bend to inside of liner and glue in place.

NOTE that the liner's symmetry will allow it to be
flattened so that fingertip pressure can be applied
along surfaces where flanges are joining.
Press with heavy flat objects until dry.

25. Reconfigure the box to its cubic form, then bend
the bottom mitered long tabs inward.

26. Apply glue to inward face of bottom flanges, then
insert the floor panel and press down into place so
that edges fit into wall/tab bends.

Apply fingertip pressure around edges to join.
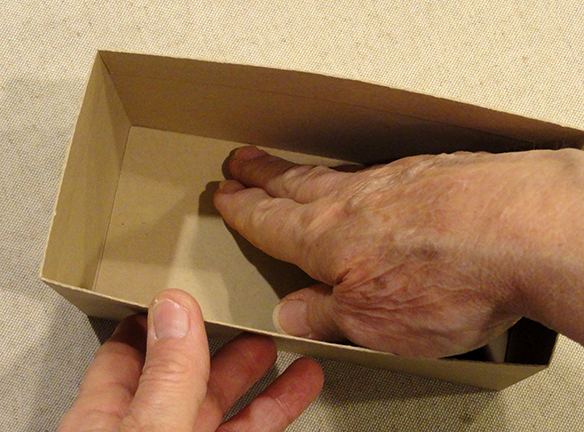
27. Fit the liner into the base box and push down fully.
Apply glue between the walls to attach in place.
Use flat weights inside box with one side face down
to help keep walls together until adhered.
Then rotate to glue and weight the second side, etc.

28. To close the recipe box, fit the lid over the liner
flanges to align with base rim.

29. Take note of the corner guide marks on
platform thickened shape, then . . .

. . . apply quick grab glue such as Fabri-Tac to
underside of base box, fit onto platform with corners
at guide marks, and attach in place.
(This image shows the mason jar variation with
jar "liner" assembly in place.)

30. Add finishing touches to your recipe box by
preparing and affixing the "Recipes" label onto front, or . . .

. . . top.

A print & cut style label can be centered on
the underside of lid.

Print & cut 4x6 recipe card dividers are also
custom designed for this box . . .

. . . so that the lid can fit over them.

