Create an extra special and personalized Valentine,
birthday or get well card to express love to a beloved recipient
by
cross-stitching their initial letter on the needle-holes punched
panel that
will peek through the window of multi-layered card front.


Then embellish with hearts, flower, sprigs and vine curls.
Search out a cross-stitch letter that will fit
(centered)
within the 22 x 22 stitches panel.
Or, purchase/download the
“Ornament Oval Poinsettia” letter
of choice for a compatible design.

On the card’s inside panel, consider
attaching
a sentiment “tag” or panel such as the “Tag Love You Slant”
separate
design.
Square card measures approx. 5.75” x 5.75”
when top- or side-fold closed.
Assembly will begin with the Hearts decoration card which
will present many steps that are common to both designs.
Stitching instruction begins in Step 8.
The Flower decoration card specific steps
will follow, beginning in Step 17.
ASSEMBLY: 1. Identify and cut the shapes:
A card base (shown in shapes layout as side fold;
sample project is created as top-fold)
B top frame layer
C middle frame layer
D bottom frame layer
E stitching hole-punched panel (2 for strength)
F hearts, swirl vines, ferns

that all the "chads" have been removed from
the cut shapes. Use a tool that fits into the hole size
without enlarging them, such as the tapestry needle
that will be used for the stitching.

3. Obtain the stitching needle (tapestry size 24/26)
and 6-strand embroidery floss of choice.
Also procure the embroidery charted initial of choice
from other sources that will fit within the 22x22 stitches
stitching panel (suggested that one "empty" row be
left around actual design space - so 21x21 stitches max).
The sample stitched card projects uses letters from other
Hearthsewn cross-stitched project files available through
Silhouette America's online store (search as
"Ornament Oval Poinsettia") then select, purchase and
download the letter(s) of choice. NOTE that for sample card
projects shown here, letters are stitched in single color.

4. Prepare the stitching panel by layering and gluing together
(liquid glue) the two cut panels, taking supreme care
that stitching holes are lined up as precisely as possible,
along with outer panel edges.
 Place the glued-up panel on a flat surface and press
under a flat heavy object such as a thick book or
other heavy weight (or book with heavy object on top)
until thoroughly dried. This may require several hours
or overnight.
 5. Become familiar with the three card front "frame"
window layers which have slightly offset edges around
outer edges and within window opening. Then . . .
 . . . use dry adhesive tape to assemble the layers.
 6. NOTE that the completed cross-stitched panel
will be centered behind the window opening of
the assembled card front, with equal plain margin
around outer holes rows and smallest window inner edge.
 Then the front panels assembly will be mounted
and attached to the front panel of the folded card,
with same offset margin as is visible along edges.


 Insert the needle into the bottom right hole of first 'X' . . .
 . . . and pull through until front thread is flush with surface,
7. Once card is fully assembled, the front panel
decorations will be positioned and attached in place.
Refer to the thumbnails at the beginning of this tutorial
to position ferns, swirls, whole heart and flourished heart
at the bottom left area.
STITCHING INSTRUCTIONS
8. Cut a 24-30" length of 6-strand floss, then separate
one strand (NOTE: for fuller stitches, you may try
using TWO strands separated then laid together) . . .

. . . fold the length in half and thread the two ends
(or alternately the loop) through eye of a blunt tip darning
needle size 24/26 (recommended). Pull the two ends
part-way down - the loop will remain as the long end
and will be used to "tie on".

9. Study this diagram to understand how to form
cross stitches for uniform appearance and tension.
NOTE that the RIGHT SLANT stitches are generally
placed across the row first, followed by the LEFT SLANT
stitches placed coming back across the row.

10. Create a print out of the Ornament Oval Poinsettia
letter stitching chart if using one of those designs
(or lightly temp mark on other selected pattern)
and transfer the center lines of the full design footprint.
(In the diagram below for letter R, these are shown in red,
with the intersection center also marked/shown.)
(NOTE: after analyzing the letter design being used,
determine the best way for stitching to proceed; for the R
shown, the long row that falls below the vertical center lines
was deemed best place to begin stitching.)
Visualize the position of the 'X' of the first stitch - often accomplished
by counting back from the center intersection along
the target start row - then insert the needle
UP from backside through the top left hole of the bottom FOUR
that will create the 'X". Pull needle and thread through
leaving approx. 3-4" of loop "tail" still on backside.
and short loop remains on the backside of the panel.


. . . and cinch the thread up firmly on the back.
This is the "tie on" step.

inserting in the top left hole that will form the second 'X',
pulling floss through fully, then inserting needle into
the bottom right hole that completes the RIGHT SLANT stitch.

12. Repeat the stitching process that completes each charted
RIGHT SLANT stitch across the remaining stitches of that row . . .

. . . then return back across to complete
the LEFT SLANT stitches.

13. To continue, move down to next row to stitch the RIGHT SLANT
stitches shown on the chart, then move back along the short row
to complete the 'X' stitches.
NOTE: be aware that when the stitching continues downward as
suggested in the progression of this design, it will be
necessary to find a way to begin the first RIGHT SLANT
stitch in a manner that does NOT un-do the final
LEFT SLANT stitch of the previous row.

14. Continue in the same manner to begin and complete
rows. When floss length on needle gets close to being
too short to continue, pause in mid stitch when needle
is pulled through to backside, then slip the needle under
the adjacent 4-5 stitches. Pull the needle fully through, then . . .

. . . remove needle and trim the excess floss close
to the stitching it crossed under.
This is "tying off".

15. To complete the R design, a new needle-load of
thread was tied-on to complete the back lower "leg", then . . .

. . . a new needle-load was tied-on to move up to
complete the remaining front top area, and then
a new needle-load was tied-on to complete right
rounded portion as final section.
You will need to analyze the selected design
to determine most straight-forward progression plan.

16. As shown previously with blank stitching panel,
the completed stitched panel is positioned behind
window and attached in place (dry adhesive recommended).

Here is the panel in final position.

And here is the card front with embellishment
decorations added.

On the inside of the card (shown top-folded)
the "love you" sentiment with panels is attached.

CARD STITCHED INITIAL WINDOW
WITH FLOWER VINES
17. Identify and cut the shapes:
A card base (shown in shapes layout as side fold;
sample project is created as top-fold)
B top frame layer
C middle frame layer
D bottom frame layer
E stitching hole-punched panel (2 for strength)
F flowers, leaf sprigs and ferny sprig

18. Similarly to the 'R' project above, create a print out of
the Ornament Oval Poinsettia letter stitching chart if using
one of those designs (or lightly temp mark on other selected
pattern) and transfer the center lines of the full design footprint.
(In the diagram below for letter J, these are shown in red,
with the intersection center also marked/shown.)

(NOTE the indication on diagram above for suggestion
about where to begin stitching the J.
Then refer to the remainder of Step 10 above to begin
and complete the charted design.
19. Prepare the decoration shapes. Add back curl to
the inner and outer petals of the large flower . . .

. . . using a narrow dowel tool and/or a stylus tip.

20. Position the narrow petal accent shape (with
petals positioned at flower petal center and
between petals as shown) and glue in place. Then . . .

. . . layer the stem/lobe accent two layers with
center holes aligned - rotate for best offset arrangement
of "stick" stems - and glue together. Then . . .

. . . position and attach on top of the other flower assembly
with center holes aligned.

As desired, insert a decorative large brad at center
or a large stud or jewel, etc.

21. Also add back curl to the small flowers, and
depress centers around holes with a large stylus end.

22. Refer to the thumbnails at the beginning of this tutorial
to position leaves and ferny sprig, large flower and
smaller flowers at the bottom left area.

Add small studs or jewels as centers for small flowers.
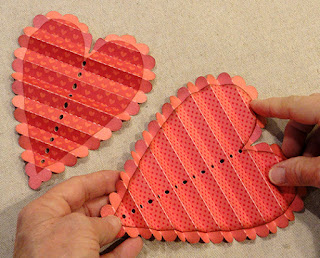
Here is the completed flowers cross-stitched card.