Here's a "heavenly" addition to the 3d nativity box figures ensemble.
Angel box, like the other figures in the series,
is built as a lid and base, with layered decor accent shaped
assembled, then attached to the lid.
Angel can be built with a flat bottom,
but is designed to stand on top of a constructed platform
with a hole-inserted hex peg on the bottom of the boxing
that fits into a center top receiving hole
on the stand.
From that "elevated" position,
she more appropriately can make her declaration
to the shepherds and others.

ASSEMBLY:
ANGEL BOX
1. Identify and cut the shapes:
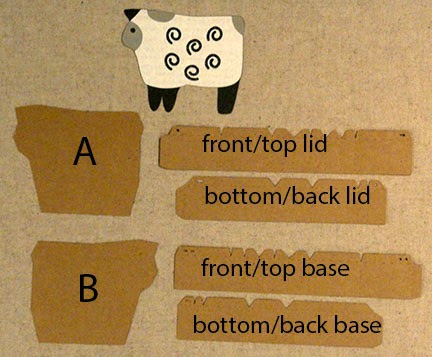
A box lid angel profile, left & right boxing strips and bottom boxing segment with hex hole
B box base profiles with left & right boxing strips
peg shape
angel base shape (assembly base)
angel decorative shapes
 2. Assemble the box lid and box base shapes as for other figures in the nativity series. (Follow this LINK to see the basic box assembly process.)

3. Prepare the peg by folding on perforations to form a tube.

4. Apply glue to the long tab and join the tube seam. It may be helpful to insert a rod such as a knitting needle or bamboo skewer into the tube to give yourself a pressure surface to join the seam.

5. Fold the bottom end tiny tabs outward.

6. Fold the tabs back up, then insert tabs end of peg through bottom boxing segment hex hole.

7. On the inside of the LID, fold the tabs outward again and glue in place.

8. Assemble the angel decor shape layers.
This will include the dress hem stars cutout area overlaid on the contrast color band shape.

Layer and glue together the face base contrast (eyes color) oval with the fleshtone oval with eyes cutout.
Insert the face layers into the hair "slot" so that the bangs overlap the forehead area, with the side and bottom hair areas under the face edges.

Position the dress over the base shape (cut base shape from the paper that will show through at bottom as under skirt) so side edges match up - this will help position the skirt high/low enough - then position the head assembly to also match up with the corresponding base shape cut edges.
Make sure that the top of the skirt is inserted between the chin and hair.

Next position the apron with contrast color band over the dress and glue in place.
Reposition dress/apron assembly as in previous image. Apply glue to all shapes without shifting, then adhere to each other and to the base.
Refer to the illustration here to help identify the boxing strip joint position according to the tiny symbol cutouts in the boxing tabs.
3. Prepare the peg by folding on perforations to form a tube.
4. Apply glue to the long tab and join the tube seam. It may be helpful to insert a rod such as a knitting needle or bamboo skewer into the tube to give yourself a pressure surface to join the seam.
5. Fold the bottom end tiny tabs outward.
6. Fold the tabs back up, then insert tabs end of peg through bottom boxing segment hex hole.
7. On the inside of the LID, fold the tabs outward again and glue in place.
8. Assemble the angel decor shape layers.
This will include the dress hem stars cutout area overlaid on the contrast color band shape.
Layer and glue together the face base contrast (eyes color) oval with the fleshtone oval with eyes cutout.
Insert the face layers into the hair "slot" so that the bangs overlap the forehead area, with the side and bottom hair areas under the face edges.
Position the dress over the base shape (cut base shape from the paper that will show through at bottom as under skirt) so side edges match up - this will help position the skirt high/low enough - then position the head assembly to also match up with the corresponding base shape cut edges.
Make sure that the top of the skirt is inserted between the chin and hair.
Next position the apron with contrast color band over the dress and glue in place.
Reposition dress/apron assembly as in previous image. Apply glue to all shapes without shifting, then adhere to each other and to the base.

Assemble sleeves over hands/arms base shape and attach to base shape with edges matched.
Assemble horn then position and glue in place.
Position the extra hand shape on top of previous hand shape so that it looks like horn is under the hands.
Position and attach halo.

Position the wings behind the assembled angel decor shape, centering it and placing top loop edges just below halo. Glue in place.

9. Position assembled angel over the box LID, center, then attach.
It will be helpful to turn the LID face down on flat surface to apply pressure from the backside of the LID profile shape to help the decor shape attach thoroughly.

10. Assemble the box by sliding the BASE into the backside of the LID. This is a snug fit by design.

Here is the completed angel box with peg bottom.

STAND
1. Identify and cut the shapes.
A stand column
B top rim shape
C top rim cover with hex hole
(a "hole"-free cover shape is also included in file)
D base rim shape
E base bevel rim strip
F base cover square

2. Fold the column on the vertical perforations. Fold top and bottom tabs inward (this image shows "outwards" fold).
Bring tab perf line and opposite straight side edge together, overlap edge to perf line, adjust so top and bottom perforation lines align, then glue seam.

3. Fold the base rim shape on parallel perforation lines (these form the dimensional rim face) to fold edges toward center. Miter seams will form as shown. (Unfold to glue the side corner joints in the next step.)

4. Overlap the side short edges over adjacent short edge tab and glue each to form the shallow "box" shape.
5. Re-fold to get the miter straight edge to overlap at the adjacent miter perforation line. Apply glue to the miter tab, then re-overlap and adjust the sides so that the seam is accurate as it holds. It may be helpful to insert fingers into the rim cavity to apply pressure to these edges, but take care that the front and back faces remain parallel, and the miter seam does not flare.

It may also be helpful to turn the shape face down, once it has initial hold, and press the seam against a flat hard surface at the seam by inserting forefinger between as shown.

6. Fold the bottom tabs outward on the column, then insert the bottom end of column into the base rim opening as shown. NOTE that the bottom of the column has two sets of slots.

7. Slide the column through until the top tab perforation edge rests against the bottom opening edges.
8. Flex the column walls, one at a time, to get the rim tab to insert into the large single slot.

For the fourth tab and slot (and perhaps others as well), use a tool like this Silh Am spatula to gently guide the tab into the slot.
If possible, and not too messy, apply a dab of adhesive to the outer face of each tab before it is inserted into slot.

9. Apply adhesive between the rim bottom and the column top tabs, then . . .

. . . apply pressure to attach the two together.

10. Prepare the bevel rim by folding on vertical perforation lines to roughly form a ring. Fold the single and double tabs back.
NOTE: bevel corners at the eventual miter seams have a perforation guide line that is not a tab. DO NOT fold it back.

11. Begin to attach the bevel rim by inserting the tabs of the first segment into the corresponding slots in the base rim or column.

12. Continue to work around the column to insert tabs into slots until . . .

. . . all tabs are inserted into slots.
NOTE that the angled "miter" edge at each corner should overlap the adjacent angled edge at the miter guide perf line.
13. On the inside of the column, fold the paired tabs toward the middle of the tube's length and glue in place. (It is possible to apply pressure to the tabs being glued with one hand/finger on the inside of the tube, and the other on the outside.)

14. Prepare the top rim shape in a manner similar to the base rim shape in steps 3 & 4 above.

A stand column
B top rim shape
C top rim cover with hex hole
(a "hole"-free cover shape is also included in file)
D base rim shape
E base bevel rim strip
F base cover square
2. Fold the column on the vertical perforations. Fold top and bottom tabs inward (this image shows "outwards" fold).
Bring tab perf line and opposite straight side edge together, overlap edge to perf line, adjust so top and bottom perforation lines align, then glue seam.
3. Fold the base rim shape on parallel perforation lines (these form the dimensional rim face) to fold edges toward center. Miter seams will form as shown. (Unfold to glue the side corner joints in the next step.)
4. Overlap the side short edges over adjacent short edge tab and glue each to form the shallow "box" shape.
5. Re-fold to get the miter straight edge to overlap at the adjacent miter perforation line. Apply glue to the miter tab, then re-overlap and adjust the sides so that the seam is accurate as it holds. It may be helpful to insert fingers into the rim cavity to apply pressure to these edges, but take care that the front and back faces remain parallel, and the miter seam does not flare.
It may also be helpful to turn the shape face down, once it has initial hold, and press the seam against a flat hard surface at the seam by inserting forefinger between as shown.
6. Fold the bottom tabs outward on the column, then insert the bottom end of column into the base rim opening as shown. NOTE that the bottom of the column has two sets of slots.
7. Slide the column through until the top tab perforation edge rests against the bottom opening edges.
8. Flex the column walls, one at a time, to get the rim tab to insert into the large single slot.
For the fourth tab and slot (and perhaps others as well), use a tool like this Silh Am spatula to gently guide the tab into the slot.
If possible, and not too messy, apply a dab of adhesive to the outer face of each tab before it is inserted into slot.
9. Apply adhesive between the rim bottom and the column top tabs, then . . .
. . . apply pressure to attach the two together.
10. Prepare the bevel rim by folding on vertical perforation lines to roughly form a ring. Fold the single and double tabs back.
NOTE: bevel corners at the eventual miter seams have a perforation guide line that is not a tab. DO NOT fold it back.
11. Begin to attach the bevel rim by inserting the tabs of the first segment into the corresponding slots in the base rim or column.
12. Continue to work around the column to insert tabs into slots until . . .
. . . all tabs are inserted into slots.
NOTE that the angled "miter" edge at each corner should overlap the adjacent angled edge at the miter guide perf line.
13. On the inside of the column, fold the paired tabs toward the middle of the tube's length and glue in place. (It is possible to apply pressure to the tabs being glued with one hand/finger on the inside of the tube, and the other on the outside.)
14. Prepare the top rim shape in a manner similar to the base rim shape in steps 3 & 4 above.
Fold the miter flaps inward as for top rim.

14. With column rims folded toward center of opening, apply adhesive to the top surface . . .

. . . before inserting column top through the rim opening as was done for the base rim assembly.
Apply pressure to get the rim edge and the column tab to join, then repeat for all four edges.
15. As before, flex column wall to insert rim tabs into slots.
On the inside of column, fold the tabs toward middle (downward in this image), and glue in place.
It will be helpful to apply pressure to the tab gluing area with hand/finger on the inside AND the outside.

16. Apply adhesive to the underside of the cover square (top shown here) then center and glue on the top end to cover the opening.
Repeat for the base rim cover square (will NOT have a hex peg hole) using the matched-size square.

17. Apply decorative nailhead over the hole punches on the column front face.
(NOTE these holes are sized to accept standard and perhaps small head dec brads, too, but they would need to be inserted earlier in the process.)

18. Install the angel on the stand by inserting the peg into the hex hole.

Here is another look at the angel on her stand.