
Square
card holds two decorative tags.
Bottom layer tag has faux stitching (underlay
contrast
shows through stitch cut outs) and tie holes pair.
Top tag includes
offset front panel with heart shaped window
to showcase cross-stitched heart
with plaid design,
with “slainte” Irish “health” sentiment word cut out below.
Mount the two tags on front of 5.25”x5.25” card base
with accent front panel.
Tags measure approx. 3.25” wide x 4.5” tall.
Model colors work well for St.
Patrick’s Day.
Substitute other colors for varied occasions, recipients or
occasions, including school colors or other holidays.
Stitching diagram is
included with the cut file.
ASSEMBLY 1. Identify and cut the shapes:
A card base with side fold
B card front offset accent shape
C heart stitching shape (2 to layer for strength)
D slainte ("health") word cut out
E heart tag base shape
F heart tag front base shape with cut out
as stitching buffer
G heart tag front accent layer
H faux stitched tag front
I faux stitched tag contrast to show thru

These are the DMC colors used for the sample project:
ECRU (or other cream)
470 green
310 black

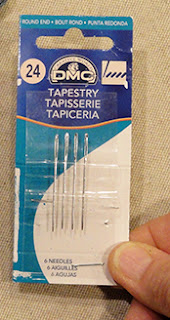


To complete the project, use size 22-24 tapestry (blunt tip)
stitching needles.
2. Prepare the two stitching hole-punched hearts
by making sure that all "chads" or cut out "crumbs"
are removed. One way to do this is to bend
a standard paper clip end straight then use it
to poke through all holes not already vacant,
then brush or scrape away extra bits.

3. Position smaller front heart on top of second
contrast heart layer, and, working quickly,
attach together, taking care
that ALL outer cut edges plus stitch holes and
hang hole edges align as precisely as possible.

One way to check that the holes align is to use
the paper clip tool to poke through various holes
across the panel, particularly at edges and corners, etc.

Immediately place the glued-up unit on flat work surface
and press flat under a heavy flat object such as
this thick book volume, possibly with something else
heavy placed on top. Leave pressure on until
glue is dried completely and NOT still cool to touch.
Pressing flat like this will help minimize warping or
curling of the liquid-glue attached unit.

HEART CROSS STITCHING
4. Prepare to stitch by cutting a 30-32 inch
length of 6-ply floss for the main color.
Following sub steps with some images from a different
project will describe how to separate single strands
from the 6-ply group to minimize knotting:
A) Separate 2 plies by holding the grouped floss length
somewhat firmly between fingers of offhand, isolating one
ply to pull away, then pull it gently away from others
while the twists of the group begin to bunch up behind it.

B) Place the two plies side by side and line up the ends.
Bring end pairs together to create a loop opposite end.

C) Thread the ends through
the needle eye.

Pull the ends through then adjust loop so that it is
the long end.

5. Study this diagram to understand how to form
cross stitches for uniform appearance and tension.
NOTE that the RIGHT SLANT stitches are generally
placed across the row first, followed by the LEFT SLANT
stitches placed coming back across the row.

6. For this project, begin at the bottom center where
the first cross stitch will be created.
Each square on the pattern chart represents 4 holes that
would be needed to create both the right and left slants.

A) Insert the needle with thread UP from backside
in the TOP LEFT HOLE where the first X will be made.

This closeup from a different heart project shows more
clearly where the first cross unit will be made.
Needle is inserted up through
the top left hole of the four that are used for
first cross. NOTE that the first hole on second
row of holes is NOT used for bottom-most row.

B) Pull the floss through UNTIL about 3-2 inches
of the loop end remains, then insert the needle
diagonally to complete the first right slant stitch.

On the backside of work, insert the needle
through the loop and pull the loop tight to remove all slack.
This is the "tying on" process.

7. Insert the needle through to front of work, in
the top right hole, then insert the needle through
to back of work, in the bottom left hole to complete
the left slant of the only cross stitch on bottom row.

the second "black" row which will be completed
in the later sequence, to the third row to continue . . . to complete the left slant stitches (5) . . .
 . . . and then the right slant stitches
to follow the chart with "green" floss. . .


to complete row 3.
9. Continue to follow the chart to move upward
as each "green" row is completed in sequence.
NOTE that ALL green squares in chart are stitched
as "complete" cross stitches with both left and right
slant stitches - even though the cream left slant
"over stitches" are shown overlaid on these.

As stitching proceeds, thread length will
eventually be used up. Before length is
unmanageably short, pause when the needle is on
the backside of work as a slant stitch is completed.
Slip needle under 3-4 stitches on the backside, then . . .


. . . trim the tails close
to the surface of the work.
This is the "tying off" procedure.

design, skipping the "black" cross stitch rows.
 11. Thread black floss onto needle, tie on to stitch

the black stitches of row 2, then continue upward
to complete other "black" rows in sequence.

as indicated on the chart.
 13. To complete the vertical "black" stripes of design,

thread all 6 strands of a length of floss onto needle.
Tie on by reversing the heart to slide the needle
under several stitches near the first insertion hole
(where ever you decide to begin these long
over stitches) and pulling length through to leave
a short tail. Hold the tail in place until 2-3 stitches
are completed.
To complete long over stitches, insert loaded needle
from back of work to front at top of the long thick line
on chart which represents these 6 stitches. Then
cross down to bottom edge to insert front to back
to complete stitch. Continue until all 6 stitches are done.
Tie off on backside in similar manner.


FINAL CARD ASSEMBLY
14. Fold card base on perforation, then position
and attach front accent panel with narrow even
offset margin all around.

15. Prepare the "stitched heart" tag by layering
and attaching front (cut out) panel on top of
tag base, aligning outer cut edges as precisely
as possible. Then . . .
 . . . position and attach front contrast accent panel

with narrow, even offset margin around outer edges.
Press the assembly under heavy flat weight
until dry (if using liquid adhesive).

by positioning contrast backside panel
to back of main tag, matching punch holes, and
with contrast edges slightly in from main tag edges.
Add narrow ribbon, yarn or thick twine tie at holes.
17. Position and attach completed stitched heart
assembly within the front accent's heart shaped
cut out window.
 18. On front of the card, arrange the angled

faux stitched tag, with stitched tag over front of card,
determine best position, then attach each tag.
Add word cut out under stitched heart window.
 Here is the completed card.


No comments:
Post a Comment