
Assemble “boxes” for
eight slats (with accent overlays),
bottom platform base, top rim frame and
separate lid
holding layered ears, then build the crate.

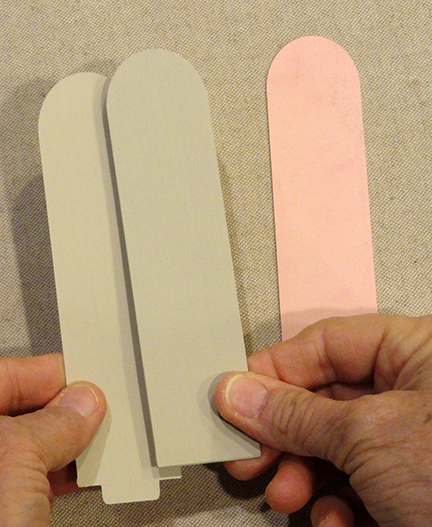
Front slats include
eye cutouts with contrast liners.
Dimensional “triangle” nose is attached to
front slats,
with optional whiskers underlay.
Interior strut support strips
help slats, platforms and
nose boxes retain their shapes.
Suitable for display
or as container for light-weight contents.
Crate measures approx. 8” tall x
4.35” wide
x 4.35” deep with ears extending 5” above.
(Requires 12x12 cutting capacity and
card stock for longest shape.)
ASSEMBLY: 1. Identify and cut the shapes:
A lid top layers overlay with reinforcement layer
B lid main shape
C lid interior (rectangle) support strips (2)
D & E left and right ears layers:
(back with bottom tab, interior layers [3*]
front pink inner ear, front edge overlay)
F slot & strips ear layers thickness test
to determine how many interior layers to cut
G eye contrast liners H nose accent & whiskers
I nose box with back panel, interior circle support
J front slats with eye hole cut outs, accent overlays
K sides, back slats
L sides & back slat accent overlays
M interior support strips for all slats (8)
N base box O base interior square support strip

P upper rim box Q slat positioning guide
(not shown: lid underside mask to hide ear tabs;
see Step 16)

2. To determine the quantity of interior ear stack layers
to cut that will fit through lid slots, stack the test strips . . .

. . . then insert through test slot. Add or subtract strips
to achieve max quantity that will comfortably
fit through slot. From this total, subtract 3 (front hollow,
back, contrast inner ear layers) to determine * quantity
to cut for D & E interior ear layers in Step 1 above.

3. Bend the bottom tabs of back and front
ear layers forward. Then work quickly to. . .

. . . stack and glue interior ear layers for both
left and right ears, taking care here and throughout
that all outer cut edges (excepting tabs) that are
intended to align are matched as precisely
as possible.

Position and attach interior stack onto inside
face of back ear, then . . .
. . . position contrast inner ear on top of stack.

Finally position and attach front overlay
onto ear front.

NOTE that bottom tabs should remain unattached
and be able to bend away from stack.

Immediately place the ear stacks under a heavy
flat weight such as a heavy book or the fabric-wrapped
repurposed weight bar shown here, and allow to
dry thoroughly, for several hours.
Pressing in this fashion will help the liquid-glued up
stack to remain flat, minimizing curling or warping.

4. Prepare the reinforced lid top layer by layering
and attaching together top (accent) with second
duplicate layer, taking care to align all edges, slots.
Press flat under a heavy flat weight until
completely dried.

5. Prepare the BASE box by bending back on all
perforation lines for box walls, end tabs and
top flanges, etc.

6. Form a tray by bending side walls up from
attached bottom panel to form corners with tabs
bent inward, then overlap front or back side wall
straight edges across tabs to perf lines and join
four corner seams.

6. Prepare the support strut strip by bending at
section perforation lines and end tab, with attached
top or bottom attachment tabs bent outward.
Form the strip into a square, then align and join seam.

7. Apply glue to bottom tabs, then . . .

. . . position square inside BASE tray in rotated
orientation as shown, centered. Apply pressure to
secure bottom tabs to underside of bottom panel.

8. Bend flanges inward, apply adhesive to top faces,
and also to top strut tabs, then . . .

. . . bend "roof" panel down into position to attach
to flanges and strut tabs. Quickly adjust for
alignment with side wall upper perf lines, then
apply fingertip pressure all around to secure.
To assist with edge seam joints, consider using
a moderately heavy flat weight such as a book
carefully placed on top until glue is dried.

9. Prepare the LID box by bending side walls,
end tabs back, and underside panel edge walls
forward as indicated by pointing finger.
(Underside panel will be tucked inside main tray.)

10. Bend side walls into position to form tray,
then align, adjust and glue corner seams.

11. Position top 2-layer panel over top of LID . . .

. . . so that box is centered underneath and
slot openings of ALL layers are precisely aligned.
Glue in place. Invert on flat work surface
and place heavy weights inside tray to help attach
and prevent warping, etc.

12. Prepare the 2 LID interior strut strips in similar
manner to BASE strut. Form each into a rectangle
to align and join end seam.

13. Add glue to bottom tabs then position
one on each side of slot openings in inside
of tray.

14. Prepare to close the bottom of the box by
adding glue to the narrow attached inner wall
section of assembly as shown, and . . .

. . . edge inner walls shown here, as well as top
tabs of rectangle struts. Then . . .

. . . bend into place inside the bottom of LID tray.
NOTE that the attached inner wall will need
assistance to fold into position, back-to-back with
wall. Then continue . . .

. . . by slipping the other inner walls into position
inside tray walls. Push into place only as far as
needed so that top rim edges of both layers align.
Apply fingertip pressure all around to secure.
TIP: Since it will be critical that these LID walls are
straight in order to fit it into the UPPER RIM BOX
to close the crate, use heavy weights, planks, or
other right-angle objects to prop snuggly against
outside of walls to assist them into desired squared-up
shape during the liquid glue drying process.

15. Reposition ear end tabs to be "flat", then determine
left or right positioning (ears tip slightly away from center).
Insert through top slots, then . . .

. . . work bottom end tabs through shorter underside slots
so that perf lines are even with slot edges.

Bend tabs toward front and back and glue in place.
Repeat for second ear unit.

16. Apply (dry tape) adhesive to underside of
cover square, then position - centered- into the recess
of lid assembly to hide ear tabs construction.

17. Prepare slat boxes. Front eye cut out box is shown
as example.
Bend back on all perforation lines for front, back,
narrow side walls, narrow top panels and tabs or
flanges.

18. Position and attach accent panel on "front"
box section, with narrow offset margins all around.

Position and attach contrast eye square over
the eye circle cut out (front slats ONLY).

19. Prepare strut support strip by bending on perfs
for segments to create zigzag format. Bend tabs
to perpendicular.

20. Compress so that strip fits within back panel
as defined by perforations, then apply glue to tabs
to attach strip in place.

21. Apply glue to top strip tabs and slat long
side flange. Fold the front panel into position to
close box, then adjust so that straight edge
overlaps across long flange and aligns at perf line.
Apply fingertip pressure to make sure strut tabs
attach to front panel underside.

Also use a block or something similar to ensure
that the side walls are perpendicular to front and
bottom as it dries. (Place block or plank snugly next
to walls and leave in place until glue is dried.)

22. At slat ends, bend side tabs inward, front tab
down into place. Apply glue to end panel, then
bend into perpendicular position to attach. Adjust
end for squareness before glue sets, then hold
and apply pressure until secure.

23. Prepare RIM shape by bending back on all
perforation lines, including the inward frame walls.

bending outer walls into position, straight edge
overlapping adjacent tab to perf line . . .

. . . and joining seams.

Apply glue to flange top faces, then . . .
 . . . bend frame into position to attach to flanges.

Adjust for squareness and edge/perf line alignment,
then apply fingertip pressure all around until secure.
 NOTE that it may be helpful to secure seams to use

a flat blade tool such as this spatula placed behind
frame edge to provide a press-against surface,
both along centers and into corners.
 26. Bend center walls down, apply glue to edge tabs,

then tuck each under the frame edge, adjust for
alignment, and hold in place until secure.
 27. Prepare to attach slats to BASE and RIM boxes

by positioning guide flat on side walls with ends
even, and marking light pencil marks at edges
of upright extensions to show slat positions.
Mark all side walls of both boxes.

28. Use quick-grab glue applied to BASE between
pencil marks, then position bottom of slat
per guide marks, with bottom faces aligned
precisely to ensure slat is perpendicular to
bottom of BASE. Hold in place until secure.

29. Repeat attachment process to position and
glue top of slat to RIM box per guide marks.

Repeat for second slat for front, then repeat for
pairs of slats on other BASE and RIM sides.

30. Prepare the NOSE box by bending back on
perforations for front, top, curved side and top tab.
Use a rod tool to add a little curl to wall extensions,
taking care not to tear tabs.

31. Position and attach accent front nose shape
centered within front panel.

32. For triangular "ring" to bring wall extension tab to
tuck behind opposite short edge, adjust and glue seam.

33. Bend tabs inward, and top panel down . . .

. . . to align edges with perforations.

Adjust shape as needed for best alignment,
then glue in place.

NOTE that it may be helpful
to invert the nose assembly face down on flat
surface to apply fingertip pressure along tabs
until all are secure.

34. Add curl to the support strip, then . . .

. . . form it into a ring to overlap 1/8" and join ends.

Apply glue to rim edges, then . . .

. . . insert into nose box, center, and hold to attach.

35. Bend tabs inward to perpendicular, apply glue
to upward faces, then position, adjust and attach
back nose shape.

36. Position whiskers underlay behind nose box . . .

. . . so that it is centered, and attach in place.

37. Locate small hash cut guide marks on front
panels, then position and attach nose assembly
so that top edge aligns at marks, centered between.

38. To close crate, insert LID's bottom extension
into frame of RIM, and push fully down into place.
(NOTE this is a snug fit.)


No comments:
Post a Comment