Showing posts with label Easter. Show all posts

Saturday, April 9, 2022

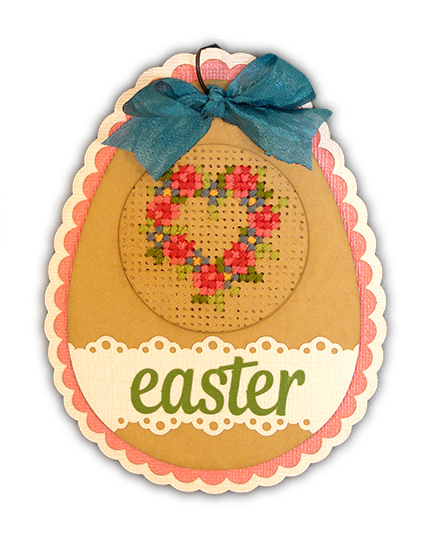
Egg Ornament Cross Stitch Wreath

 
Create a memorable cross-stitched gift tag or ornament 
with Easter or spring season egg shape. 
Punched holes panel provides “texture” with added embroidery 
stitches for wreath (pattern chart included in file). 
Extra punched egg and backer layers help “buffer” 
stitching thickness or add card sturdiness. 
Lace cross strip and “easter” welded word 
finishes the presentation. 
Tag measures approx. 5” tall x 3.75” wide 
when completed.

ASSEMBLY: 1. Identify and cut the shapes:
A egg front frame layer
B stitching holes egg layer(s) 
(cut and glue together 2 for strength)
C optional egg back layer (buffers stitching thickness)
D egg base and scallop overlay
E stitching chart printout
2. Create a "poking tool" by bending the outer arm
of a paperclip straight, then use it to poke through
any holes where the "crumb" circle is still in place
so that all stitching holes are open.
Complete this for both layers, then layer and glue
stitching hole shapes together, taking care that
outer edges and ALL stitching holes align precisely.
Press under a heavy flat weight until thoroughly
dry (to prevent curling or warping), for a few hours
or over night.
3. Select and assemble the floss colors needed for
the stitching design, and tapestry blunt needles.
(These are the colors selected for the sample.)
4. Refer to Steps 5 & 6 HERE for the floss preparation
and needle threading details.

5. To begin the stitching, locate the center position on
the stitching holes shape, then count down 8 rows
to begin the bottom center med. green cross stitches
as indicated in the notations for chart, below.
6. At the determined position for the first cross stitch,
insert the threaded needle with floss up through
the top left hole in the four-holes group that will form
that cross stitch. Pull floss through leaving approx. 1"
of the loop end behind the egg shape, then . . .
. . . move the needle diagonally down and right to
insert into the bottom right hole, and . . .
. . . pull the floss through til flush with front surface.
Turn the work face down, insert needle through
floss loop, then . . .
. . . pull the floss until flush on backside.
This is the tying on step.
7. Move stitching progress down on cross stitch position,
and insert the needle and floss up through
top left hole of that cross stitch four holes
to form . . .
. . . a second slant stitch below the tie on stitch.
8. Move down to create a third slant stitch below
previous stitches. Then redirect the needle and stitching
to create the opposite slant stitches in sequence from
bottom to top to complete the three cross stitches
in that short column.
9. Refer to the stitching chart to complete the adjacent
columns or single stitches of the same color.
10. Move the needle and floss to the next nearest
grouping of same color by simply "stringing" floss across
backside of work, then complete that grouping.
11. When floss on needle is nearly used up, or when
the stitches for threaded-up color are completed,
"tie off" by ending with needle on back of work,
then sliding under several of the backside stitches.
Clip the floss leaving only a short tail beyond
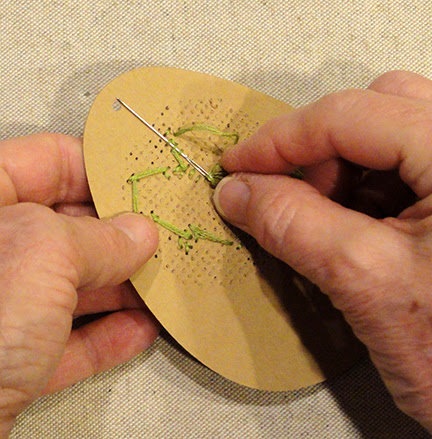
where it exits the final passed-under stitch.
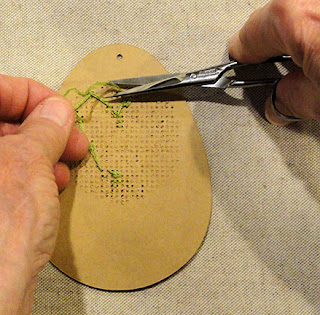
12. Tie on each color floss of the design and complete
stitches shown on design chart.
13. Complete layering of egg shape by positioning
front window over stitched work, as well as . . .
. . . back "buffer" window layer onto backside of
stitched egg assembly.
14. Position and attach the "easter" word cut out onto
center of eyelet band, then position band
onto egg assembly front in horizontal position where
the side curved edges align with egg's edges,
and glue in place. (If using liquid glue, press
the assembly under a heavy flat weight until dry.
15. Layer the scallop base and offset eggs
and glue together.
16. Position the stitched egg assembly onto
the front of the base assembly and attach.
17. Add wire hanger and ribbon bow as
embellishments as desired.

Thursday, April 11, 2019

Easter Impossible Cards Trio

This style card gets its “impossible” name from 
the one-piece base that “twists” to “impossibly” 
create the platform with pop-up center 
from a single cut shape. 
(Use card stock for base that is the same 
on both sides for the proper effect.) 
The Easter Trio designs feature Lilies Trio,
Chick in Half Egg, and Bunny Race Arch.

This tutorial will describe assembly details
for all three, beginning with 
the Chick in Half Egg design,
followed by Lilies Trio at step 14,
and finally Bunny Race Arch at step 21.

CHICK IN HALF EGG IMPOSSIBLE CARD
ASSEMBLY: 1. Identify and cut the shapes:
A impossible card base shape
B 'L' accent panels for base
C & D bracket "bridge" shapes (2 ea.)
E flower shape (2)  F flower center circle (2)
G half egg overlay   H chick base
I eye contrast underlay    J beak
K bow and strip    L bow center "knot"
2. Prepare to form the "impossible" folds and bends
of the base shape by bending forward along 
the base of the pop up panel, on perforation lines.
3. Hold the right half of the 'L' (reversed) portion
of base steady in place, while carefully rotating
the left 'L' half front edge downward and 
toward the back, until . . . 
. . . its back (shorter) edge becomes . . . 
. . . the front edge.
Here is the base shape in finished configuration,
with pop up panel standing perpendicular.
4. Position and attach the offset 'L' accent shapes
over their respective base panels.
5. Layer the pairs of bracket "bridge" shapes
to attach the smaller shape to its offset base.
6. Prepare the stabilize the base shape by
placing it on a gridded mat or equivalent
so that the front edge (as well as others)
can be squared up to conform to the 5x7 base size.
Hold in this position until . . . 
. . . the first bridge unit can be positioned across
the gap on the front portion of the base,
centering it from side to side, and also from
top to bottom in the gap front half portion.
Attach to the overlapping surfaces.
7. Repeat the positioning and attaching process
to place the back half bridge bracket assembly.
8. Prepare to assemble the pop up designs.
Position and attach the half egg over
the lower portion of the chick base.
Position and attach flower centers.
Position and attach the beak shape
where the tiny window guide cuts are
(beak should overlap and cover openings).
Position the eye contrast behind the head
so that eye openings are covered, and attach.
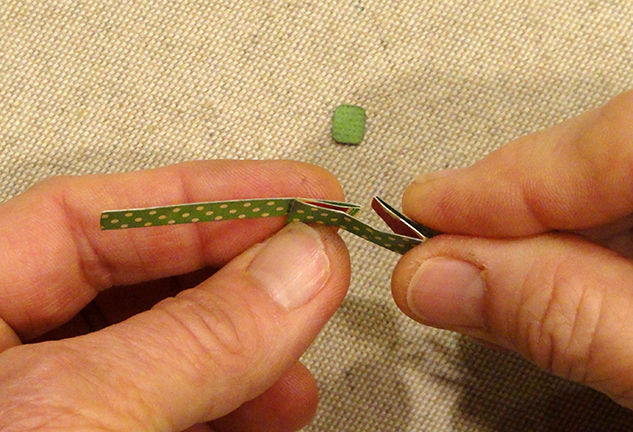
9. Prepare the bow strip shape by bending
on the vertical perforations as shown . . . 
. . . bending forward (valley folds) or 
back (mountain folds) as shown. 
This should create two loops (the shaped portions
of the strip) with a short "knot" platform between,
with left and right bands that extend from the fold
that meets at center behind the "knot" platform.
Apply dots of glue to attach the loop layers 
in place.
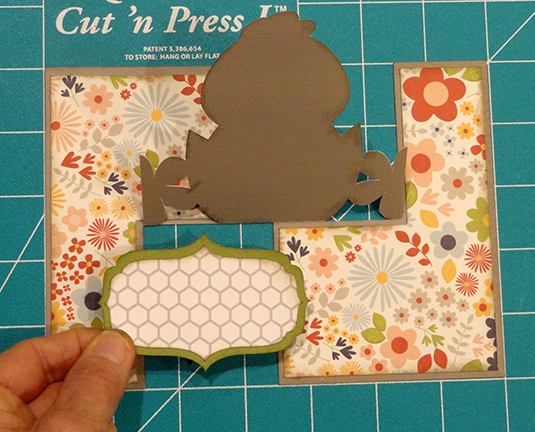
10. Position the bow unit across the half egg overlay
at a level where the ends align with egg edges,
and glue in place.
11. Position and attach the knot at center.
12.  Position and attach flower units
over the pop up panel where edges align.
13. Bend the bottom of the egg forward 
(valley fold) at perforation.
Finally, position and attach chick assembly
over center of pop up, offset at edges as shown
so that pop up margin remains visibly, and
with the bottom bend aligned at base center
cross perforation line.
Here is the completed card.
Pop up can be laid back flat to insert into
envelope, re-positioned once opened again.
LILIES TRIO IMPOSSIBLE CARD
14. Identify and cut the shapes:
A card base    B 'L' accent shape overlays
C & D bracket "bridge" and base (2 ea.)
E greenery saw tooth overlay
F leaf base  G & H left and right leaf overlays
I lily base (2 left, 1 right)
J lily sepal layer (2 left 1 right)
K lily bottom shape (2 left, 1 right)
L lily calyx (2 left, 1 right)
M lily rim (2 left, 1 right)
15. Follow steps 2-7 of Chick design to prepare
in similar manner the Lily design base with
"impossible" twist folding and arrangement,
and with 'L' accent shapes plus bracket "bridges".
16. Prepare the leaf unit by positioning and attaching
the individual left and right leaf overlays onto base
where the edges will match.
17. Position and attach the leaves assembly onto
the pop up silhouette where the edges will align.
NOTE that the bottom straight edge may be a fraction
above the perforation fold.
18. Position, centered, and attach the saw tooth
greenery shape over the pop up panel.
19. Prepare to assemble the lilies by arranging
shapes for convenience and understanding.
Prepare 2 left and 1 right blossoms.
(Left is shown here.)
Position and attach the stamen shape
at the base edges of the base shape.
Position the lower front shape on top
of the previous assembly, and attach.
Position and attach the rim shapes at upper edges
of base shape, and bottom calyx shape overlapping
bottom tip (edges don't align).
Here are the completed blossoms,
2 left and 1 right as they will attach to pop up.
20. Position the center blossom over the pop up
base edges where tip and contours will match up.
Position and attach the side blossoms where
base edges that remain exposed will line up
with blossom contours.
Here is the completed Lilies card.
BUNNY RACE ARCH IMPOSSIBLE CARD
21. Identify and cut the shapes:
A card base     B 'L' accent shape overlays
C & D bracket "bridge" shapes (2 each)
E tulips lattice overlay    F arch strip
G bunny body base (3)
H bunny body overlay (3)
I bunny head overlay (3)  J tummy overlay (3)
K tail overlay (3)         L eye dot punches (3)
22. Follow steps 2-7 of Chick design to prepare
in similar manner the Lily design base with
"impossible" twist folding and arrangement,
and with 'L' accent shapes plus bracket "bridges".
23. Position and attach the arch strip over the matching
portion of the tulips overlay lattice shape.
24. Position and attach the lattice arch assembly
over the corresponding part of pop up base panel.
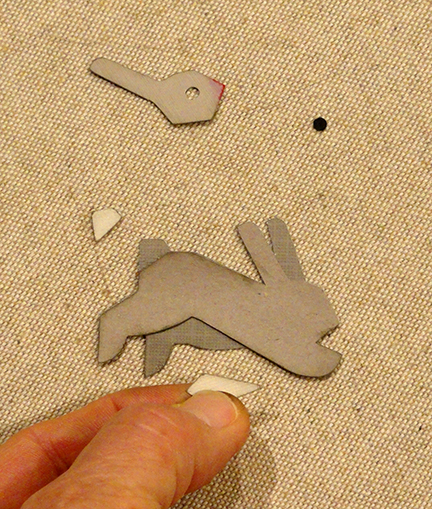
25. Prepare to assemble the three bunnies
by organizing the shapes.
Position and attach the body overlay
over the base shape, matching up
edges that correspond.
Position the tummy into the corresponding
angle at the body overlay lower edge,
and attach in place.
Position and attach the tail overlay
where it aligns with body base edges
next to the body overlay edge.
Position and attach the head overlay where
corresponding edges align.
Position and attach the eye punch dot 
into the eye recess.
Here are the three completed bunnies.
26. Position the center bunny over the pop up
base that remains exposed . . . 
. . . to line up matching
edges, and attach in place.
27. Repeat for the left and right bunnies.
Here is the completed bunny race arch card.