Showing posts with label dimensional key. Show all posts

Thursday, October 1, 2020

Lock Plate and Dimensional Key

 
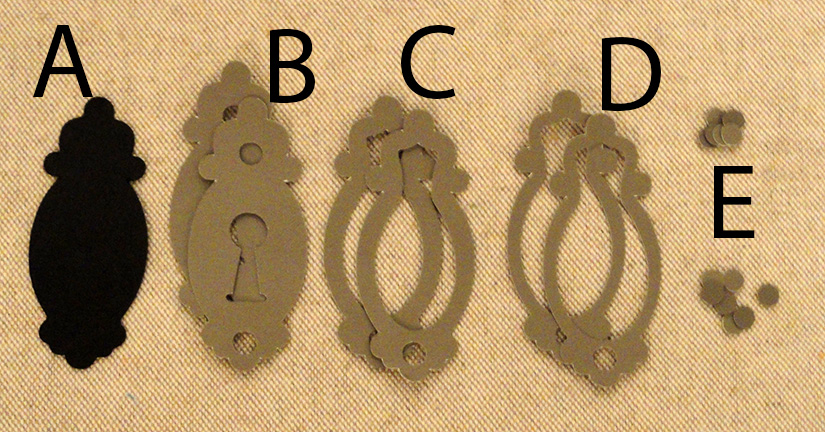
Cut and layer card stock shapes to build up this low dimensional 
lock plate that can decorate the “Pyramid 3D Box” design, 
or other containers, pages, embellished tags and more. 
Measures approx. 1” wide x 2.25” tall. 
Built-up layers give this small key dimension; 
measures approx. 1.4” wide x 3.34” tall. 

(This tutorial is under construction.
Please return soon to view
the completed assembly guide.)


Tuesday, September 22, 2020

Skeleton Dimensional Key


Five strata for each left and right assembly( (plus an extra center)
 are layered to build up the two-sided character of this spooky key. 
Use as part of an assemblage, an embellishment for Halloween cards 
or decor, or a decoration on its own. 
(If magic Santa Claus has a key to get into the house when he
can't come down a chimney, you gotta assume
the spooks have a key on Halloween night, too!)
Measures approx. 1.84” wide x 5.15” long x .2” thick 
when finished. 

ASSEMBLY: 1. Identify and cut the shapes:
for the right half 
(missing: 1 extra of first shape for center layer)
for the left half.
The layering steps will be shown for the right half.
Repeat the same process for the left half, up through
Step 6.

When layering, take particular care to line up ALL cut
edges as precisely as possible.

2. Layer some of the units:
A) long whole but offset layer onto main layer;
B) skull shapes layered;
C) 'bow' flourishes layered;
D) 'bolt' circles into one stack
3. Continue to layer onto the long central assembly:
E) shorter barrel onto long barrel assembly.
4. Complete the layering:
F) skulls on;  G) 'bow' flourishes on; 
H) lrg & sm collars accents on;
I) 'bolt' circles stack at base recess;
J) rectangle throating & K) bit overlay on.
NOTE: as layering progresses, either press the glued-up
stacks and units under a heavy flat weight such as
this fabric covered re-purposed weight machine bar,
or a heavy book or similar object, to assist until the assembly
is completely dry, and to help avoid warping and curling.
5. To help strengthen and provide a bit of
extra thickness, layer one of the half assemblies
over and attach to an extra whole layer
(this will strengthen the top ribbon loop).
6. Here are the left and right assembles, shown
from their face sides. To complete the assembly . . .
. . . reverse one of the assemblies to position and
attach the halves back to back.
7. Attach a ribbon loop as desired.
(The sample has a length threaded through
the top key loop, with twine wrapping as knot.)

Here is the completed skeleton dimensional key.

Saturday, December 8, 2018

Key Magical Short Dimensional


Present this "magical" key as the tool that Santa uses 
to get into each house on Christmas even 
when he can't (or prefers not to) come down the chimney. 
Fancy short key gets its dimension from 
slightly offset layers that are built up and 
stacked on front and back. 
Designed to coordinate with the "Santa Mail 3D Box" 
and "Pad Lock 3D Model". 
Measures approx. 3.75" tall 
(bit end fits into Pad Lock keyhole). 

ASSEMBLY: 1. Identify and cut the shapes:
(Step 2 will indicate quantities to cut for left & right)
A center main key body
B key body overlay
C key top "crown"   D shaft
E knob main and separate center knob
2. Use this diagram (also shown on cut file)
to cut the build-up quantities to make dimensional key.

3. Layer and attach each of the multiple shape units,
taking care to align matching edges as precisely
as possible at each step. 
(Middle units are shown here.)
Allow the stacks to dry while pressing flat with
heavy flat object.
Crown, shaft and knobs are shown here
to layer and attach.
4. Position and attach the stacks in order
onto corresponding "face" of main key base stack.
Shown at left here, is the base with middle,
crown, shaft and knobs attached,
with opposite face stacks awaiting attachment
for the opposite face.
Here is the finished key, with distress ink
helping to make it look vintage and antique.
Key can be used separately, or paired
as shown here with the Santa Mail Box
and attached Padlock 3D Model projects.