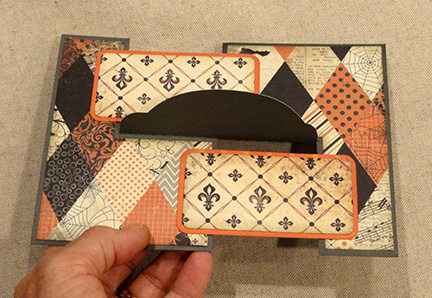
Replica lantern-style vessel has fold-over rim
with punch holes to attach a rustic wire "handle".
Front panel can be
switched out
for any one of three face variations included in the file.
Use
contrast back panel to show through feature openings,
or leave off panel and
place an electric candle
inside to shine through.
Measures approx. 7.125"
tall x 4" wide x 4" deep.
ASSEMBLY: 1. Identify and cut the shapes:
A hull front B hull back
C front face panel (one of 3 options)
D contrast back panel for face panel
E bottom panel (with cutout for finger access)
F bottom panel cover
G bottom "foot" rings build up (4; optional)
H top panel (with rim slots)
I neck strips (2) J handle hole reinforcements (8)

 3. Layer and attach the handle hole reinforcement circles
into two stacks of four shapes each.
Place under a flat heavy weight until dry.

 Take care to bend back the wedge tabs at each
angled seam along top and bottom edges of each
hull shape, pinching/creasing all the way into corners.

 6. Form the hull unit into a tube to bring
the straight edge and opposite flange together,
overlapping straight edge to flange perforation line,
adjust top to bottom and join seam.


 11. Form the neck strips into a ring to overlap
and join the second side seam.


 Working around the rim edge in clockwise direction,
bend the second flange tab inward into position
while at the same time overlapping the back edge
over the previously-positioned rim to form
a mitered narrow "seam".
13. Repeat for all inner flange tabs. When the final
flange tab is overlapped and positioned,
the lead edge will need to be tucked under
the first flange tab rim to continue the sequence.
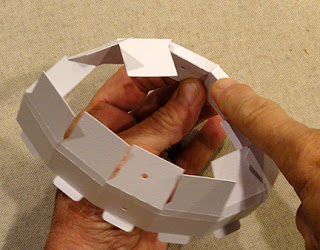
 On the top panel backside, bend the tabs outward
and glue in place.
 NOTE that it may be helpful to place the assembly
on a flat work surface to apply pressure to the area
where the tabs are joining underneath.
 15. Bend top panel edge tabs inward, then
insert the assembly into the top opening of hull
to align hull edges with corresponding
tab perforation lines/edges of neck assembly,
adjust, and glue in place all around.
Use the neck opening and front opening
as finger access for assembly.


 . . . insert into the hull bottom opening in a similar
manner to top panel assembly in Step 15.
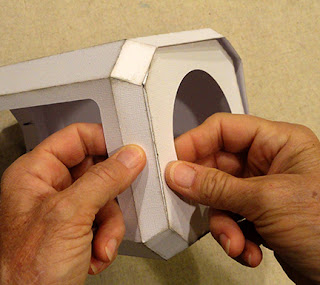 18. Position the foot ring assembly, centered,
on the outer surface of the bottom panel cover,
and glue in place.
Cover with a heavy weight while drying.


 22. Prepare and attach a wire or jute handle
through the reinforced neck punch holes
and otherwise embellish as desired.


A hull front B hull back
C front face panel (one of 3 options)
D contrast back panel for face panel
E bottom panel (with cutout for finger access)
F bottom panel cover
G bottom "foot" rings build up (4; optional)
H top panel (with rim slots)
I neck strips (2) J handle hole reinforcements (8)

2. Prepare the optional "foot" rings build up
by layering all shapes carefully with all edges lined up
as precisely as possible. To avoid warping
and distortion, place the ring assembly under
a flat, heavy weight for several hours until thoroughly dry.

into two stacks of four shapes each.
Place under a flat heavy weight until dry.

4. Prepare the front and back hull shapes by
bending back on all panel, top, tabs and side flange
perforation lines.

angled seam along top and bottom edges of each
hull shape, pinching/creasing all the way into corners.

5. Position, overlap and attach the first side seam
to join the two hull panels, taking care that each end
of seams align properly.

the straight edge and opposite flange together,
overlapping straight edge to flange perforation line,
adjust top to bottom and join seam.

7. Bend the top panels inward slightly to
align edge over wedge tab to perf line and join
seams across top.
Repeat across bottom of hull.

9. Prepare each of the neck strip shapes by
bending back on top two "rim" perforation lines,
side tabs back, and bend bottom tabs outward.

10. Overlap ends and join first side seam.

and join the second side seam.

12. Form the neck "rim" by bending
the first top flange tab inward . . .

. . . until the straight end edge aligns with
the bottom edge (next to tabs), and glue edge
in place.

bend the second flange tab inward into position
while at the same time overlapping the back edge
over the previously-positioned rim to form
a mitered narrow "seam".
13. Repeat for all inner flange tabs. When the final
flange tab is overlapped and positioned,
the lead edge will need to be tucked under
the first flange tab rim to continue the sequence.

14. Prepare the top panel by bending back on
all outer edge tabs.
Position the neck assembly over the top panel
with the punch holes centered along two side edges
as shown (these edges become the "sides").

and glue in place.

on a flat work surface to apply pressure to the area
where the tabs are joining underneath.

insert the assembly into the top opening of hull
to align hull edges with corresponding
tab perforation lines/edges of neck assembly,
adjust, and glue in place all around.
Use the neck opening and front opening
as finger access for assembly.

16. Position a reinforcement circle unit on the
inside of rim exactly over the punch hole opening,
and glue in place. Repeat for second side.

17. Prepare the bottom panel by bending back
on all perforation lines. Then . . .

manner to top panel assembly in Step 15.

on the outer surface of the bottom panel cover,
and glue in place.
Cover with a heavy weight while drying.

19. Position and attach the bottom cover,
centered, over the bottom finger access opening.

20. Position the selected face panel, centered,
over the front panel opening, and attach.

21. Apply adhesive to appropriate contrast panel
edges, then insert face side outward into the hull
through neck opening, and slot into place
behind the face panel, fitting neatly into
the recess created by hull edges attached to face panel.

through the reinforced neck punch holes
and otherwise embellish as desired.