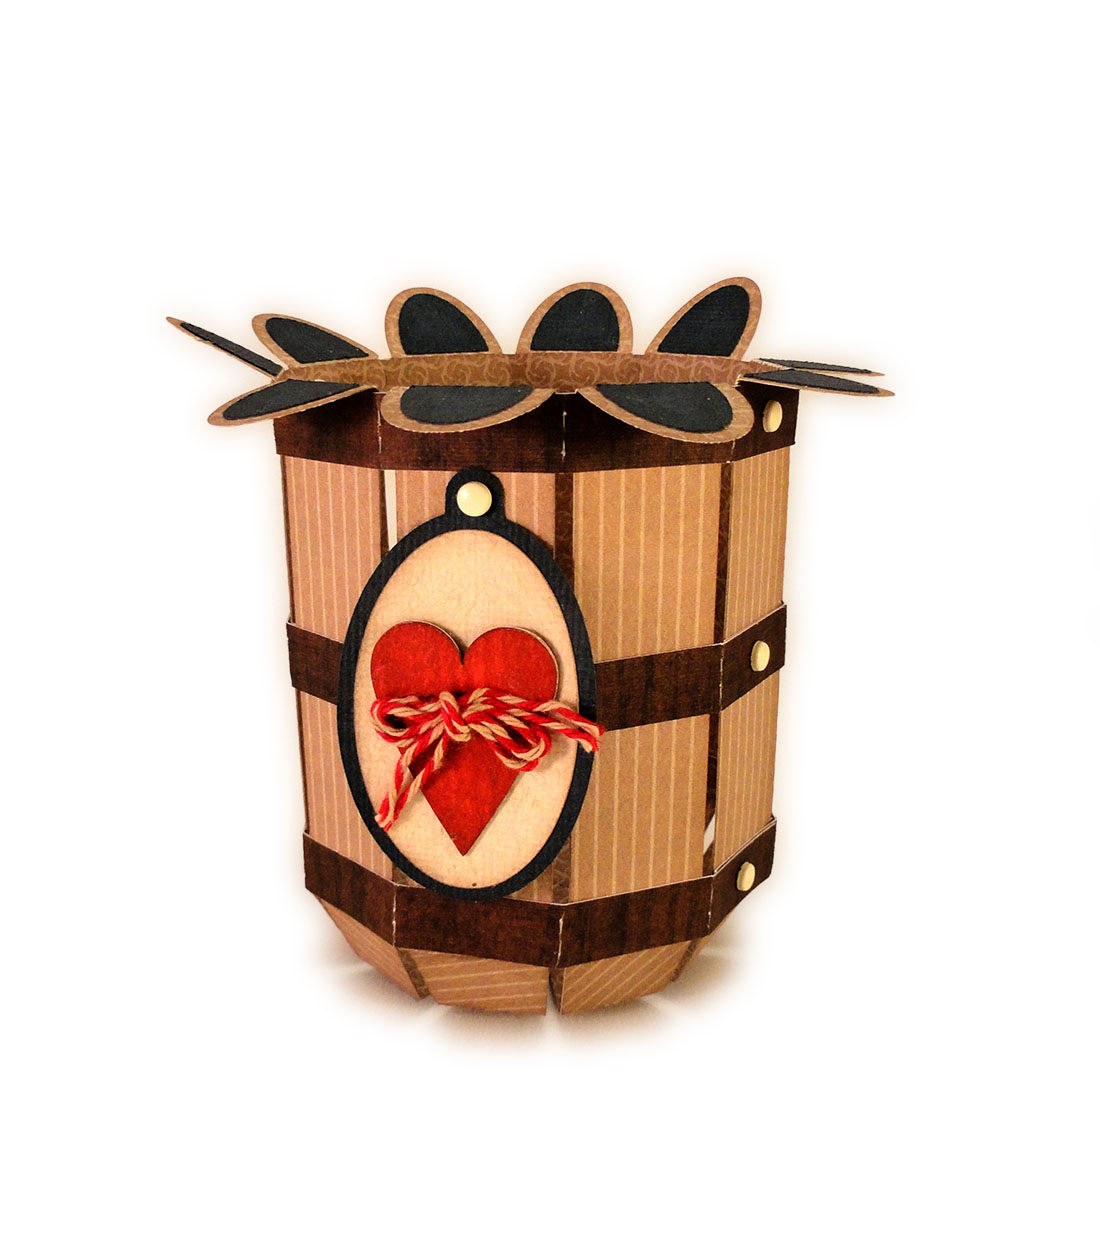
Vintage style decoration or
gift container features
walls and base that are thickened by layering
4-5 cut
shapes for the look of chipboard.
Side outer and front/back inner walls include
connecting tabs that fit into corresponding slots
to adjacent walls or base.
Built-up layered shaped handle has
inner bottom nibs that fit into small slots
on side walls.
Layered plaque with streamers, shadow,
and “Easter” word cut are also provided
for embellishment on front panel.

Decorate front with egg shape cut from favorite Easter
print
(or use included template to trace and hand cut
the egg
shape from special panel print
“Easter Wishes” Journaling Cards #EW174012
by
Echo Park) with offset shapes and
squared-off lower extension.
Add other
embellishments of ribbon and
tiny fabric posies, as desired.
Basket measures approx. 5.5” wide x 3.75” deep
x
6.25” tall at handle height.
ASSEMBLY: 1. Identify and cut the shapes:
A egg print cutout B scalloped accent egg
C scalloped offset accent egg
D basket front panel
E basket front for build up (4)
F basket back panel
G basket back for build up (4) plus slotted back (1)
H basket front slotted with tabs
I side outer panels (2)
J side outer panels for build up 4-5 for each side
K base front face with slots
L base shapes for build up (4-5)
M handle for build up (including outer accents; 7-8 to fit
side wall slots - see steps 3 & 4)
N opt. tracing template for egg front shape
from specialty print “Easter Wishes” card stock.
Alt. A: traced and cut from “Easter Wishes” card stock


 3. For alternative egg front panel that uses
“Easter Wishes” specialty card print from Echo Park
(shown here) . . .


 6. Position the front panel over the middle
"shadow" layer and attach, then . . .
 . . . position and attach to the bottom streamers
layer.
 7. Position, centered, and attach the word cut on top.
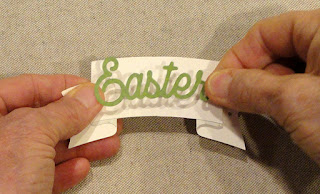
 9. Position and attach the front accent layer
and the other build up layers, taking care to align
all cut edges as precisely as possible.

 10. Layer and attach the base build up shapes,
with edges aligned, and press under a weight.
 11. Layer the front wall accent shape with the build up
layers, attach and press under flat weight.
Position and attach the scalloped front egg panels
unit onto the front of the wall, and press flat again.
 12. Layer the inner build up layers only
for the side walls, and attach. Press under flat weight.


 20. Position and attach the base build up unit
to the top base layer.
 21. Apply quick-grab adhesive in the side wall slot,
then insert the first handle nib into slot and push in
place completely.
 22. Apply glue, then flex the handle so that
nib can be inserted into the opposite wall slot
and attached in place.


A egg print cutout B scalloped accent egg
C scalloped offset accent egg
D basket front panel
E basket front for build up (4)
F basket back panel
G basket back for build up (4) plus slotted back (1)
H basket front slotted with tabs
I side outer panels (2)
J side outer panels for build up 4-5 for each side
K base front face with slots
L base shapes for build up (4-5)
M handle for build up (including outer accents; 7-8 to fit
side wall slots - see steps 3 & 4)
N opt. tracing template for egg front shape
from specialty print “Easter Wishes” card stock.
Alt. A: traced and cut from “Easter Wishes” card stock

2. Layer the regular print front egg panel
with scalloped . . .

. . . and offset scalloped circles and attach.

“Easter Wishes” specialty card print from Echo Park
(shown here) . . .

. . . position the template over the Easter word
floral print, adjust, then pencil-trace.

4. Carefully hand scissors cut the egg out
on the traced line.

5. For the regular print egg front panel, prepare
the label layers and word cut.

"shadow" layer and attach, then . . .

layer.


8. Position and attach the banner on top of
the egg panel assembly.

and the other build up layers, taking care to align
all cut edges as precisely as possible.

When using liquid adhesive, it is recommended
that the build up assembly be pressed under a flat
weight such as this fabric covered, re-purposed
weight machine bar, to help keep the build up
flat and avoid warping and curling, until completely dry.

with edges aligned, and press under a weight.

layers, attach and press under flat weight.
Position and attach the scalloped front egg panels
unit onto the front of the wall, and press flat again.

for the side walls, and attach. Press under flat weight.

13. Position and attach the tabbed front panels
for the side walls, and press flat under weight.

14. Layer the handle shapes into a stack,
to determine how many shapes should be cut
and layered so that the inner edge "nibs" will fit
snugly into the cutout slots of the side walls.

Keeping the stack together and aligned, fit the nib
into the side wall slot . . .

. . . then add or take away layers
until final quantity determination is made.

15. Layer the handle shapes, working in two stages
to attach a few, allowing to dry while being pressed flat,
then adding the remainder. The accent handle front
and back shapes should also be added to the stack.

16. Begin the walls assembly by fitting the side tabs
of one wall section into the slots of interior FRONT
wall only, then . . .

. . . bending the tabs inward and gluing in place.
17. Repeat for the back wall, inserting first wall tabs
into slots, bending and gluing in place.
18. Repeat for the second side wall.

19. Position the walls assembly over the base top layer
(which includes the slots) and insert the tabs of sides,
front and back walls into the base slots. . .

. . . until the wall bottoms are flush with base,
and tabs are fully inserted.
(This may require working around with patience
to insert tabs and keep them in place.)
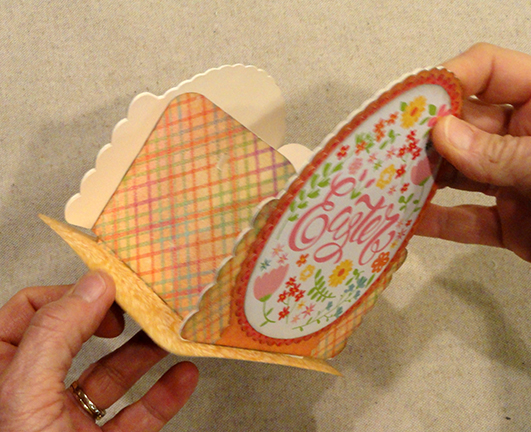
On the base bottom side, press tabs back
and glue in place.

to the top base layer.

then insert the first handle nib into slot and push in
place completely.

nib can be inserted into the opposite wall slot
and attached in place.

Here is the completed vintage Easter basket
using the print panel with Easter layered banner.

Here is the basket completed with the specialty print egg
front panel, plus ribbon and flowers attached
as embellishments.