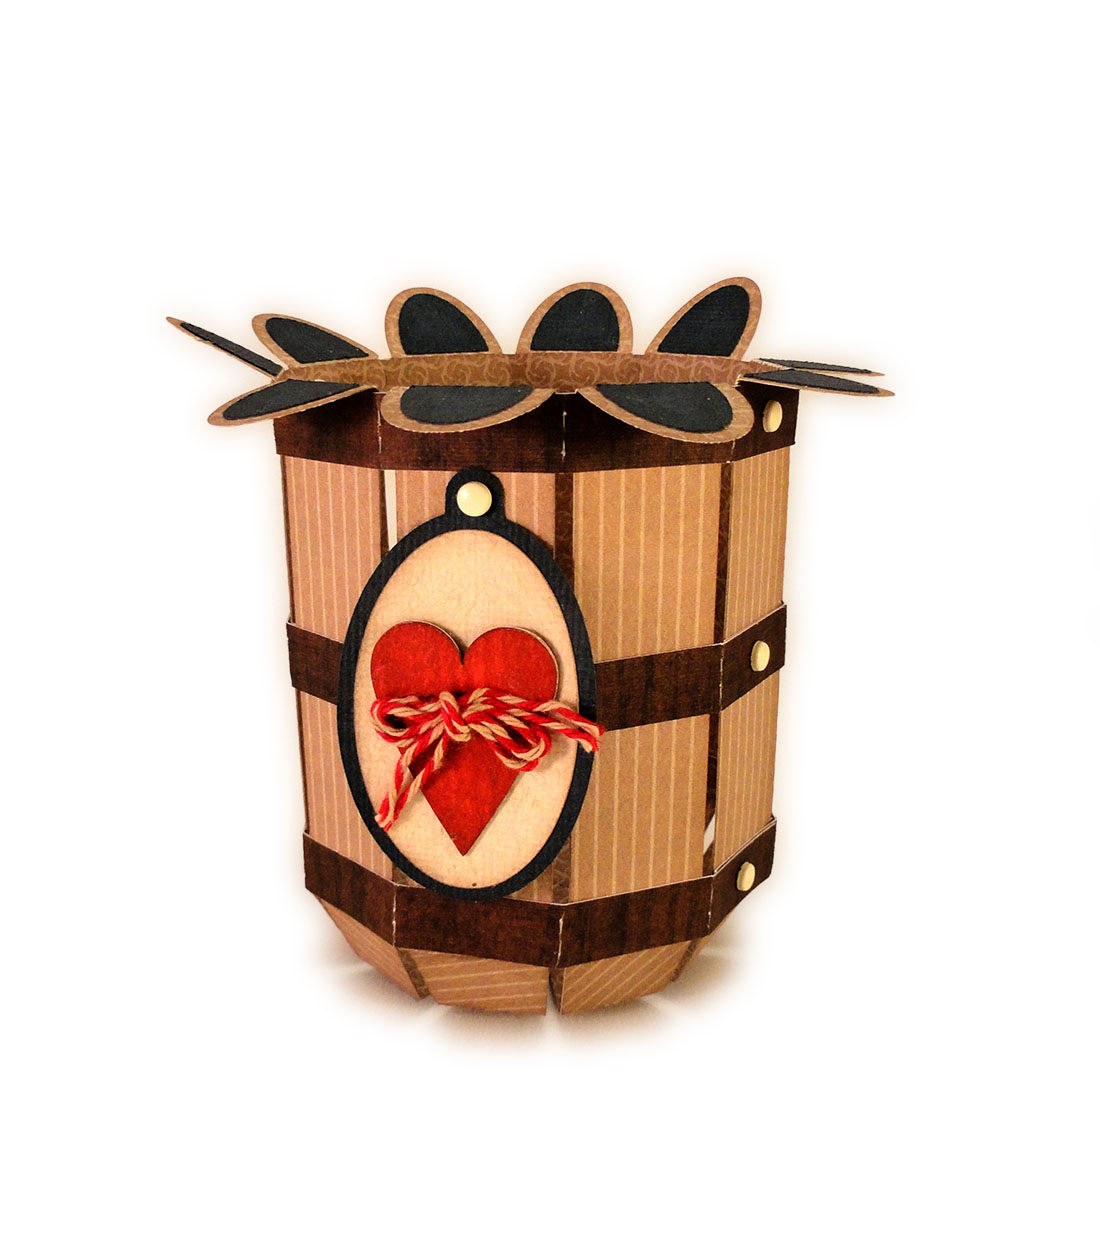
Vintage style decoration or gift container
features
walls and base that are thickened by layering
4-5 cut shapes for the
look of chipboard.
Side outer and front/back inner walls include connecting
tabs
that fit into corresponding slots to adjacent walls or base.
Built-up layered
shaped handle has inner bottom nibs
that fit into small slots on side walls.
Decorate front and back with scalloped offset accent heart
with squared-off
lower extension, plain offset heart with extension
(and optional matched whole
heart) and inner plain edge heart.
(Use smallest heart as a template to trace
and
hand cut accent shape from 3x4 printed panel,
if desired, as is seen in the
model project
which uses "Kissing Booth" #10387 3x4 Elements
by Simple Stories.

as desired. Simple
plaque label also provided
for embellishment on front below hearts.
Basket
measures approx. 5.5” wide x 3.75” deep
x 6.25” tall at handle height.
ASSEMBLY: 1. Identify and cut the shapes:
A front or back inner wall shapes with slots (2)
B front or back outer wall for
build up (thickness) (cut 4 for each of 2 sets)
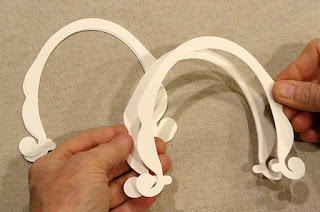
*C handle build up (7-8)
D base for build up (4)
E base top layer with slots
F side walls outer shapes (2)
G side walls inner shapes for build up
(cut 4 each for 2 sets)
H accent offset heart panel
I accent offset inner heart panel
J scallop heart K plain edge heart (see step 8)
L label
*see step 2 for quantity-to-cut notes
 2. Determine how many handle layers should be cut
by stacking 7 or 8 and testing the inner nib layers depth
for snug fit in the side wall slot.
3. Layer handle shapes for build up by gluing together
each of the shapes, taking care that all edges are
aligned as precisely as possible, with special
attention given to the inner edge nibs.
It may be wise to layer 4-5 and glue together
then allow to dry for a while, then complete
joining of the required quantity.

 5. Layer and glue the base main panel shapes,
taking care to align all cut edge as precisely as possible.
Press under a flat weight while glue dries.
NOTE that the slotted base shape should remain
unattached at this point of assembly.


 C) Replace the heart template inside the frame
temporarily, then . . .
 . . . remove the frame, holding the heart in position.

 E. Carefully hand scissor-cut the shape on
traced line.

 10. Position and attach the heart accent assembly
onto the front panel stack.
(Repeat as desired for back accent onto back panel.)
 11. With side wall stack oriented so that the tabbed shape
is facing outward (stack ins inward), insert the side tabs
of side wall assembly through the corresponding
slots of the inner front panel. Bend tabs back and glue in place.
 12. Repeat for back panel, inserting side tabs
through corresponding slots, bending and


 18. Flex the handle slightly to allow the second
end nib to slide into the opposite wall slot.


A front or back inner wall shapes with slots (2)
B front or back outer wall for
build up (thickness) (cut 4 for each of 2 sets)
*C handle build up (7-8)
D base for build up (4)
E base top layer with slots
F side walls outer shapes (2)
G side walls inner shapes for build up
(cut 4 each for 2 sets)
H accent offset heart panel
I accent offset inner heart panel
J scallop heart K plain edge heart (see step 8)
L label
*see step 2 for quantity-to-cut notes

by stacking 7 or 8 and testing the inner nib layers depth
for snug fit in the side wall slot.
3. Layer handle shapes for build up by gluing together
each of the shapes, taking care that all edges are
aligned as precisely as possible, with special
attention given to the inner edge nibs.
It may be wise to layer 4-5 and glue together
then allow to dry for a while, then complete
joining of the required quantity.

Press the handle build-up under a flat weight such as
the fabric-covered re-purposed free weight bar shown,
until the glue is dried.
NOTE that this may take several hours.

4. Layer and glue the front main wall shapes,
taking care to align all cut edges as precisely
as possible. Complete a glued-together stack
for both front and back walls.
NOTE: the slotted front and back walls should
remain unattached at this point of assembly.

taking care to align all cut edge as precisely as possible.
Press under a flat weight while glue dries.
NOTE that the slotted base shape should remain
unattached at this point of assembly.

6. Layer the glue up the non-tabbed side wall stacks
for left and right wall units.

7. Position and attach the outer side wall shapes
onto each of the two side wall stacks, taking care
to align the top rounded edges and slot edges
as precisely as possible. Press under a flat weight.
The wall build up stack
will fit within the dashed lines of the side and
bottom tabs.

8. If using a traced medallion shape for the main
plain edge center heart, prepare the heart tracing
template as follows:
A) cut the heart template with space around it from
utility paper (non-decorative card stock) then
trim a square around it to form a frame.

B) Using only the frame with heart window,
position it over the panel as desired, then hold in place.

temporarily, then . . .


D) Trace around the heart edge with pencil.

traced line.

9. Prepare the accent front (and back if desired)
panel by layering the medallion heart on top of
the larger offset plain edge heart, then
attaching these to the squared-bottom panel
scalloped heart (plain heart edges will match up
at upper portion), and then onto contrast larger
scalloped edge squared-bottom panel.

onto the front panel stack.
(Repeat as desired for back accent onto back panel.)

is facing outward (stack ins inward), insert the side tabs
of side wall assembly through the corresponding
slots of the inner front panel. Bend tabs back and glue in place.

through corresponding slots, bending and
gluing tabs back.
13. Follow the same process to attach the second
side wall shape (tabbed shape toward the outside,
and stack inward) both front and back panel
build up, inserting tabs through slots, bending
and gluing in place.

14. Position the front stack (with accent assembly)
over the front tabbed/attached panel, match up
edges, and glue together.
Repeat for the back build up stack.

15. Insert all the bottom tabs into corresponding
slots of base single layer, bend tabs inward
and . . .

. . . glue in place on base underside.

16. Position the base build up assembly on
the bottom of the attached base, adjust so that
all cut edge are aligned, and glue in place.

17. Position handle build up so that first nib
on handle inner edge can fit into the side wall
slot, insert and work fully into position.
Glue in place if desired.

end nib to slide into the opposite wall slot.

19. Position and attach the label.

Here is the completed handle basket.

If desired, decorate the basket with
tiny purchased roses, ribbon loops on hull,
and bow on handle.