Circle
base shape with engineered folds on each side
and at horizantal center creates side
steps
for extra interest. Begin with overlay accents for card front,
back and
step back panels.

Additional elements to mix n’ match:
center rectangular
medallion with offset side edge
nibs cutout shape; rounded edge shape with
offset accent;
tab-top index card accents, circle with offsets at center top
and as trio near bottom; lower front strip overlays;
buttons with offset; plus silhouette bases
for some ensemble groupings

Two-layer rectangular tag for sentiment
is provided for card back;

Panels and shapes coordinate to Graphic45
“Christmas Magic
Stickers”.

When folded, large card measures
approx. 8.75” wide x 5.75” tall.

Designed-to-fit matching medallion flap envelope
is available (“Envelope Lrg Medallion Flap”)
which also uses “Christmas Magic” sticker on shaped flap.
ASSEMBLY: 1. Identify and cut the shapes for the card:
A card base B-E offset accent shapes for base
F button circle bases and accents (2 ea.)
G front accent "strips": bottom base, top strip, narrow
H ticket accent base, ticket and patterned top accent
I medallion ensemble: base, offset, circle base & offset
J index card ensemble: base silhouette, card (2 ea.),
top tabs (2)
K circle accent: base circle with inner circle
L back rectangle tag base & accent


 4. Position, centered, the medallion pattern shape
on the medallion base, then . . .
 . . . position and attach on the front flap, offset
from the shaped edge.
 5. Layer and attach the tag shapes, then position
the eyelet ring at the circle punch.


A card base B-E offset accent shapes for base
F button circle bases and accents (2 ea.)
G front accent "strips": bottom base, top strip, narrow
H ticket accent base, ticket and patterned top accent
I medallion ensemble: base, offset, circle base & offset
J index card ensemble: base silhouette, card (2 ea.),
top tabs (2)
K circle accent: base circle with inner circle
L back rectangle tag base & accent

Identify and cut the shapes for the envelope:
A env front with flap B env back
C medallion base D pattern offset medallion
E tag base F tag offset pattern G eyelet ring

ENVELOPE ASSEMBLY
2. Prepare the env front by bending back the flange
tabs on sides and bottom.

3. Position, align and attach the env back along lower
edge flange tab, then bend into place to align
and attach along the sides.

on the medallion base, then . . .

from the shaped edge.

the eyelet ring at the circle punch.

6. Position and attach tag (with twine tie
if desired) on envelope front or back.

DOUBLE STEP CARD ASSEMBLY
NOTE: This card kit is intended to provide scope for
individualization, so pick and choose the elements you
like, add your own, duplicate some, eliminate others.
7. Prepare the card base by folding on the perforations:
a) fold the lower front folds as "mountain" folds;


fold as "mountain" folds.

8. Fold the base in half so that the curved edges
align, then . . .

including through the layers where the side mid
folds are hidden.

9. Position and attach the base accent shapes:
a) center the front accent panel with top edge at
the horizontal fold edge and side cut edges, and
offset at along curved edge.

and c) side accents with top edges at folds,
offset at curved edges.

10. Prepare the strip ensemble by positioning and
attaching the narrow strip along the bottom of
the upper strip. Then . . .

of the lower wide strip.

the middle of the front accent, aligned with
the step edge where side edges will also match.

12. Prepare the top center circles and button ensembled
by layering and attaching.

13. Prepare the index card ensemble.
a) attach tab tops onto each card;

b) layer and attach the circles for top center;
c) position and attach each card over the silhouette
base with offset top, side and lower edges,
one on left and one on right.

14. Prepare to position and attach the index cards
over the center front (card is folded), using the envelope
as a gauge (if preparing the card with envelope)
for how high they can be placed and still fit into
the envelope. Then . . .

of index card silhouette and card front.

15. Layer the ticket base with pattern front panel,
then position and attach to rectangle base.

the shapes and attaching, then position circle ensemble
centered on medallion with bottom layers even,
and attach.

17. Position and attach the medallion ensemble,
centered and with bottom edges aligned,
on the ticket ensemble.

ensemble, centered over card front, and with
lower rectangle panel edge approx. halfway down
the top strip panel, as shown here, or as desired.

19. Prepare the circles trio by layering circle bases
with interior circles, then . . .

. . . position and attach side circles first onto base
silhouette, then center lower center circle.

20. Add twine bows to buttons if desired.
Position and attach middle circles unit at lower center,
and side buttons on the back wall of side steps.
(Take care that buttons don't extend too far beyond
card base, or it may not fit into envelope.)


21. Use these sticker card stock elements to
create a magical Christmas version of this
double rocker side step card.
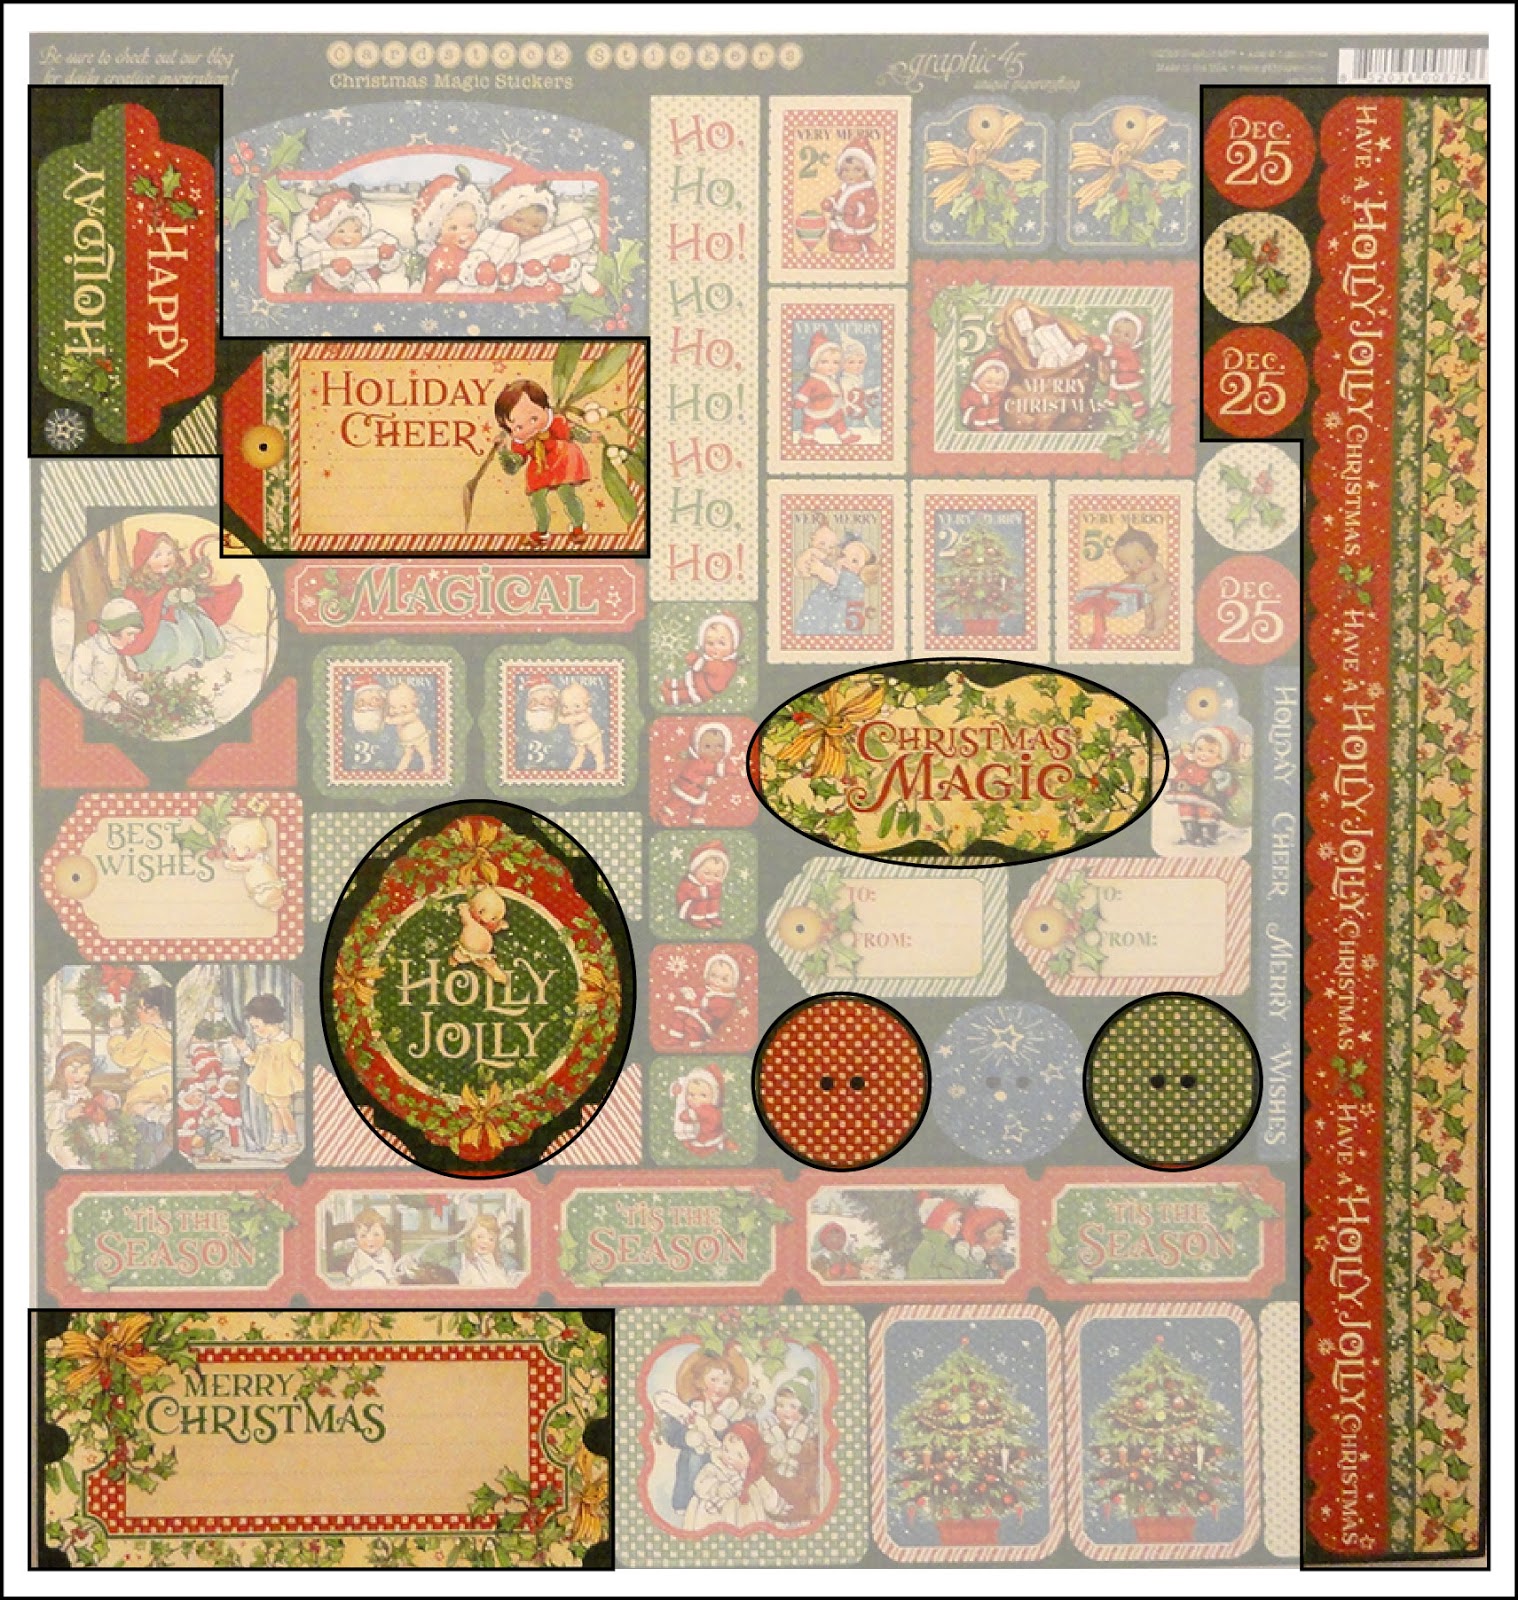
Here is the card version with the Graphic45
specialty elements in place:
FRONT VIEW

BACK VIEW

and ELEMENTS FOR ENVELOPE.