Monday, September 15, 2014

Fall Banner With Fabric Flags Plus Paper

Create this large scale "FALL" banner from fabric & paper
using svg cut shape templates to trace and cut
base triangle and shield flags from burlap or canvas fabric.
Then prepare your fabric with iron-on fusible web,
place on the cutting mat (Silhouette Cameo suggested; others may work)
and let the cutting machine do the detailed work!


Other features of this banner include dimensional paper rosette
and layered letters.

This project will soon be available exclusively
from SnapDragon Snippets, first through SVG Attic,
and later through the SnapDragon Snippets website.


 CONSTRUCTION:
Assembly highlights shown here refer specifically to a banner constructed using fabric elements. If can also be constructed completely from paper (card stock).

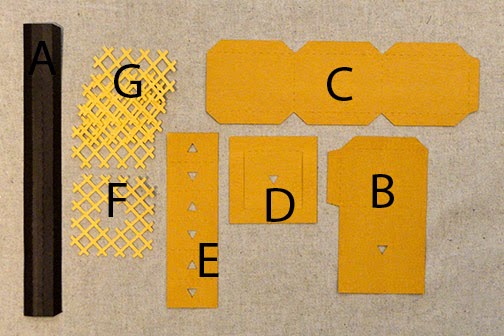
1. Cut the 2 flag base shapes from "waste" card stock using the cutting tool.


2. Use the cut template to pencil trace the shapes from your selected fabrics.

 The sample project uses sparkle polka dot burlap purchased (2014) from JoAnn Fabrics for the shield shaped flags that hold the FALL letters, and "Document" print home dec canvas fabric for the end flags.


 3. If you are using a fabric that frays (like burlap and course canvas) you will want to treat the edges with Fray-Check, which is a liquid "glue" that can be applied with the applicator tip bottle it comes in. Squeeze a narrow margin at the edge of the fabric right after cutting then let the solution dry. Use a liner on your work surface to catch stray solution. Allow to dry before adding fused shapes

Fray-check is available in the notions section of fabric and craft stores. It sill stiffen the fabric edge, and only slightly darken the edge, but is essential for projects like this.
 4. Prepare a fabric panel the size of the flag shape plus and extra 1/2" to 1" for cutting margin. Cut and apply lightweight or heavy weight fusible web such as Heat N Bond to the fabric backside, remove the paper backing, then position and attach to cutting mat. Test and adjust cut settings (I use the Cameo "cotton print" setting then adjust the blade to "5"), then cut the decor banner shapes. 


5. Position on fabric base shape and use hot iron to fuse in place. Follow fusible web manufacturer's directions.


6. Prepare fabric sections for layered maple leaf shapes as described in Step 4 above, determining a fabric panel size that can cut the two large or the two inner leaves together at one time, plus the cutting margin for the entire panel.

Here you can see the leaf shape being weeded on the mat once it has finished cutting.


7. Position (centered side to side, and roughly top to bottom) the larger outer leaf and fuse in place on the canvas flag shape.


8. Position the inner leaf on top of the base leaf with even outer offset margin, taking care that this very flimsy shape lays properly before applying the hot iron to fuse it.


9. Position and sew ribbon to the top edge of the flags to assemble the banner.

For this project, I used TWO ribbon layers so that the top edge of the flags are encased between. First I attached the ribbon top edges together, then I inserted the flag top edge between, pinned in place, then stitched the layers including the back ribbon edge. I used approx. 1.5 yards ribbon for the streamer, duplicated for the second back layer.


READ Step 16 BEFORE PROCEEDING
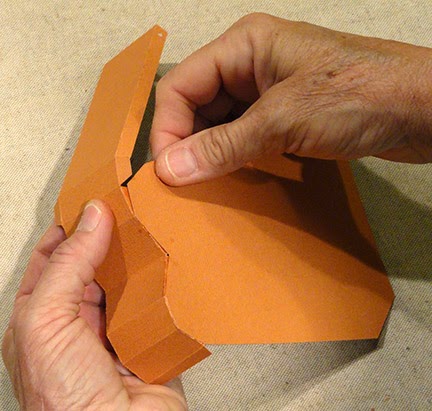
10. Prepare the rosette. Each rosette will require TWO perforated strips. Complete one for each of the "FALL" letters.

Fold each strip in accordion fashion, beginning at the non-tabbed end. Tab end is indicated here by my pointing finger. It has slanted top and bottom edges, and will be attached to the other strip used for the one rosette being assembled here.


Fold back and forth, first perforation as "mountain" fold and second as "valley" fold, across the full length of each of the two strips.


11. Complete the first seam. Overlap the straight edge of the first strip (at left) until it aligns as the tab perforation line of the second strip (at right). Glue in place.


12. Form the combo strip into a ring, face side outward, then overlap straight edge and opposite tab perforation line as in Step 11 to complete the second seam.


13. Prepare to form rosette and attach stabilizing front center circle. Hot glue is recommended for its quick grab, so have your gun heated before proceeding.

Push one edge of the rosette ring in to the center, allowing the accordion folds to adjust as you do so, but keep control of the whole length or it will get out of shape easily.


14. Apply hot glue at the inner edge of the strips assembly, where the circle shape will cover it completely, WHILE YOU HOLD the rosette folds relatively closely bunched.


15. Quickly center the first circle cover and immediately push in and adjust the folds so that the center gap is as small as you can get it. Hold until the glue is cured.


16. Once the first side is completed, repeat the cover circle adding process on the second side, applying hot glue at the center where it will be covered (including IN the gap if you wish), then quickly adding and centering the circle shape. Hold until glue is cured.

Complete four rosettes.


17. Position rosette (centered) over the decor banner and hot glue in place (or use other secure and sturdy adhesive).


18. Layer each of the "F A L L" letter and offset shapes and glue. Position each in order over the rosette shape on its flag and attach in place. (You may wish to try to hide the rosette's center circle cover as much as possible as you select each letter's final position.)


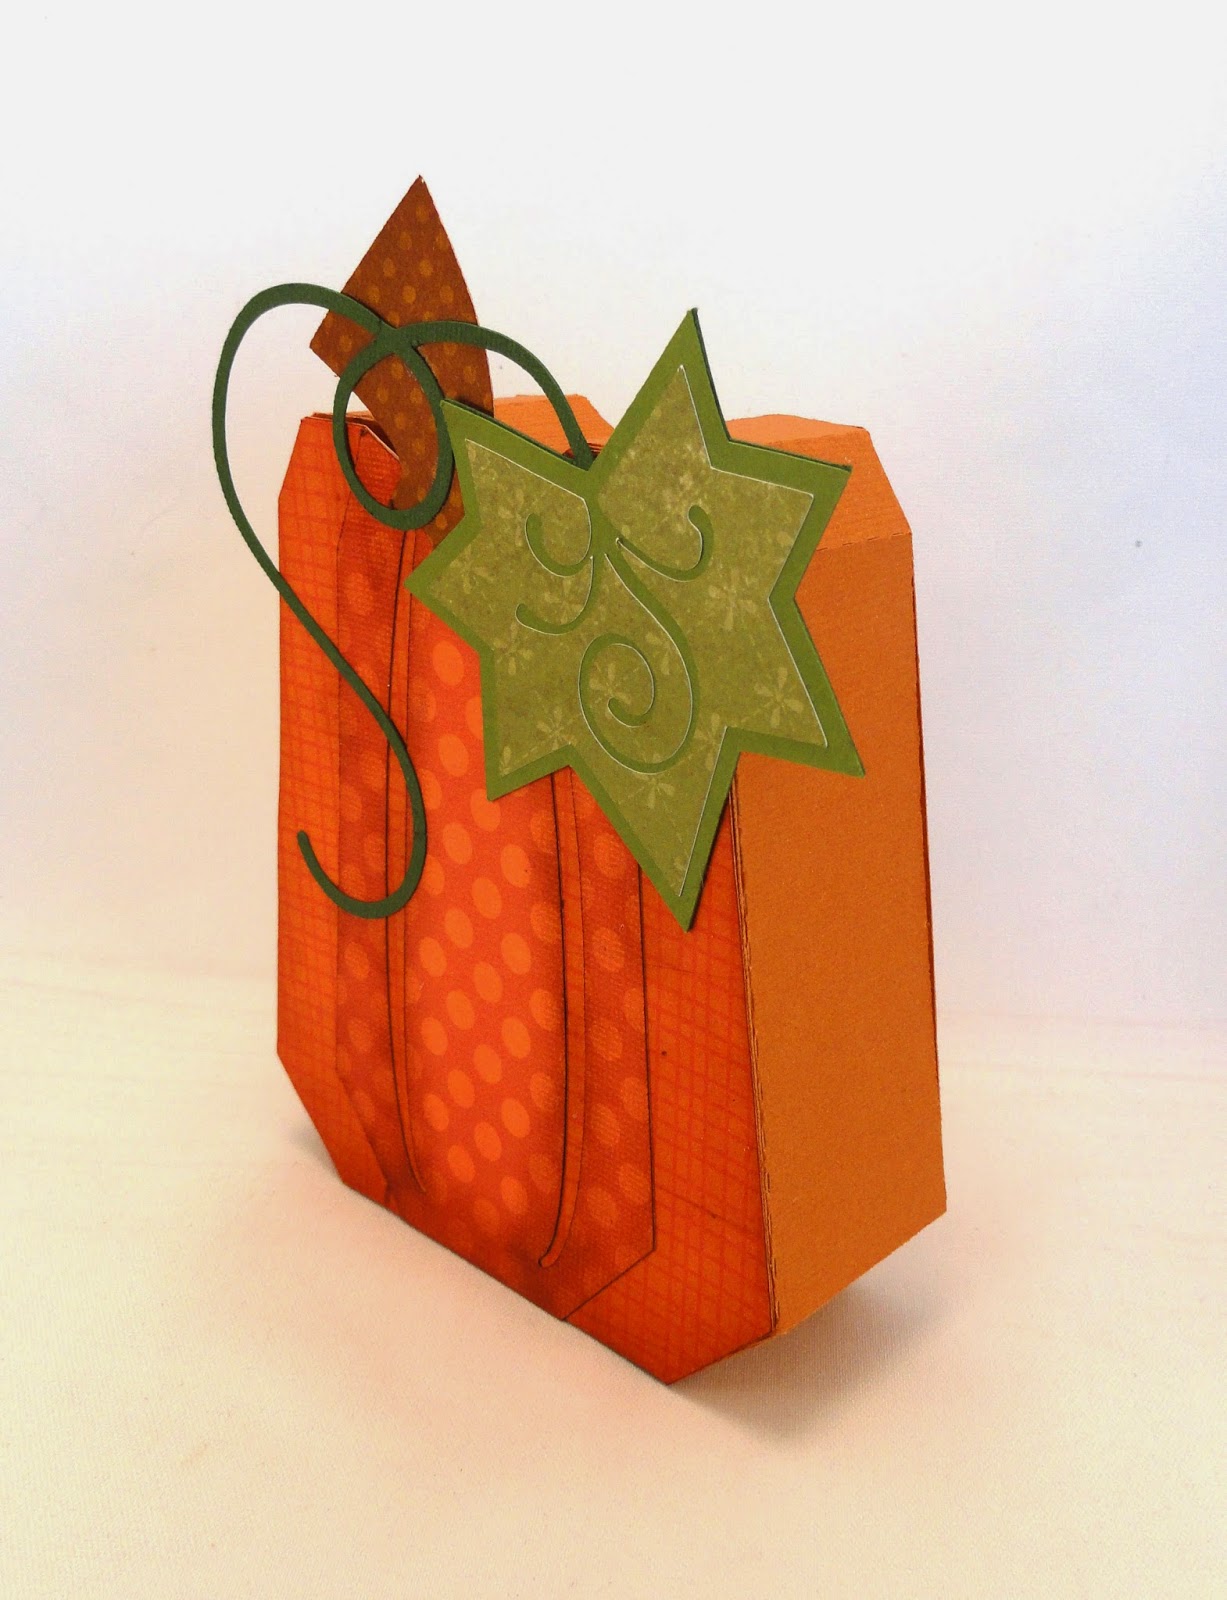
Here once again is the completed banner.

Trim ends to your required length - depending on where it will hang or be otherwise displayed.


Friday, September 5, 2014

Scarecrow Figure with 3d Hay Bale Stand


Perky scarecrow with straw layer details 
is attached to a triangular column “post” 
that inserts into the top of the hay bale box. 
Build box with bottom trap door for construction access. 
Platform can be added to interior to allow 
bottom end of post to insert and be held in place. 
Box measures 2” tall x 3” wide x 3” deep. 
Height with scarecrow in place is approx. 11”. 

This svg design is available for purchase and download 
from SnapDragon Snippets, and through
Silhouette America's online store.
2d Figure is available (soon) from
SVG Attic as part of a FALL Letter Box Ensemble.
(Search this blog for more information
about that ensemble.)

ASSEMBLY:
1. Identify and cut the shapes for the pole and hay bale box.
A triangular post
B box top with one attached side
C box sides
D box bottom with trap door
E post bottom stabilizer
F decor shape for top
G decor shapes for sides


Identify and cut the scarecrow shapes. 

Shown here at top are the "straw" layer shapes: main base, face (left), cuffs (top right) and neckerchief.


Shown below are the other scarecrow shapes, including layered hat, head with face, shirt base and front, neckerchief and outline, gloves contrast base, hands and cuffs.

(Refer to Steps 14 & 15 to see how he is assembled.)

2. Fold the box top/side shape on perforation lines as inward (or mountain) folds. Fold the box sides shape on vertical perforations as inward or mountain folds. Fold tabs back.


3. Align one end of side strip with side tab of box top/side, overlap straight edge with perforation line of tab, adjust up and down for perfect alignment, then glue in place.


4. Fold the box into a tube to bring opposite tab and edge together, align and glue in place.


NOTE that it is possible to flatten the box to apply pressure to these edges to glue securely.


5. Fold the side edge tabs inward and the top down into position. Align and glue the edges to tab perforations. It may be helpful to align and attach the back edge (opposite front perforation) first.


Turn the assembly over and place on a flat surface to apply finger pressure against the tab and edge from the inside of the box.


6. Prepare the box bottom by folding the trap door outward on the perforated line.

7. Orient the back so that the triangle opening of the back points in the same direction as the box front triangle opening.

(NOTE that in this image, they DO NOT line up as they need to!)


8. Line up the back edges with the corresponding tab perforation lines, adjust and glue in place, inserting fingers through trap door to the box's interior to apply pressure where needed for secure seams.


9. Prepare the post stabilizer by folding in accordion fashion.


 It should fold into a flat rectangle with holes aligning. Glue all surfaces that touch (both front and back).


10. Open the trap door. Position the stabilizer over the inside face with holes aligned, and glue in place.


11. Glue the small hole circle cover over the triangular hole. 

Close the trap door and glue the larger circle in place across the door edge and side margin to secure the door closed.


12. Position, center and glue the top decor shape in place on the top of the box.


13. Position and glue the side decor shapes in place.


14. Layer the "base" straw shapes under the corresponding decorative shapes. Largest straw base shape includes hat straw extensions. Also shown are glove shapes, neckerchief, head.


15. Position and join the layers into units, then assemble appropriate order and glue in place in sequence. 

Here the head/face and neckerchief layered units are being positioned over the body.


16. Prepare the post by folding on all long perforation lines as inward or mountain folds.


17. Fold the post shape into a tube. Apply adhesive to the face of the long tab, overlap the opposite straight edge and join.


It will help with this seam to insert a long narrow tool like a bamboo skewer or knitting needle to help provide resistance so that the edge can be pressed into place. Move the pressure of fingers along the entire length to work the edge until it is completely joined and secure.


18. Position the post behind the center of the scarecrow with the top end approx. half-way up the head shape as shown, then glue in place.


19. When figure is secured on post, insert post bottom end through box top triangle hole. Continue to insert post until it sits in the corresponding stabilizer triangle hole.


Your scarecrow figure is now ready to display!

Pumpkin 3d Box With Tapered Top

Decorate for fall and harvest 
with this blocky pumpkin with taper top, 
décor front, stem and viny leaf. 
Back trap door allows for construction access 
then closes up for a self-contained “box” block. 
Box measures approx. 5” tall x 4.25 wide. 
Available for purchase and download from
SnapDragon Snippets, also through
Silhouette America online store, and
SVG Attic as part of a FALL Letter Box Ensemble.
(Search by that title here in the blog to see that project.)
ASSEMBLY:
1. Identify and cut the shapes.
A pumpkin box front
B top boxing strip (includes 'C's at center)
C bottom boxing strip
D pumpkin box back
E tap door 'key' cover
F front decor shapes
G letter front (used for the "FALL" ensemble


2. Fold the boxing strips on the vertical perforation lines, folding back (as mountain folds) on all except the center perforation line. The center is marked on each tab with a 'C', as shown by pointing finger here.

Fold all edge tabs back.


3. Identify where the "center" perforation will be positioned at the top center indent of the box front. Line up and overlap the straight edge (here on the left top) with the first tab perforation line to the left of the marked center perf. Glue first tab in place.


4. Fold the boxing strip so that the next straight edge lines up with the corresponding tab perforation line. Adjust and glue the second tab in place.

Complete all edge-to-tab seams for this "half" of the top boxing strip.


5.  Continue working in the same manner to align and join the tabs and corresponding straight edges for the opposite half of the top boxing strip.


It may be helpful to turn the assembly over after tab and edge are initially secured in place and to place the face of the box on a flat surface. Press against the tab backside to firmly join to box front, and press into the corner as firmly as possible. 


6. Line up and join the lower boxing strip edge at the appropriate end tab of the upper boxing strip. 


7. Continue aligning and joining the edges and tabs of the lower boxing strip until all but last tab is joined.  Prepare, align and join the end tab while simultaneously positioning and joining final edge tab to complete front edge.


8. Prepare the box back by folding the trap door along perforation so that it opens outward.


9. Fold the tabs of the boxing strips inward. Line up the box back shape with the boxing edges, then join corresponding tabs and edges.


It will be helpful to reach fingers into the box interior through the open trap door to apply pressure where needed to join tab and edge.


10. Once back is completely in place, glue the "key" shape in place to cover the hole. 


Then, close the door into place, apply glue to the tab end, then apply pressure to join to lower margin of the back shape.


11. Assemble the front overlay decor shapes (including base front, center shape, stem, vine/leaf base shape with full leaf and decor leaf). Position over box front and glue in place.


12. If you are building the "FALL" letter box ensemble, the pumpkin holds the 'A' of FALL. Position and attach the large letter A, using regular adhesive, or dimensional foam squares (or equivalent) to the upper and mid center and side backsides.


Here is a preview of the FALL Ensemble, in case you're curious!

Here is a slight side view . . .

 and the finished front view.