Build this dimensional snowflake
using a newly-available cut file from
SnapDragon Snippets through the Silhouette America
online store, then use as a tree ornament,
wreath embellishment, or hang a series
from your candelabra.
with "face" cardstock on top (and on back in some cases)
gives it layer dimension. Raised triangles with
center front glued edges gives it spacial dimension.
Step 1. Identify and cut the pieces you will need:
A. base layers, front white 3 interior chipboard, back white
B. second layer shapes, front white, 1 chipboard
C. third layer, front and back white, 1 chipboard
D. top layer, front white, 1 chipboard
E. triangle points, 6 from chipboard
F. triangle accent (white) cover shapes
G. sawtooth circle to cover brad on back
Not shown in this photo are the dimensional triangle points interior white triangles.
Step 2. Glue the first layer shapes together, taking care to match the hanging hole points. For my project, I will used the quantities of white (face and back) and chipboard (for stiffness) shapes listed in Step 1.
Apply adequate glue to one surface then join the shapes in sequence, working with just two layers until the glue sets and dries. Use something heavy and flat to help the shapes dry flat and evenly.
Step 3. Glue the second layer shapes together.
Step 4. Glue the third layers together. I am using a white back layer because part of this second "snowflake" shape will show from the backside between the larger points of the first layer.
Step 5. Glue the fourth layers together.
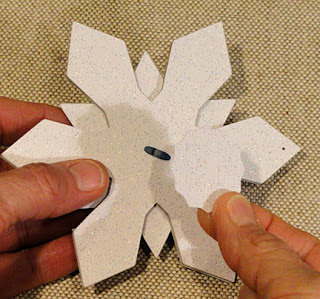
Step 6. When the previously gluing of layers are dry, apply glue to B backside, then center and align exactly with edges of A.
Step 7. Apply glue to backside of D layer, then center, align edges, and join to front of C.
Step 8. Prepare to join top (C/D) layer to bottom (A/B) layer. Apply glue to the areas below the deep "valley" between the large points . . .
. . . then place, center, adjust. Hold in place until glue is secure.
Step 9. Fold your selected version of the dimensional triangle point shapes on perforations to being the sides up toward the front center. The version shown for this tutorial uses the shape without the tab, since I chose to cut the shapes from chipboard. Apply glue to one of the front edges to be joined, then bring the two edges together and hold in place until secure.
Step 10. Apply glue to backsides of triangle (front) accent shapes, then glue left and right shapes into place on dimensional point. complete all 6 points this way.
Step 11. Apply glue to the backside of the dimensional triangle. Position on large point below tip as shown here. Complete for all six triangles and points.

Step 12. Apply glue and insert the interior accent triangle shape inside the dimensional point. Complete this step for all six triangles.
Step 13. Insert decorative brad through the holes from the face side of the snowflake. Bend prongs flat. Apply glue to the camouflaging sawtooth circle shape, position over the prongs and hold in place until all edges are secure.
Here is the completed snowflake shown from the front with brad in place. String a narrow ribbon, monofilament (clear) thread, or other appropriate hanging loop through the tip punch hole.
Other options are also possible. At right, see just layers C & D as a simpler ornament. Layers A & B alone would also work as an ornament.
For a very dimensional snowflake, cut extra B, C & D shapes plus dimensional triangles to complete the back as the front was completed in this tutorial.


Marvelous!
ReplyDelete