Remember a parade, congratulate a marching band
member,
or celebrate July 4th with this dimensional parade leader hat.
Includes
"hidden" base hexagon box
attached to bottom layers of built-up brim.
Decorate with 1) brads and chain attached at side punch holes in
"lid",
2) contrast crown strips near top, and
3) three layer fringe
and star cockade with brad at center front.
Measures approx. 3.75" tall x
4.25" long x 3.5" wide when closed.
ASSEMBLY: 1. Identify and cut the shapes:
A crown main (front) shape
B crown back shape
C crown trim accent strips (6)
D upper brim with slots
E upper brim under cover
F brim rim strips (2) G bill
H cockade shapes I star button (3)
J base container tube
K base upper brim with slots
L brim bottom & top covers (2)
2. Prepare the front and back crown shapes
by bending back on all perforation lines
and tabs.
3. Join the front and back crown sections
at one side seam by overlapping straight edge
of front at corresponding side tab to
perforation line of the back section.
4. Position and attach the crown trim accent
strips near top of each panel
(where ends of strips align at panel edges).
5. Form the crown assembly into a tube
to align and join the second side seam.
6. Layer and attach the two brim strip arcs,
taking care that all edges align.
7. Position and attach on the front of theupper brim shape with slots.
Take care that outer edges line up
and match as accurately as possible.
8. Insert the bottom (front) tabs of crown assembly
into corresponding slots of upper brim shape . . .
. . . then bend tabs inward and glue in place.
9. Bend the crown bottom back tabs inward
to wrap over the brim edge, and glue in place.
10. Position and attach plain brim shape
face outward over the bottom of the
previous brim shape, lining up edges
and enclosing tab construction.
11. Prepare the bill shape by bending back
at angled perforation lines, bending tabs
forward.
corresponding slot, then . . .
. . . insert each side tab.
On the inside, bend tabs upward
and glue in place.
13. Layer the star "button" shapes, then
layer cockade shapes with bottom edges aligned,
and attach to form one unit.
Insert decorative brad through punch hole.
14. Position cockade assembly onto front of
crown assembly and glue in place.
15. Use a tool to lift bill as much as possible to apply
small amount of adhesive near the rim strips,
then pop the bill edge inside the rim strips
and hold in place until secure.
16. Measure and cut a length of decorative
chain, if desired, then attach at crown sides
with decorative brads.
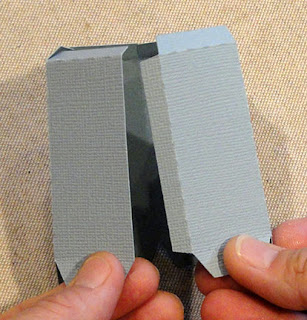
17. Bend top tabs inward, top "lid" shape down
and glue in place, aligning edges and perf lines.
18. Prepare base "container" tube by bending
back on perforation lines and tab lines.
Bend "outer" portion of bottom tabs forward.
19. Form shape into a tube and completed side seam.
20. Bend top rim tabs inward and glue in place.
21. Insert the rounded inner tabs into slots
of base brim . . .
. . . then bend toward center and glue in place.
22. Glue outer tabs in place on top of base brim.
23. Position and attach bottom brim cover
under base "container" assembly.
24. Insert tube through plain base brim,
slide down and glue in place to hide the tab
construction.
25. Insert base container into bottom of
upper hat assembly to close box.
Here is completed hat.


Hi Jodi. I really like this. How can I purchase the cut file/svg file please? Thank you!
ReplyDeleteMy design files are only available as a purchasable download through Silhouette America's online store. Search under the artists button - Hearthsewn
Delete