Showing posts with label knight. Show all posts

Sunday, March 13, 2016

Knight Crest Cupcake Cup & Pick

Group these knight pick cupcake treats in a group
for a feast centerpiece, or place one at each setting
at your Quest Party.
Knight emblem has 4 shapes plus the circles.
Cupcake wrap has one side seam and several
bottom tabs for quick assembly.

ASSEMBLY: 1. Identify and cut the shapes:
A main cupcake wrapper   B pick circle
C pick scallop circle (outer)
D helmet layered shapes
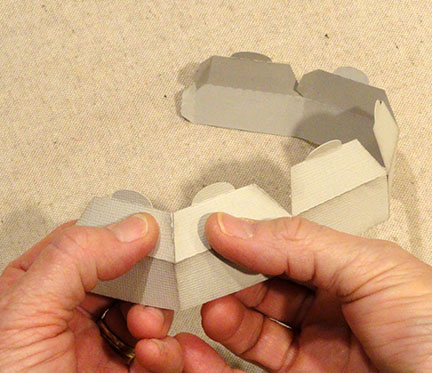
2. Prepare the wrapper shape by bending slightly
back on all perforation lines of the arch.
Also bend back the bottom platform shape and its tabs.
3. Form the wrapper shape into a tube to bring 
the unattached side edge to overlap the opposite side
edge and line up the punch holes of each.
Glue the overlapped edge in place.
4. Insert and attach optional decorative brads.
5. Bend the platform tabs under, apply glue to
face side of each, then bend platform into
the bottom opening of arch tube so that it is even with
the bottom of the side edge, and glue in place.
6. Assemble the helmet by layering the
contrast helmet shape over the "show-thru" base,
then adding grille and plume.
7. Layer and attach the pick circle and outer scallop circles
with pick sandwiched in between.
Position and attach the helmet assembly.
8. Position cupcake in the wrapper cup,
and insert pick on top for your finished product.

Knight Tunic Crest Heat Transfer Vinyl

Tunic emblems for your little band of knights
can be digitally cut from heat transfer vinyl
(we have used smooth for the samples here).
Be sure to reverse the images before cutting
if you use the transfer vinyl.

OPTION 2: Cut a stencil from vinyl
Use your digital cutter to cut the image (non-reversed) 
from stencil (clear) or solid vinyl to mask the portions
you don't want painted, then spray paint
(or stencil brush or sponge) the emblem on.
You can view details of a stenciled image
for a different project by visiting this POST.

(This assembly guide is under construction.
Please return soon to view the completed tutorial.)
PROJECT ASSEMBLY:
1. Prepare the fabric tunic pattern
(use two reg. printer sheets taped together).
Here is a suggested layout for a child
between 4 and 8 years old.
(May need to modify smaller for younger child.)
If cut crosswise on 45" to 60" wide yardage,
it would require 3/8 yd. of fabric for one tunic.
NOTE that the shoulder edge is placed
on the FOLD of fabric when cut.
2. Cut the tunic from your selected fabric.
3. Finish the raw edges of fabric.
For this project, leftover home dec fabric (linen-like)
was used, so it was essential that edges be finished.
This image shows edges being overcast with coordinated
thread color using a home serger.
If preferred, you can use felt or non-woven fabric
that won't need edge overcasting.
OR, you can zigzag the edges, or hem ALL edges,
or use a fray protector such as FrayCheck.
4. Optional: hem the neck opening edges.
Complete "stay stitching" around edge with matching
thread color approx. 1/4" from fabric edge.
Clip into seam allowance stopping just short of
the stay stitching ONLY at center front, center back,
shoulder angles.
Turn the 1/4" seam allowance to back (at the stay stitching)
and topstitchin place.
5. Prepare the heat transfer vinyl.
This project uses EasyWeed smooth style.
(You can get good instructions for this product
at many blog tutorials. HERE is the one I like.)
PREPARE YOUR IMAGE TO CUT:
be sure to reverse the image prior to cutting the vinyl.
SET UP THE VINYL IN THE MACHINE:
make sure that the thick plastic carrier side of
the heat transfer vinyl is on the bottom so that
the cutter blade will cut the vinyl.
 ADJUST THE CUT SETTINGS FOR
"HEAT TRANSFER VINYL" plus the style you are using.
Then, when everything is double-checked and correct,
send the cutting job to the cutter.
 6. Weed away the "extra" parts of the vinyl
by using a hook took to carefully lift up and
peel away the background surrounding the
elements of the design.
7. Position the transfer sticky side (vinyl side)
down on the face of the project, center
and adjust positioning, then press for a
temporary stick.
8. Use a pressing cloth on a flat hard surface that
can take the heat from the iron.
Use a teflon sheet or second press cloth on
the top. Follow the tutorial for the heat settings,
pressure application, and time being allowed to
heat transfer the design.
9. After checking edges for proper adhesion
as suggested in the tutorial, peel away the carrier
plastic sheet.
(DO NOT TOUCH WITH HOT IRON AFTER THIS POINT!)
10. Cut ribbon or twill tape ties: 4 @ approx. 12" long.
Sew approx. 8.5" up from the bottom edge of tunic.
Here is the completed crown and sword design
on a tunic.

Knight Crest Bottle Label Print & Cut

Use the print & cut features of the Silhouette Cameo
to print this knight crest label onto adhesive label paper,
then attach to regular cut-out band,
personalize it if you choose, then place one
at each table setting of your Knight Quest Party Feast.
(Or, if you are using other systems, simply print
and "fussy-cut" the oval.)

ADVICE: Review a good tutorial to better understand
how to use the Silhouette Studio/Designer Studio
software and system (or other system you may be using)
that facilitates the print & cut process.
Here is one we recommend: 
https://www.youtube.com/watch?v=gMcWKW8Ep70

PROCESS & ASSEMBLY:
1. Set up the print & cut colored designs in the software,
selecting 8.5x11 paper size. Apply the registration
print marks to your setup (make sure the images
are positioned within the markings).
NOTE that the bottom registration mark has been
moved up -- and could have been moved up even
more to conserve label paper.
2. Select your printer and send the job to print.
For extra ease in the process, I have inserted
a sheet of adhesive back paper (label sheet).
Regular white card stock that your printer can handle
is also a good choice, but will need to have
adhesive applied to attach it to the band base.
3. Prepare the printed sheet to cut by positioning 
in the upper left of the cutting mat, in the usual manner.
Send the job to the cutter where the outer oval
shape will cut.
4. Lift the oval emblems from the cut mat . . .
. . . center and attach on the front of the
previously (conventionally) cut band.
5. Center the band front as desired on the
beverage bottle, then wrap the ends to the
backside, overlap and glue edges.
Here is the completed print and cut
bottle wrapper.

Tuesday, March 8, 2016

Guard Tower A6 Card

Enchanted invitation for a knight or princess party, 
or birthday greeting has front gate flap 
that flips upward to reveal the message panel. 
Front bottom tab strip wraps to back at bottom 
to slide into a back bracket. 
Measures approx. 4.63" wide x 6.25". 


ASSEMBLY: 1. Identify and cut the shapes:
A main card base    B tower base
C tower front   D crenelation accent shapes
E gate base with panks
F gate and built up (2)
G banner shapes   H back tab bracket
2. Assemble components:
top - layer crenelation base with dentelle top
lower left - layer arch build up
lower right - layer banner shapes
3. Center and attach the tower base onto the
card base.
4. Prepare the tower front by bending forward
at the upper perforation line, and back
at the lower tab perforation line.
Position and attach only the upper portion
 to the matching tower base upper portion.
5. Position and attach the gate base
shape, centering it between the two
cut marks at the lower front tower bottom edge
as indicated here. 
Tower and gate bottom edges should match.
6. Position and attach the banner shape,
either above the gate, as is previewed here . . .
. . . or across the gate as shown here.
This image also shows how the front tower
hinges to open and reveal the message space.
7. Prepare the tab latch bracket by bending
the sides both back where the edges
will meet at center back.
8. Apply glue to the middle shape
along a narrow margin at upper
shaped edge only, as shown,
then 're-close' the back sides to glue in place.
9. Apply glue to the entire back (two halves) . . .
. . . then position at the center back of card base,
with bottom straight edges even with base
bottom edges.
To latch the card in closed position,
bend the bottom tab to the back and tuck
up into the interior space of the bracket as shown.

Friday, February 26, 2016

Castle Tower 3D Box

Dimensional six-sided tower has tapered center column 
with brick mortar overlays, faceted base, 
crenelated rampart top with mini bad accents, 
upper & lower architectural "bead" details. 
Base tray has finger tabs for easy removal 
so castle can be used as a gift box. 
Measures approx. 6.75" tall x 3.25" deep x 3.875" wide. 

ASSEMBLY: 1. Identify and cut the shapes.
A main tower panels (6)
B tower brick overlays (3 ea. of window, plain)
C tower lower stabilizer hex
D base riser (2)   E base tray
F crenelation base
G crenelation fold-over shapes (6)
H upper tower opening cover
I upper "bead" shapes (2)
J lower "bead" shapes (2) 
Not shown: brick overlay window contrast and
optional crenelation brad over strips
2. Prepare the main tower shapes by bending upper
and lower sections forward slightly, side tabs back.
3. Begin joining tower panels by overlapping
straight side of on panel over the corresponding
tab to perforation line, adjusting top and bottom
of sections, and gluing center segment in place . . 
. . . adjusting and gluing top segment . . .
. . . then adjusting and gluing bottom segment
in place.
4. Join the third section in place in the same manner,
then continue joining panels in place until
all 6 are joined into one assembly.
5. Prepare the window style brick overlay
by gluing the edges of the contrast
window under shape behind the window opening.
NOTE: you may design your rook tower with
all window shapes or all plain shapes as desired.
6. Position and attach each brick overlay
onto one tower section, between upper and lower
slots, and between side perforation or straight edges.
7. Form the tower assembly into a tube to bring
the straight side edge to overlap the opposite
perforation, then join the center, upper and
lower portions as in step 3.
8. Prepare the base riser shapes by bending
back on all perforation lines and tabs.
9. Join the two shapes end to end.
10. Complete the angle seams by bending two
adjacent upper panels toward the center
to bring the straight side edge to overlap the adjacent
tab perforation line, and glue in place.
Complete for all "available" angle seams.
11. Form the riser into a ring to bring the remaining
side edge and tab together to join.
Also join the angle seam.
12. Insert the castle tower up through the bottom
of the riser ring . . .
. . . and push down into position fully.
During this process, insert the riser
interior tabs into the bottom tower slots.
(This for me was the most time-consumer part
of the assembly. It required using a blade tool
like a spatula to help tuck one tab inside, and
glue in place, before working to insert
the remaining tabs.)
13. Prepare the base tray by bending back on
all perforation and tab lines.
14. Form the tray by bending sides back/upward
to bring straight edge to overlap adjacent perforation
line, and glue in place.
15. Prepare the crenelation base shape in a similar
manner to the tray shape in step 15 above.
16. Insert the top scallop tab end of tower
through the crenelation base opening to the
position where tab perfs line up with straight edge.
Bend tabs back and attach to the 'ledge'
of the crenelation shape.
17. Prepare the fold over shapes by bending back
at both perf lines to create a top surface.
18. Position one end over the crenelation edge,
line up the punch circles, and glue in place.
(Bottom straight edge should line up the crenellation
base perf line.)
Bend the back toward the inside of the
tower to line up the bottom and punch circles,
and glue in place.
20. Prepare all bead shapes by bending back on all
perforation lines.
21. Join the upper 'bead' shapes end to end
by overlapping the straight end edge over
the opposite tab perf line.
Also join the lower 'bead' shapes in similar manner.
22. Insert the tabs into the upper and lower
slots for one of the bead segments.
On the inside of the tower, bend the tabs away
from the 'bead' position, and glue in place.
23. Position and insert the tabs for the second
segment, and follow same procedure to 
attach tabs inside tower interior.
As subsequent segments are positioned,
NOTE that the left edge should overlap
the previous ends to form a miter seam line.
Apply a dab of glue under the miter overlap
to help them attach.
24. Continue positioning and attaching beads
all around, until the final seam remains.
Push the end tab under the adjacent segment,
while at the same time allowing miter end
overlap as described above here.
Glue in place.
25. Repeat the same process to position and
attach the bottom bead in place.
It may be helpful to use a flat tool such as
the spatula shown here, to help guide the
"dog ears" of the left segment miter tabs
under the corresponding edges of the first
segment attached.
26. Apply glue to the crenelation base ledge,
then position the hexagon cover over the opening . . .
. . . and push into place against the ledge
and apply finger or tool pressure around the edge
to ensure attachment.
 27. Apply glue to the crenelation base ledge,
then position the hexagon cover over the opening . . .
. . . and push into place against the ledge
and apply finger or tool pressure around the edge
to ensure attachment.
28. Prepare the bottom tower stabilizer hex
by bending the edge tabs upward.
29. Position the stabilizer into the bottom opening
of the tower bottom, and . . .
. . .insert until the hex and
tower edges line up as closely as possible.
Pinch the layered edges in place to secure adhesive.
30. Insert the base tray into the bottom of the tower . . .
. . . then attach decorative contrast brads as desired.
Use cover strips to hide brad prongs on the inside
as desired.
Here is the finished tower.
Castle tower chess box has a companion
Knight chess box design available, too.