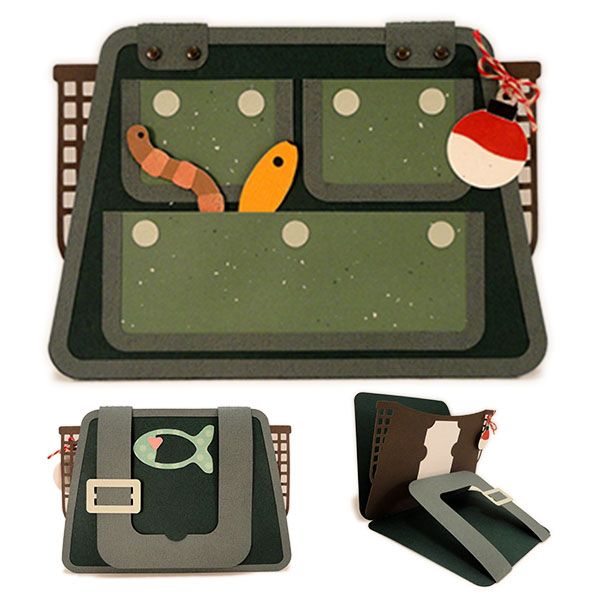
Replica canvas creel bag folds at the bottom,
with middle layer to hold gift card
(or substituted included plaque with
message)
that includes the end netting "pockets" of a real creel.
Three front pockets have edge trim like the front and back panels,
with punch
holes to position circle "buttons".
Strap with faux buckle accent attaches to
card front
with small brad fasteners, then wraps over the top
to a half-circle
cutout latch on the back, acting as closure.

ASSEMBLY:
1. Identify and cut the shapes:
A creel card base (frt & bck) with edge trim and back decor fishy/heart
B insert (represents end netting) with gift card tabs
C strap handle (card closure)
D buckle and separate strap for buckle
E lower and upper pockets with trim shapes
F pocket contents: bobber, lure, worm
G optional sentiment insert in place of card
H pocket button circles (6)

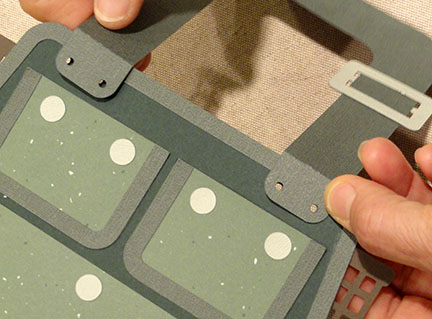
2. Prepare the main card shape by folding inner sides together at center bottom perforation line.
3. Attach front and back rim edge accent shapes, taking care to line up outer cut edges as exactly a possible.

4. Prepare the insert shape by folding the bottom tabs back on perforation lines.

5. Position the insert face side down against the backside of the card base front. Line up insert tab perf lines at the card base perf lines, and center side to side. Glue tabs in place to attach them to the backside of the card base back.
NOTE that the pointing finger is showing that the insert lower side shaped edges are slightly offset from the card base shaped edges.

To help the insert tabs attach properly, after the tabs have some initial "grab", fold the card base closed and apply pressure along the fold edge (where the tabs are attaching inside).

6. Prepare the large and small pockets by attaching the rim accent shapes at corresponding side/bottom edges. Also position and attach the buttons, centered over the positioning hole punches.

7. Prepare to attach the pockets to the card front by locating the tiny guide marks which will be used to position the upper side "corners" of each pocket.

8. Apply adhesive to the margin near the side and bottom edges only (backside) of the large pocket, then position with the highest point (corner) of the side edges lined up with the top of the two guidemarks for the large bottom pocket. Attach pocket, taking care that the bottom of pocket and card front trim edges remain evenly parallel to each other.
9. Repeat the prep, aligning and attaching process for the top two pockets, using the pairs of guide marks visibly on the card front.

10. Prepare the buckle accent shape by weaving the separate strip over the buckle prong. Insert the strip end from the backside on one end, toward the front, over the prong, then back downward to the backside of the buckle. Adjust so that the strip's end edges do now show beyond buckle edges, and so that the strip is centered in the openings.
Glue the end edges to the backside of the buckle ends.

Here is how the unit should look from the front.

11. Position and attach the buckle over the corresponding shaped edges of the strap handle face side.
12. Position the strap ends over the top front of the card assembly so that the hole punches align.

Attach (4) accent brads of your choice.


Attach (4) accent brads of your choice.
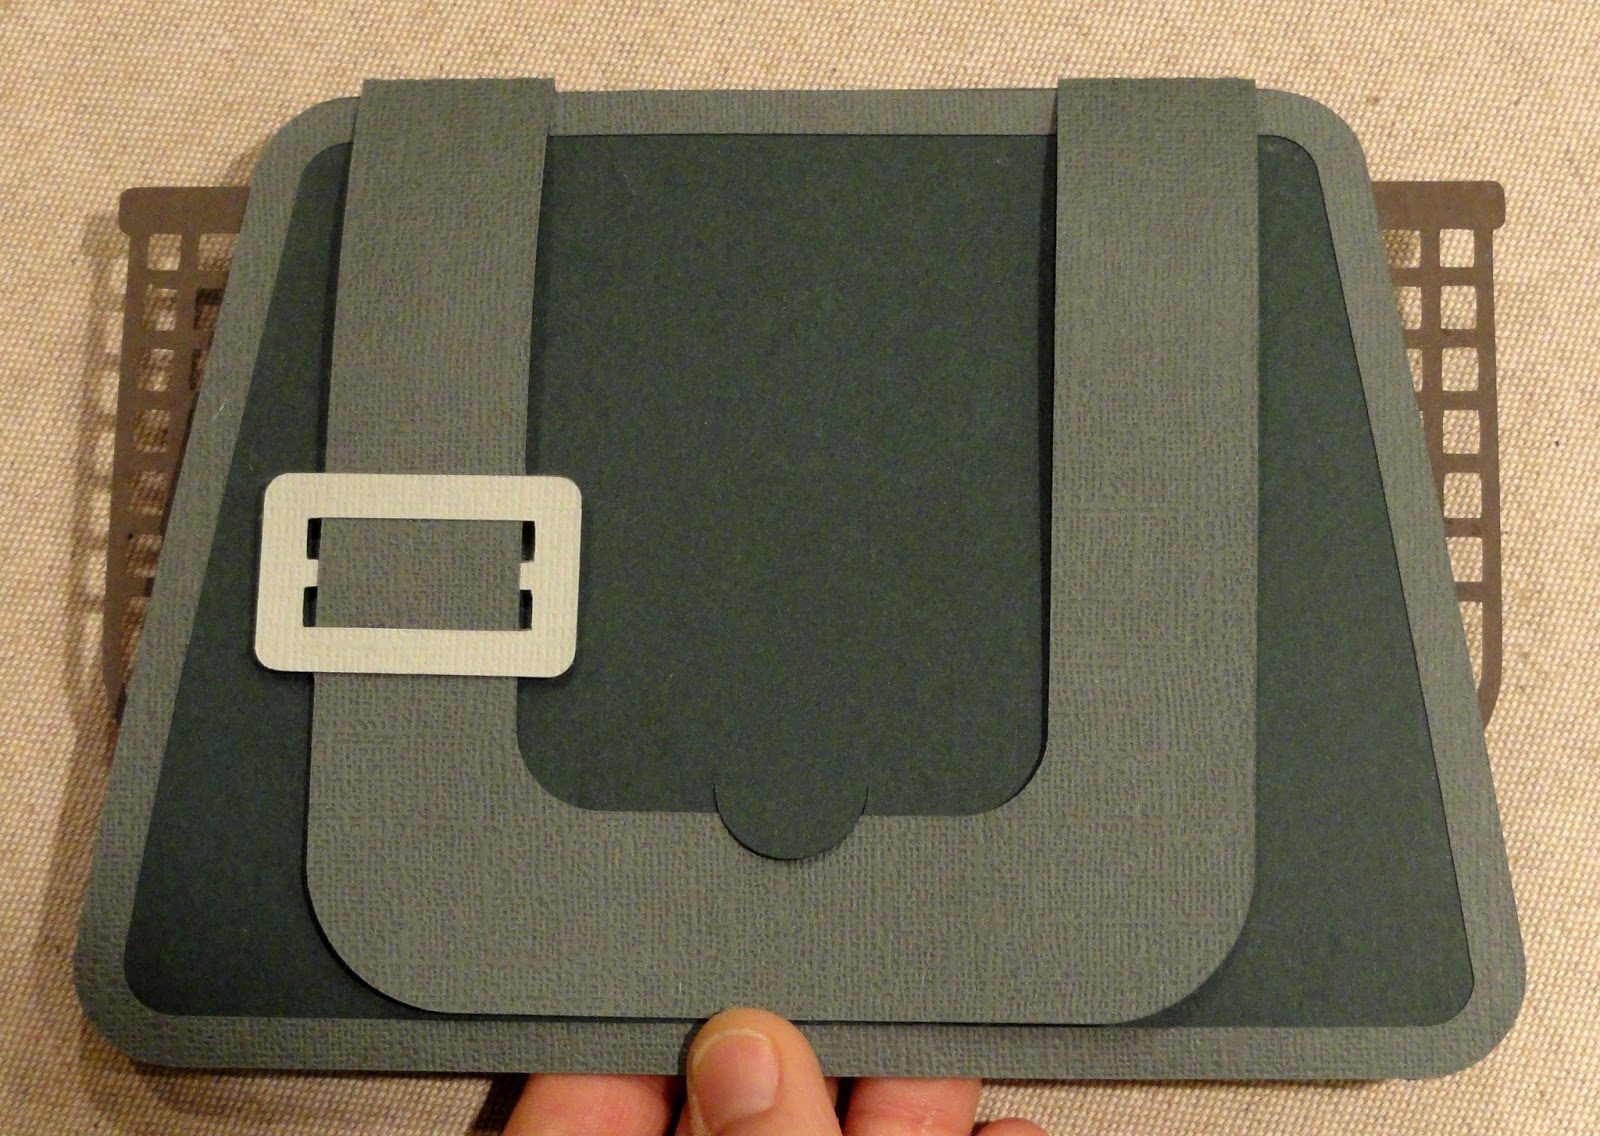
To close the card, the strap handle will fold over the top layers of the card front, insert and back, and be brought downward until the semi-circle latch cutout can "catch" the inner edge of the handle U arch, as shown.

13. Attach the tiny heart onto the fishy accent shape, then position and attach the fishy between the handle straps onto the card back.

14. Prepare the creel card for giving by inserting a gift card between the two semicircle holder tabs.
Alternately, use the message sentiment card in that position. (You can print message on paper or card, then cut and trim to size (use cut file shape as template), if preferred.
Here is the completed, closed creel bag card finished.
(Tuck the assembled worm, lure and bobber into pockets,
as shown. Or, tie the bobber top loop to the netting
with Trendy Twine.

Here's a view of the card's back to compare.

No comments:
Post a Comment