
With this very involved project,
it was "the angel" in the details! - and there are a lot of them!
Angel has articulated bead joint arms and
legs
and a head full of twine curls.
A back display bracket makes hanging display easy.
(She does NOT stand on her own!)
Measures approx. 18"
tall x 10" across wings.
Detailed clothing
top to bottom includes "corrugated" crown,
wrap collar, puff sleeves
with band rings, bodice overlays,
bell skirt in sections with attached
"underskirt" arches,
eyelet apron, flat bloomers,
boot overlays with lacing holes.
Accents include layered wings with
lacing holes,
heart and stick star swag, round and star paper buttons.
(Not a beginner project, but loads of
fun to create.)

ASSEMBLY:
1. Identify and cut the shapes for the body, head, legs, arms and sleeves:
A head shape B neck
C face with eye/brows contr underlay
D head back cover
E & F torso front and sides
G torso back H torso back covers
I torso bottom J leg connect tabs (2)
K upper arms (l & r)
L lower arms/hands (l & r)
M upper legs (l & r)
N lower legs (l & r)
N lower legs (l & r)
O boots left & right (2 ea.)
P bloomers (l & r) Q sleeves (l & r)
NOT SHOWN: updated scallop edge sleeve bands (2)

R dress front with underskirt strip
S front sides l & r with underskirt strips
T dress back with underskirt strip
U bodice front, sides, front star button
V collar
W pinafore front X pinafore ruffle
Y swag components (hearts & stars*)
Z wing base and front, l & r
AA America band, word cut, tiny star
BB crown
CC wings hanger* (with buttons at sides)
(*cut at least 3 each for sturdiness)
2. OTHER INGREDIENTS: to complete the Angel, you will also need: 36 yards of Trendy Twine Totally Kraft and spray starch (or equivalent twine, or doll hair specialty yarn, wool roving, etc.), narrow ribbon for joints, 24 small (1/4") beads for joints, 4 wood beads for swag, twine to attach buttons, perle cotton to lace boots and wings, optional "real" buttons for wings (two -1/2" red round) and collar star, ribbon for waist, two 4 inch sections of wood dowel to provide shape for the lower leg.

3. Prepare the head shape by folding back slightly on all the perforations lines.
Identify the back with finger hole cutout, the head base with neck hole cutout, and the front with the largest rectangular panel.

4. Build the head front into shape by forming the various "darts": fold or bend to bring the straight edge to overlap its adjacent wedge tab's perforation line, and glue in place.
Begin near the face base as shown here. . .

. . . then move up the side of the head front to continue completing darts . . .

. . . toward the top of the head.
Complete the darts on both sides and also note that some of the darts have two edges to align and join to their associated dart perforation lines.

5. Prepare the neck by folding back slightly on the vertical perforation lines, and folding top edge (narrow end) and bottom edge tabs outward slightly.

6. Form the neck into a tube to bring the vertical straight edge to overlap the opposite tab's perforation line, adjust to line up the bottom edges of tall (unbent) neck back panel and the adjacent bottom tab.
Glue in place.
It may be helpful to insert a "press-against" surface such as a flat-edge pencil to help glue the seam into place.

7. Insert the top of the neck into the head's neck hole, with the back of neck oriented to the back of the head hole. Push the neck inward ONLY until the tiny top tab perf lines reach the neck opening edge.

8. Fold the tabs (but not the back tab) outward and glue in place. Make sure that the neck upper perforations line up as exactly as possible at the neck opening edge so the Angel will hold her head in the appropriate posture.
Apply pressure and hold until secure (with this gluing step and throughout).

9. Apply glue to the tab face surfaces. Fold the head back panel tabs inward, and "close" the head into position . . .

with the tabs inserted inside of head side/top edges. Use the finger hole to reach inside with finger tip to help join each of the tabs to the inside surfaces of the head sides until all are secure.
NOTE: it may help the shape to attach top center tab first, then work around each side to adjust and glue in place.

10. Position and glue the back hole cover in place.

11. Prepare the face panel by bending back slightly on the upper and lower perf lines.
Distress edges and add a pinky-tip smudge of blush or chalk paint for cheeks.
Also bend back the perf line on the eye/brow contrast liner. Glue the liner behind the eyes/brows with perf lines aligned, liner offset inside face edges.

12. Position and attach face panel, centered, on the front of the head.


13. Prepare the torso front and sides by bending slightly at the waist perforation lines (back for front, outward for sides), and folding side tabs back.
14. Line up and join the lower front's straight edges to the corresponding tab perforation lines, then align and join the upper edge and tab. Complete for both left and right.

15. Complete the torso top assembly by folding the top of the sides panel inward, folding the top of the front panel back to overlap it, . . .

line up the neck hole edges that should match, and glue the layers together.
Also fold the top panel's back tabs downward at the back.

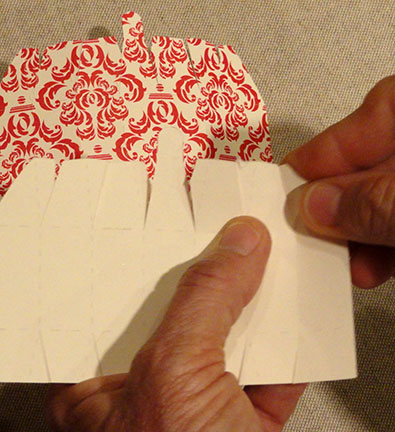
16. Prepare the torso bottom panel by folding the tabs inward at a perpendicular angle (NOTE that the card stock paper being used for this sample is polka dot to match the "bloomers".
17. Prepare the leg attachment tabs by folding each half-circle tab back to perpendicular. Apply glue to the narrow panel (underside) between the half-circle tabs, then insert each tab shape into a slot pair, push in fully, and apply pressure to join to the bottom panel.

18. Position the bottom panel assembly inside at the base of the torso assembly (wide end is body front). Apply glue to the tabs area, then line up and join torso tabs to bottom panel tabs.

19. Twist the neck into the neck opening at the torso top, then adjust the neck upward until the bottom neck tab perforation lines seat exactly at the neck opening edges

* * * THIS IS IMPORTANT * * *
Make sure that tab perf lines are as exactly as possible at the neck opening edge to ensure that the angel's head will be upright and not tipped forward.

20. Bend the neck tabs outward (back neck tab DOES NOT bend) and glue in place on the inside of torso.

21. Prepare the joint tunnel tube by folding back on all long perforations, also folding end tabs out slightly.
(NOTE that it may be best to leave at least one end tabs unbent to assist the threading into the torso opening in the next steps.)
Overlap the straight long edge to the opposite tab perforation line, and glue in place.
NOTE it may be helpful to insert a narrow rod tool such as a knitting needle or skewer into the tube to provide a "press-against" surface to help join the seam.

22. Insert the tunnel tube through the "shoulder" square opening on one side of the torso, through the torso cavity . . .

. . . and out through the opposite opening.

Bend the end tabs (both ends) back and glue in place on the outside of the torso assembly.
(FYI, the arm-connecting ribbon for the beads joint of the shoulder will pass through the tunnel.)

23. Position and attach the torso back panel over the back cavity, lining up straight edges to tab perforation lines on sides and top; bottom tab straight edges should be even.

24. Position and attach the upper and lower back opening covers.

25. Prepare the upper arms by folding on the long side and tab perforations, also folding along the partial perforation lines to help give the arms some dimension and allow for insertion of bead joints.
Fold into a "tube" to overlap the side straight edge to the tab perforation line, and glue in place.
26. Prepare the lower arms/hands in similar fashion.

Complete this "elbow" joint by threading narrow ribbon (model here uses silk ribbon) onto a darning (blunt end) needle, threading through first bead, through hand then upper arm holes, through a bead inserted inside the arm sections, then out through upper and hand holes, then through third bead on the other side.
Complete the "circuit" by passing the needle back through the first arm layers, middle bead, and second arm layers (bypass side beads this time).

Tie the ribbon ends into a square knot and trim with 1/4" tails.
Here you can see the completed arm unit with elbow triple-bead and ribbon joint.
REVIEW: the ribbon passes once through side beads (so they won't pull off the ribbon joint) but twice through the center bead and all arm openings.

28. Prepare the upper legs in a similar fashion to upper arm, folding, creasing, forming a tube and gluing side tab.

29. Prepare the lower leg in similar fashion to fold and bend center, tab and partial perforation lines.
30. Locate and arrange the left and right boots (one will include the attached bottom flange and tab).

31. NOTE: the leg/foot includes a partial bottom edge shape to assist with boot alignment. To eliminate "show-thru" between boot layers, the toe portion of the boot will be trimmed away, once the boot is positioned and attached.
Apply glue to the leg portion to heel only of each boot shape. Attach in place on the leg section, taking care to line up the lacing holes, and the edges that should match. Before the glue is dry . . .

. . . use scissors to trim away the toes extension of the leg section as shown.
Re-apply pressure to attach the remaining leg edge to the backside of the boot.
Complete both boots.

32. Fold the boot into a tube shape, join front edge to tab.

Also fold the bottom flange into position and tuck the tab under the bottom of the boot edge and glue in place. (Insert a narrow rod tool to assist with this seam).

33. To help provide some shape and ballast for the lower leg/boot, cut 4" lengths of dowel (diameter slightly larger than standard school pencil, or 5/16") and insert into the top of the boot. Push inside so that the top of dowel clears the joint tab.

34. Thread a darning needle (blunt end) with no.5 perle cotton (or equivalent such as baker's twine).
Lace down the boot holes . . .

. . . then back up to the top . . .

. . . then tie in knot and bow at top. Trim ends to approx. 1 to 1.5 inches long. Secure ties with a dab of clear glue.

35. Refer to step 27 to insert upper leg end into top of boot and prepare triple bead and ribbon knee joint.

36. Prepare the bloomers shape by folding back on all perforations. Form the shape into a "tube" to bring the straight side edge into position to overlap the tab opposite. Align the edge at the tab perf line and glue in place.

37. Slide a bloomer leg over the top of a leg assembly until top joint holes line up (bloomers seam toward the back). Glue-tack in place at top near holes, if necessary.

38. Complete the triple bead and ribbon joint. Insert the top of the leg between the tabs at the torso bottom panel, then refer to step 27 to position beads, thread ribbon through and back, tie off.
Complete both leg attachments.

This is how the legs should appear at this point of the assembly.

39. Prepare the America band by bending back slightly on band perforation lines.
Attach the word cutout and the tiny star over the "i". Bend the word cutout to match the band perforation bend.

40. Prepare the skirt front by folding/bending back slightly on vertical perforation lines.
41. Position the America band at the hem edge with punch holes lined up (band may be slightly longer than the space between holes). Glue ends in place, and/or attach with small grommets or brads.

42. Prepare side skirt panels by folding/bending on perforation lines.
43. Attach left and right skirt sections (front edge is marked by a small circle symbol cutout) by inserting tab under front skirt straight edge, adjusting to align top and bottom edges.
44. Join back skirt to one side section back tab. Skirt should be one unit at this point in assembly.

46. The underskirt will be inserted under the skirt hem edges, with the skirt edge aligned at the intermittent dash mark positions, as is indicated by the pointing finger at right. Dash marks are on front and back skirt sections only, assuming the side underskirt sections will be lined up to match these during assembly. Position and attach front and back underskirt sections, then position, adjust and attach side sections (sides have triangle symbol cutouts at front ends).

47. Position and attach the bodice shape over front of torso assembly. Position and attach the side bodice shapes also, bending the top shoulder portion back to attach in corresponding position, and taking care to line up tunnel openings.

48. Position and attach front skirt waist edge to torso by abutting under the bodice edge.
NOTE: the top of skirt is not a tab arrangement, meaning that the narrow margin at top of skirt that is being attached to the torso will not exactly lay flat against the torso.
49. Wrap the sides and back skirt around torso and attach in place. Complete the final skirt side and back seam.

50. Prepare the pinafore skirt by folding the pleat perforation lines as alternating "mountain" and "valley" folds from center toward sides. Also fold the perforation partial line near the side edges back slightly.
Apply glue (1/2" down from top or so) between pleats on front and back to secure pleating.

51. Center and attach pinafore skirt at the top of the skirt front, bending side perforations back to wrap around slightly to torso sides.

52. Pleat the pinafore ruffle strip in similar fashion to skirt in step 50, and glue with dot near bottom edges front and back to secure.
Position at top of pinafore skirt, overlapping slightly, and glue in place.

53. Attach the arms to the shoulders of the torso assembly by threading a long enough length of ribbon through a double bead joint at top of one arm (thumbs of hands should be forward as arms hang at doll sides), through the tunnel, out and through the second arm triple bead joint.
Complete the circuit back (refer to step 27), skipping the outer bead, back through arm layers and middle bead and arm layers, back through tunnel, through arm layers and middle bead and arm layers.
Complete the circuit back (refer to step 27), skipping the outer bead, back through arm layers and middle bead and arm layers, back through tunnel, through arm layers and middle bead and arm layers.

Tie square knot, trim ribbon ends as done with previous joint assembly.
54. Prepare each sleeve by folding back slightly on all perforations, including the wedge "dart" tabs.
(The model paper's pattern camouflages the perforation lines, so I have turned my shape to the backside to show the dart lines.)

55. Form pleats across the top of the sleeve by overlapping the straight edge to the adjacent perforation line, and gluing in place.
Complete the 6 pleats at the top of the sleeve, then . . .

. . . work along the bottom to complete the 6 pleats.

56. Form the sleeve into a tube to bring the straight back side edge to overlap the opposite tab and align at the perf line. Glue the edge in place.
Complete two sleeves.

57. To attach the sleeve, first insert the arm through the sleeve tube, slide it up the arm completedly . . .

. . . until the shoulder front, top and back edges of torso assembly are inside the sleeve. Position the top sleeve tab with perf line at the top shoulder edge, center front to back, and glue in place.
Repeat for opposite sleeve and arm.

58. Prepare the sleeve band by adding curl to the strip, folding end tab back. Form a ring and glue the straight end over the opposite tab.
(NOTE: the paper for the model is actually a printed scallop. The band cut shape includes scallops and small tear drop cutouts.)
Slide the sleeve band over the arm, up to the bottom of the sleeve . . .

. . . until it touches the sleeve. Apply a bead of viscose adhesive (such as Fabri-Tac) just under the band upper edge, then hold in place (for as long as is required) until it is secure.
Repeat for both sleeve bands.

You may wish to also add a dab of viscose glue to secure the back edge of the sleeve to the back torso.

59. Bend collar inward at perforation lines. Add some curl to the collar, then . . .

. . . wrap collar around angel neck, center, glue in place at back. When back glue is secure, overlap front collar tips and glue in place with minimal glue.

60. Prepare the star button by cutting 4 or more duplicate shapes and gluing into a stack (or use a purchased star button of equivalent size).
(NOTE: for the model, I used the star cutout as a template to cut a star button from oven-bake poly clay.)
Thread perle cotton or twine through holes (I used double perle cotton), tie knot and bow.
Use quick-grab glue (Fabric-Tac or hot glue) to attach in place under collar.

61. Prepare twine curls for wig. Attach twine end with masking tape strip near end of rod (this tutorial will use a double tip knitting needle).

62. Snugly wrap the twine around the rod tool, and slide wraps close together.

62. Snugly wrap the twine around the rod tool, and slide wraps close together.

Continue wrapping coils around the tool until . . .

. . . the tool is filled. Clip and attach twine end to tool to secure.
(FYI my needle allows for approx. 9" of wrapping, using about 4 yards of twine per "hank", for a total of about 36 yards for the Angel's wig.)

63. Spray the coiled twine to saturdate thoroughly with liquid spray starch.
Allow the twine to dry thoroughly (2-3 hours in my dry climate).

This is the product that I used.

64. When dry, undo the tape end anchors and slide the curled twine off the rod.
NOTE: avoid pulling the curls straight so that the twine retains its full curliness.
Complete the wrapping, spraying process to produce 9-10 lengths.

65. Bring the ends of one "coil" together to fold the length in half, then . . .
 . . . bring the ends together with the opposite loop and center ends/loop in a "hank" that measures approx. 4 inches on each side (8" total).

(This sizing is based on my knitting needle length and the coil it produced, as a guideline for your own creation.)

66. Prepare the back portion of the "wig". Use two hanks, fold in half with ringlets hanging down the back of the head. Attach with viscose glue near the crown of the head. Apply additional glue down the back of the head as deemed necessary.

67. Prepare the main wig section by bunching 6 lengths side by side, aligning and "flattening" or smoothing the middle. Stitch across the center with short sewing machine stitching and matched thread (2-3 passes) or glue together to a narrow strip of paper underneath.

68. Position the center of the wig on top of the head, adjust forward as desired, then glue in place under center "seam". Continue to adjust/arrange and glue in place down head sides as deemed necessary.

Pull the back hanks of the main wig section around to the back of the head to overlap and blend into the back hair attached in step 66.
Add more glue as needed to keep the arrangement you achieve, but take care that glue does not show.

69. Prepare the "bun" hair by coiling a 1 or 2 remaining hanks into a bun. Tuck any cut ends underneath to hide.

Position the bun toward the back top of the head, and use generous amount of glue underneath to securely hold the arrangement you have achieved.

70. Prepare the crown by folding in fan fashion alternating mountain and valley folds, (center front fold is "mountain" fold).

71. Dry fit to test how the crown will look in front of the hair bun, and get an idea about your selected location Then apply glue to the underneath curved edge of the crown, re-position, and hold in place until secure.

72. Wrap a length of ribbon (optional) around torso waist, tie in knot and bow, trim and arrange ends, and glue in place.

73. Layer and glue together the left and right wing and inner wing (backsides together). Make sure the lacing holes line up.
NOTE: I wanted to use a piece of printed canvas that I have had in my paper craft collection for a while (from a great closeout), so I cut one inner wing template, and used a sharp darner needle when lacing through the pilot holes in the outer wing.

74. Thread a 24" length of black (contrast)
no. 5 perle cotton or equivalent onto a darner needle.
Start at top or bottom lacing hole, insert needle back to front, leaving a short tail.

75. Use one of the small circles provided in the cut file to glue the tail in place and hide it at the same time, for a clean aesthetic finish on the wings back (trim the tail so it doesn't peek out from behind circle).

76. Stitch up and down between the holes - the long space is intended to be the stitch that shows on the wing front, and the short space will show on the wing back.

Continue the stitching all around the wing edge.

When you get to the last lacing hole (not the button attachment holes near the center of the straight short wing edge) the stitch should be exiting toward the wing back.
Trim a short tail and cover with a glued-on circle as was done at the beginning of the stitching.
Repeat for the other wing.

77. Place the two wings face down with "center" straight edges aligned and touching.
Note where the button attachment holes are.
Prepare the hanger by layering and gluing together 3-4 identical shapes to create one very sturdy hanger shape.
Layer the hanger over the top of the wings, line up the buttonholes of all shapes, and thread twine or perle cotton through the buttons (either paper layered with multiple circles and rings or purchased) and the wings to attach all together.

Add glue between the button-joined hanger and wings to further secure the assembly.

78. Position wings assembly on the back of the angel with the hang hole approx. half way up the back of the head as shown, and with a generous amount of viscose glue or hot glue, attach wings to back of torso.

no. 5 perle cotton or equivalent onto a darner needle.
Start at top or bottom lacing hole, insert needle back to front, leaving a short tail.

75. Use one of the small circles provided in the cut file to glue the tail in place and hide it at the same time, for a clean aesthetic finish on the wings back (trim the tail so it doesn't peek out from behind circle).

76. Stitch up and down between the holes - the long space is intended to be the stitch that shows on the wing front, and the short space will show on the wing back.

Continue the stitching all around the wing edge.

When you get to the last lacing hole (not the button attachment holes near the center of the straight short wing edge) the stitch should be exiting toward the wing back.
Trim a short tail and cover with a glued-on circle as was done at the beginning of the stitching.
Repeat for the other wing.

77. Place the two wings face down with "center" straight edges aligned and touching.
Note where the button attachment holes are.
Prepare the hanger by layering and gluing together 3-4 identical shapes to create one very sturdy hanger shape.
Layer the hanger over the top of the wings, line up the buttonholes of all shapes, and thread twine or perle cotton through the buttons (either paper layered with multiple circles and rings or purchased) and the wings to attach all together.
Add glue between the button-joined hanger and wings to further secure the assembly.

78. Position wings assembly on the back of the angel with the hang hole approx. half way up the back of the head as shown, and with a generous amount of viscose glue or hot glue, attach wings to back of torso.
And voila! After only 78 steps, she's complete.
(Sorry about the length of this tutorial.
Hope the thorough instructions were helpful.)

She's beautiful - love all of your creations.
ReplyDeletebonjour,
ReplyDeleteINCROYABLE TOUT SIMPLEMENT INCROYABLE !MAGNIFIQUE COMME
D 'HABITUDE BRAVO MERCI !!!!!!!!!!!!!!!!!!!
wow! This is just AMAZING! Love it.
ReplyDeleteHi I've just bought your template, I'm looking forward to making the doll. Please could you tell me what weight card to use?
ReplyDeleteI used what cuts well on the Silhouette Cameo settings as "textured cardstock. Not sure I know otherwise how to designate this cardstock. Equivalent to Bazzill. Probably what you think would hold up well after your finished doll is stored.
DeleteThank you .
DeleteHello. I love all your wonderful creations but unfortunately they are not comparable with my Cricut Design Studio. this is the forth one I have bought from SVGAttic and have not been able to use. My daughter has re bought two for me (she has a Silhouette) and I have enlarged them. I have asked for your help but have never received a reply. Now I have the Tree Stack Box and this Liberty angel figure that I can not use. I would love to make this into a Christmas angel but trying to guess how much larger to make it is impossible without knowing how much to enlarge it. Maybe this is something you can do for us Cricut owners in the future. We like to make your beautiful creations too but will have to shop else where. Thank you, Debbie Potz
ReplyDelete