
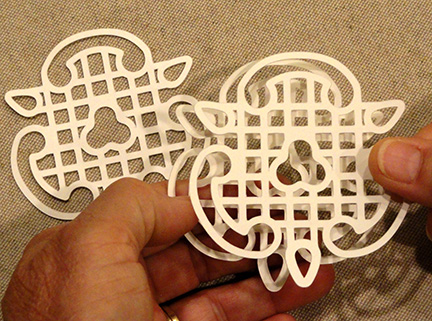
Twelve facets create this "round"
container
which is composed of base (approx. 1.5" tall)
with reinforced
construction,
and .5" thick pancake-style dimensional lid
(approx,
4.25" across) that fits to base
with a flange extension.
Lid is accented
with icing-styled overlay
and window cutout.
Use as storage for potpourri or
small items
such as cotton swabs, safety pins, paper clips,
jewelry and more.
ASSEMBLY: 1. Identify and cut the shapes:
A lid base main shape
B lid overlay build up layers (2)
C lid top accent layer
D contrast "show-thru" layer for accent layer
E icing shapes build up (3)
F lid rim ring
G lid under-lid and interior contour
H base walls shape (2)
I base rim interior gauge markers (6)
J base interior shape, bottom cover
K base interior reinforcement ring


 4. Position and attach the build up shapes on top
of the lid shape, matching up the cut edges
and window cut outs.


 8. Position and attach the top accent layer
assembly over the center of the lid
(lid build up reinforcement layers).


 13. Prepare the under-rim and interior contour shape
by bending back the interior tabs, and the tab ends
forward.


 15. Bend the contour tabs into position with
the narrow end tabs prepared to attach to
lid main shape underside, tip edge pushed
into position to align at the positioning cut line
identified.

 . . . re-position to glue in place.
NOTE it may be helpful to use a spatula or other
blade-style tool to gently push wall back until
tab tip is in proper position.


 17. Fold flange in half and glue each tab to
the connected wall segment.
 18. Bend the flange section into a curve, then
position inside the lid contour edge, align each
segment with a segment of the interior wall,
and glue in place.


 21. Position the base rim interior gauge markers
within perforation lines that define
alternate wall segments on the wall shape
backside with the bottom edge at the lower
tab perforation. NOTE: make sure that
the bottom edge tab can still bend to perpendicular
without interference.


 Bend the final flange into position and glue
tip tab.


25. Temporarily bend the base bottom tabs
outward, then . . .


 Complete the gluing of bottom tabs by
placing the box bottom-down and
reaching finger(s) into box base to apply fingertip
pressure along the edge until bottom is
securely attached all around.


A lid base main shape
B lid overlay build up layers (2)
C lid top accent layer
D contrast "show-thru" layer for accent layer
E icing shapes build up (3)
F lid rim ring
G lid under-lid and interior contour
H base walls shape (2)
I base rim interior gauge markers (6)
J base interior shape, bottom cover
K base interior reinforcement ring

2. Prepare the lid main shape by bending back
on all perforation lines, including . . .

. . . the tiny wedge tab at wall segment extension
as shown here, and . . .

. . . between the wall segments.
(The outer segment is folded back here which
makes it easier to access for bending the
wedge tab back.)

3. Layer and glue together the two lid build up
shapes . . .

. . . and, if possible, use a weight to flatten and reduce
warping or curling (here and
throughout where applicable), such as
the fabric-covered re-purposed bar weight
shown here, flattening the icing shapes build up
that are directed in step 8.

of the lid shape, matching up the cut edges
and window cut outs.

5. Position and attach the contrast underlay shape
underneath the lid top accent shape . . .

. . . noting that the tallest, roundest mound
of the underlay is positioned underneath
the trio of punch circles.

6. Position and attach the icing build up shapes
into a stack, taking care that all edges
align as precisely as possible.
7. Position and attach the icing build up shape
over the lid round accent, taking care to align
the inner window cut edges that should match up.

assembly over the center of the lid
(lid build up reinforcement layers).

9. Begin to form the lid rolled walls by bending
the farthest out segment extension into position
with the long inward tab tucked under the straight
edge of the lid edge . . .

. . . with the wedge tab under
the adjacent edge.

10. Add a dab of glue to the wedge tab at the end
of the first wall extension segment,
and to the extending tab, then . . .

. . . bend the lead edge of the next wall segment
down into position . . .

. . . to attach to wedge tab,
and beyond that, the lower portion of the wall
over the regular tab extension, and glue in place.
11. Continue around the lid to repeat the process
for each two-part wall segment until all are
attached to the adjacent wedge tab, or wedge
and regular side tab.

12. Bend the under-rim tabs inward to prepare
the multi-facet face to which the rim ring
is positioned and attached.

NOTE it may be helpful to position and attach
one edge first, then position and attach
the edge directly across the lid, then
work around each half to adjust, align
and attach edge tabs to ring underside.
Reach fingers under the ring and tab
to apply pressure to attach the layers together.

by bending back the interior tabs, and the tab ends
forward.

14. Position the under-rim shape over
the backside of the lid assembly, align
the outer cut edges . . .

. . . and reaching under the tabs and rim layer
as for previous rim ring to attach all around lid.

the narrow end tabs prepared to attach to
lid main shape underside, tip edge pushed
into position to align at the positioning cut line
identified.

Add a dab of glue under the tip tab, then . . .

NOTE it may be helpful to use a spatula or other
blade-style tool to gently push wall back until
tab tip is in proper position.

If the edges of the two rim shapes extend
beyond the lid wall edges, use scissors
to trim overhang even.

16. Prepare the lid flange shapes by bending back
along the middle perforation line, also bending forward
on the perf lines between the segments.

the connected wall segment.

position inside the lid contour edge, align each
segment with a segment of the interior wall,
and glue in place.

19. Prepare the base wall shapes by bending
back on all perforation lines, except bend the top
narrow tabs forward.

NOTE that the wedge extension between the wall segments
SHOULD NOT be bent at all.
(The cut line on the wedge extension is an
overlapping edge extension line.)

20. Align and overlap the two wall shapes
to complete the center side seam.

within perforation lines that define
alternate wall segments on the wall shape
backside with the bottom edge at the lower
tab perforation. NOTE: make sure that
the bottom edge tab can still bend to perpendicular
without interference.

22. Use a straight edge to trace a line all along
the top edge of the gauge markers.

23. SKIP the first segment (without side seam tab)
which will be finished after second side seam is completed.
Add glue to the underside of tip tabs, then . . .

. . . bend the rim/flange back so that the tip tab
aligns either at the cut edge of gauge marker
or to the traced line, and glue in place.

Carefully add a tiny dab of glue on the wedge
extensions beyond the guide line . . .

. . . then form the base wall assembly into its
ring form while at the same time making sure
that the wedge extensions tuck under
adjacent rim straight edge . . .

. . . to align straight side edge over the opposite
tab and glue in place.

tip tab.

24. Prepare the interior reinforcement ring shape
by bending back outer edge tabs.

25. Temporarily bend the base bottom tabs
outward, then . . .

. . . insert the top face edge of rim into
the base assembly . . .

. . . and slide upward to rest along the top flange
tip tab edges.

26. Insert the base bottom shape into position
within the wall bottom tabs, then . . .

. . . bend edge tabs over bottom shape
to glue into place.

placing the box bottom-down and
reaching finger(s) into box base to apply fingertip
pressure along the edge until bottom is
securely attached all around.

27. Position and attach the bottom cover
to conceal the attachment tabs.

28. Place the lid into position on the base
by inserting the flange extensions inside
the base rim.

Here is the completed box with lid in place.


No comments:
Post a Comment