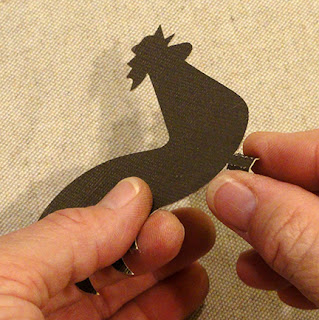
Create a fun cake, potted plant pick for
farmyard-themed events or decor.
Three rooster body shape variation are stacked
and glued together to give dimension.
A skewer pick ( 3/32" diam.) provides
the "post" structure,
with the pointed end inserted into a pointed
channel
within the interior body build up shapes.
Rooster body main shapes have
bottom post-wrap stems
to help secure in place with strong glue.
Arrow whole and partial shapes are built up
to allow "wrap around" attachment at bottom of stem.
If desired, add
the 1/2" painted wooden bead below vane.
Sized to coordinated with
"Barn 3D Model" design.
(Find that tutorial by following this LINK.)
1. Identify and cut the shapes for Rooster Weather Vane:
A main body build up (with point recess; 4 each left & right)
B main body with bottom stem (1 each left & right)
C body front (1 each left & right)
D wings build up (5 each left & right)
E arrow whole (1 each left & right)
F arrow sections for build up (2 sets each left & right)
bamboo or wooden skewer 3/32" diameter
and 1/2" wood bead with hole to accept skewer
2. Prepare the build-up body layers (with wedge
cutout at bottom center) by layering the four
left-facing and four right-facing shapes and gluing
together, taking care to align all edges as PRECISELY
as possible.
When layering the shapes and gluing together,
throughout this assembly process,
especially with liquid glue which is recommended,
it will be essential to use a flat weight such as
the muslin-covered re-purposed free weight bar
shown here laid on top of the shape until the stack
is thoroughly dry and no longer cool to the touch.
(This may require a few hours to cure.)
3. Position the two stacks back to back
and glue together. Press with weight until dry.
4. Preview and check to make sure there are enough
built-up layers to match the skewer thickness
by inserting the skewer pointed tip
into the cutout recess . . .
. . . into the bottom of the built-up thickness.
If the thickness of skewer and body do not
match, add one or more layers as needed
to create the matched thickness.
5. Prepare the body main shapes with stem layers
(left and right) by bending back the tiny tabs at stem sides.
6. Assemble the left and right body top layer assemblies
by positioning and attaching the corresponding
body fronts layer over main stem layers,
with edges as precisely aligned as possible.
and glue in place. Press with weight until dry.
7. Position, align and attach (and press) the front
body assembly layers over the body build up.
8. Prepare a left and right wing stack by layering
and gluing the four left and four right wings.
9. Position and attach the wings in place
on each side of the body using cut markings
on front body to assist with positioning.
10. Add a slight bit of "curl" to the center
of whole arrow shapes between guide marks.
11. Layer the pairs of point and fletching end shapes
into stacks.
12. Position and attach a fletching end stack over
corresponding backside portion of whole arrow, and also
position and attach point stack.
Repeat for second whole arrow unit.
13. Assemble the pick:
A) cut stick to desired length
(for Barn 3D model, this length will be around 11"
but should be tested and trimmed as needed
once assembled and inserted).
B) insert the pointed end of skewer into
rooster shape bottom and glue in place securely.
C) Bend the stem side tabs of both front and back
into place to wrap around skewer . . .
. . . and glue tabs to skewer.
D) Position center of first arrow unit below stem,
with cut guide marks on each side of skewer post,
then . . .
. . . turn the assembly over to position the second arrow
unit over the previously-attached arrow,
matching all cut edges.
E) Slide the painted bead up the skewer
to touch arrow, and glue in place.
Here is the completed rooster weather vane design
shown with shorter skewer post.
For use with the barn model, insert
Rooster Weather Vane accent post "stick"
through opening in loft roof, through
the roof support panel (look through door openings
to "fish" the end around until it inserts through hole)
then seat end into the round depression
in the hull bottom reinforcement panel center.
(Glue in place if possible.)


No comments:
Post a Comment