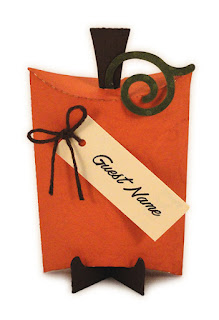
A
single side seam and bend-in oval ends
make this petite favor box quick to cut
and build.
Stem and vine swirl inserted at top slot suggest
a harvest pumpkin.
Glue bottom closed and place it on
the X-arms tiny stand for an upright harvest
table favor.
(With cut strip and printed guest name, punched
for twine bow,
etc., it can double as place card
for Thanksgiving dinner setting.)
Box with stem measures approx.
2.375” wide
x 4” tall x .8” deep when assembled and closed.
ASSEMBLY: 1. Identify and cut the shapes:
A pillow box hull main shape
B fold-over stem with end tabs
C vine swirl (single layer) with end tab
D stand strip
2. Prepare the hull shape by bending back on end flange
and center long perforation lines, then . . .
carefully creasing along the curve perforation lines,
taking special care at ends so that perf cuts don't
tear out.
3. Prepare the stem shape. For this project,
the fold-over (doubled) stem is demonstrated:
bend back at top center perforation, then bend
end tabs forward.
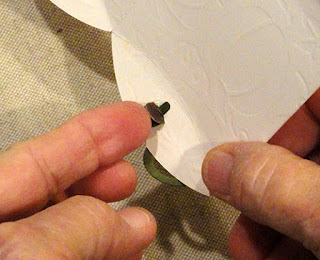
4. Insert the stem tab(s) through top oval panel slot . . .
. . . then bend vine swirl end tab forward,
position it in front of the stem and insert end tab
through slot as well.
On the backside of panel, bend the vine tab back
and glue in place to backside of oval panel. Then . . .
. . . also bend stem tabs back to attach to panel
in similar manner. Allow to dry.
5. Form the assembly into a "tube" to bring side
straight edge to align over fold of bent-inward flange,
adjust for top-to-bottom alignment, and glue seam.
NOTE that the box shape can be flattened on
work surface to allow fingertip pressure to be
applied along seam to secure it.
6. At box bottom, bend the inward oval panel
(connected to the back panel along with the top
unnotched oval panel) into position as the box is shaped
by slightly "squashing" sides inward.
Bend the second bottom oval panel into position . . .
. . . then add quick-grab adhesive to top face of
first oval panel (between the oval panels),
then press together to attach oval panels together.
Hold until thoroughly dried.
7. To close the box, bend the top oval panels
inward in similar fashion, unnotched oval first . . .
. . . followed by notched and stem-containing oval.
8. NOTE that the stand is colored dark brown
in the final project, after these images were shot.
Prepare the stand strip by bending short perf
lines forward (valley folds) and long perfs between
knobs back (mountain folds) in a sort of accordion sytle.
9. Apply glue to one side only of the pairs of
segments that fall on each side of a knob pair,
then press those two segments back to back
to form the stand's legs.
Repeat for two more "legs".
10. The final "leg" of stand is formed with the two
end segments - apply glue to backside of one,
then press together.
Here is the completed, four-legged stand.
11. To stand the pillow box pumpkin on table top,
the bottom of box is positioned side to side across
the stand's center 'X' formation.
Here is the completed pumpkin on
its stand.
12. Although a name tag shape IS NOT
included in the cut file, you can easily prepare
guest name tags by typing and printing names
within a word text program, trimming to desired
rectangular size, then punching a hole at end.
Tie twine accent, OR tie tag around stem.


No comments:
Post a Comment