Build and assemble three different size
rectangle boxes
(each composed of lid and base),
add accent "stripe"
or panel rounded rectangles (plus star)
on the front faces, then stack into
flag form.
Cubic posts with .25" wooden dowel inserts cut to size
can be
used to insert through the stack strata
to add strength and stability,
assisting glue between box surfaces.
For version without posts, extra LID
designs are included
without the pole insertion openings.
Measures approx. 7.5"
wide x 6.125" tall x 1.5" deep.
ASSEMBLY: 1. Identify and cut the pieces.
A star box LID and BASE, accent panel and star
B interior support strut C top conceal panel
D optional support/connection posts
E short right side box LIDs and BASEs (2 ea.)
F short interior strut supports G top conceal panel (1)
H long bottom box LIDs and BASEs (2 ea.)
I interior strut supports (4) J bottom conceal panel

2. Prepare each of the stripe and panel boxes
in the same fashion, as will be demonstrated using
one of the long, bottom stripe boxes.
Prepare the shape by bending back on all
panel edge perforation lines and tabs.
Prepare LIDs and BASEs in the same way.

3. Identify the BASE of each different length or size
box set by locating the symbol "cut out" on the edge
of a side tab (half circle, double half circle or V notch).
The BASE will fit inside the LID to complete each box.

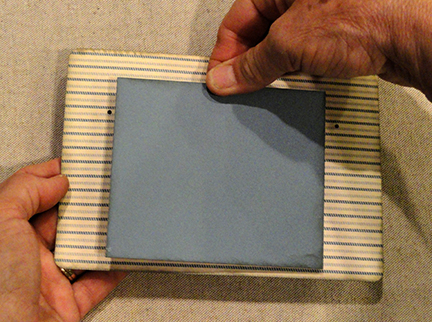
4. Position and attach each of the stripe or panel accent
shapes onto the front of each LID.

Here are all five box LIDs with their accent
front panels (plus star on the taller box).

6. Form the LID shape into a three sided box "tray"
by bending the panels back. Bend the end panels
into position so that straight edges overlap
corresponding tab flanges to perforation line,
and glue in place. Repeat for opposite end.

forward at the center perf line, and bending back
on edge tabs.
NOTE that the various size struts also have
corresponding symbol cutouts on one tab
to identify which will fit in long, short or tall star box.

with flange faces being glued to inside of bottom
surface. Strut walls will angle at 'V' formation
to help support center of top & bottom walls.
NOTE: long bottom boxes will have a pair
of struts as shown.

9. Apply glue to strut top flange faces, then
insert BASE assembly into the LID.
Slide BASE nearly fully into LID, pausing to
apply adhesive along the bottom margin of each face
before sliding fully in and flush at bottom edges.
Apply pressure along all faces until secure.
(Prepare all 5 boxes to this stage.)

wrap shape by bending on all long perforation lines.
NOTE: the side tabs were eliminated in the final version.

to wrap the post shape around, overlapping
straight long edge over flange to perforation line,
then applying pressure all along seam,
adjusting as needed, until seam is secure.
12. Measure the dowel to length by aligning end
with base edge of end tabs, marking opposite
end of dowel at the tab perforation.
Remove dowel and cut to size, reinsert.
Prepare TWO posts.

13. Insert post through TOP opening of star box,
through interior, and out the bottom opening.


(long stripe box), then apply glue onto underside
of upper box before . . .

through stripe bottom box.

16. Repeat post insertion and gluing through
bottom stripe box, then glue bottom tabs in place.

17. Position and attach the top
concealing panel to hide the post assembly.

18. Glue the first short stripe box into position,
attaching to top of top long stripe and end to
star box. Then . . .

. . . repeat for the top short stripe,
19. Insert post through all stripe openings
(this will require a bit of "fishing" to find openings)
working end tabs out fully if possible.
Glue tabs in place at top and bottom.
Glue top and bottom concealing panels in place.

20. Decorate the box stack as desired.
Sample has ribbon wrapped around outer edge,
with berries sprigs tucked into knot.