Dimensional rectangular box is specially sized to showcase
decorative 5x7
purchased card front print art
(not included in the cut file).
Lid fits snugly
over base with full depth side walls.
Top frame has whole panel and frame
cut-out layers
built up and pressed flat while drying for a rigid lid,
with
overlay members that enclose the card art to create
miter seams at corners.

Lid
has overhang detail (a simple L-style stand
is included for empty box upright
display); alternatively omit
the frame layers to mount the card directly on lid.
Measures approx. 7.75” tall x 5.75” wide x
1.25” deep.
ASSEMBLY: 1. Identify and cut the shapes:
A main LID hull (one piece)
NOTE: if cutting from smaller card stock, the LID
would be composed of front panel, 2 side walls, 2 end walls
B hull side wall accents
C LID overhang backside base layer with guide marks
D LID build up layers (5)
E top frame base layer
F inner frame layer div. 2 pieces - buffer/guide for 5x7 card
G miter members: 2 long sides; 2 short top & bottom
H main BASE hull (one piece)
NOTE: if cutting from smaller card stock, the BASE
would be composed of bottom panel, 2 side walls, 2 end walls
I opt. inner liner

 3. Bend the walls back to align/overlap the straight
edge over the corresponding tab to join each corner seam.
 4. Bend the flanges inward and glue in place
('dry' tape style adhesive recommended) to wall
inner edges.


 7. Repeat Step 3 to join corner walls.
 8. Repeat Step 4 to bend flanges inward and
attach to BASE inside walls.


 13. Prepare the build-up frame layers by positioning
and gluing together the first two layers of rectangles,
taking care to align the cut edges as precisely as possible.
14. Continue to add additional layers below the top two,
following the same careful alignment and glue up.
Refer to Step 11 above, then press under a heavy flat weight
to prevent curling or warping until completely dry.


 17. Once the build up is dry (several hours),
position the card front inside the buffer frame . . .

 18. Position the frame/miter members assembly
over the top of the card front layers, and attach
in place. NOTE: if you wish to protect the card to
be able to remove it at some future date unharmed,
"dry fit" the card in place, then glue the frame front
to the buffer frame ONLY.
Place under a flat weight until completely dry.
 19. Position the LID box on the underside of
the frame assembly . . .


 Here is the completed frame box.


A main LID hull (one piece)
NOTE: if cutting from smaller card stock, the LID
would be composed of front panel, 2 side walls, 2 end walls
B hull side wall accents
C LID overhang backside base layer with guide marks
D LID build up layers (5)
E top frame base layer
F inner frame layer div. 2 pieces - buffer/guide for 5x7 card
G miter members: 2 long sides; 2 short top & bottom
H main BASE hull (one piece)
NOTE: if cutting from smaller card stock, the BASE
would be composed of bottom panel, 2 side walls, 2 end walls
I opt. inner liner

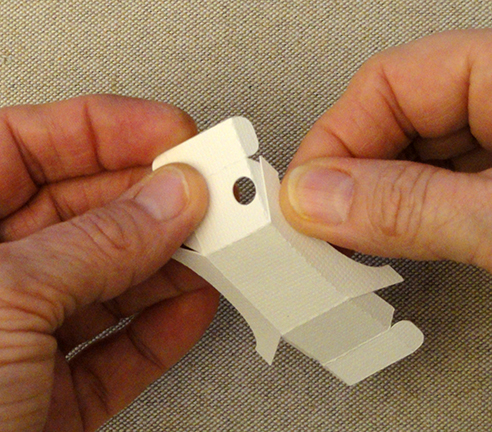
2. Prepare the LID main hull shape by bending back
on all the perforation lines for panels and tabs.
Identify the triangle 'up' symbol that shows that
this is the LID.
NOTE: if building the LID from smaller stock,
position and join the side walls to the sides of plain
front panel, short end walls to ends of panel, etc.

edge over the corresponding tab to join each corner seam.

('dry' tape style adhesive recommended) to wall
inner edges.

5. Position and attach the offset long and short wall
accent shapes (dry style tape adhesive recommended).

6. Repeat Step 2 for the BASE shape (except
the BASE will NOT include the 'up' triangle symbol).
NOTE: if building the BASE from smaller stock,
position and join the side walls to the sides of plain
bottom panel, short end walls to ends of panel, etc.


attach to BASE inside walls.

9. Separate the 5x7 card along fold line between
front and back. Optional: mount the back panel
onto the offset, rounded corner inner liner shape,
then position and attach into bottom of base.
(NOTE: the liner has more function when building
the box with separate side walls, which will have
bottom flange tabs showing on the inside.)

10. Prepare the front frame by positioning the short
end miter members and long side miter members
over the frame base, taking care that edges and
corners line up as precisely as possible (here and throughout).

11. Once glued up, press the frame assembly under
one large or several smaller flat heavy weights
so that it will dry flat, without curling or warping,
and leave in place until completely dry.

12. Identify the LID build up bottom layer, which
includes offset corner guide mark cuts that will assist
in positioning of the LID tray box.

and gluing together the first two layers of rectangles,
taking care to align the cut edges as precisely as possible.
14. Continue to add additional layers below the top two,
following the same careful alignment and glue up.
Refer to Step 11 above, then press under a heavy flat weight
to prevent curling or warping until completely dry.

15. On the top layer of the build up, position and attach
the buffer 'L' shapes (or the whole shape if preferred)
taking care to align outer edges and corners precisely.
Press the assembly under a flat weight until dry.

16. Position the bottom layer (with guide marks)
face away at the bottom of the build up stack,
and glue in place, aligning edges and corners precisely.
Place under the weight until completely dry.

position the card front inside the buffer frame . . .

. . . where it will fit and should be flush with buffer frame.

over the top of the card front layers, and attach
in place. NOTE: if you wish to protect the card to
be able to remove it at some future date unharmed,
"dry fit" the card in place, then glue the frame front
to the buffer frame ONLY.
Place under a flat weight until completely dry.

the frame assembly . . .

. . . so that the corners align with the corner guide mark
cuts, and attach in place.
(Dry tape perm adhesive is recommended.)

20. To close the box, slide the LID walls over
the BASE walls. NOTE this is designed with snug fit.


21. If you wish to display the frame box upright,
assemble the mini easel by bending back on center back
perforation line. Position and attach the reinforcement
side shapes over front of each half.