Monday, March 22, 2021

Egg Medallion Elegant Layers Card

Celebrate Easter with this unique card for giving or display, 
with its egg-shaped central decoration composed 
of 14 built-up layers and shapes, pairs with narrow offset edges 
that suggest gilding, and punch cut out details. 
Two-layer front panels include top layer with shaped corners 
to accept pearls or studs if desired, and bottom edge slots 
to hold optional ribbon accent (1” to 1.25” suggested width) 
for accent bow around assembled egg. 
Number notations cut into largest base egg shapes, 
or notations with cut file assist with assembly order. 
Small circle or triangle cut-in symbols assist 
with layers alignment. 
Card finishes as side-fold 5x7. 

ASSEMBLY: 1. Identify and cut the shapes:
A card base - side fold
B card front accent layer:
contrast rectangle
corner cutouts and bottom ribbon slots
C egg base layer pairs 1 & 2
D egg shaped layer pairs 3 & 4
E shaped layer pairs 5 & 6
F bottom flourish layer pairs
G lower "flower" flourish pairs
H upper "flower" flourish with point base pair
I daisy base "flower", daisy and flower center circle
2. Prepare card base by folding in half with face sides outward
and creasing crisply. Position and attach contrast rectangle
base shape with narrow offset margin all around.
3. If using the ribbon/bow accent, cut a 22-24" length,
locate center, weave under the center portion of card slots
as shown, and attach invisibly in place.
4. Position accent panel with ribbon onto card base
assembly with narrow margin accent all around,
and attach in place.
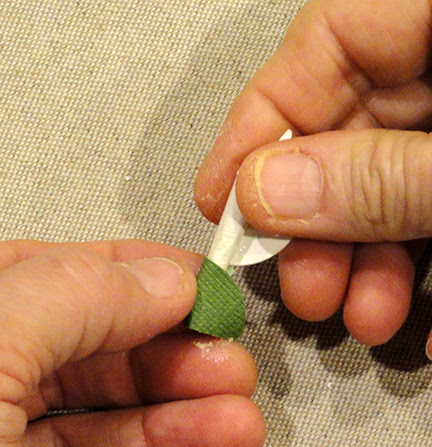
5. Identify the cut-in numbers for pairs of egg layers 1-6
so it is easy to identify glue-up order (number 4 located here).
Also note the center alignment circle cut outs
to help position layers, as well as position on care front.
Position smaller shape (centered) on top of larger shape in pairs,
with very narrow margin all around, and glue layers together.
It is advised to press liquid-glued layers under a flat heavy
weight such as a thick book volume for a period of time
to ensure even drying, and avoid warping and curling.
6. For a couple of the smaller shapes, triangle or small circle
position symbols will help, so these shapes are NOT layered
into their pairs until positioned onto the assembly.
After that, coordinated shapes can be positioned by
gauging the even offset margin, or otherwise centering.
7. Position and layer the two pairs of "flower shapes
by aligning the center punch holes, and also aligning
for the narrow offset margin all around (except where
tallest point of base extends at top).
8. Stack and attach the two flower shapes, so that
the tall point is at "north" position, and base rounded
petal "flower" tips are centered between the top layer points.
9. Position the daisy flower base on top, center punch circles
aligned, with rounded lobes between top layers of petals.
10. Stack and glue together egg paired base layers,
aligning center hole punches, then adjust for centered
vertical orientation. Press under flat weights while drying
if using liquid adhesive. 
11. Position the flower medallion assembly on top
of the egg stack assembly with center punches aligned,
and top point aligned upward along centerline,
and attach in place.
12. Position the bottom flourish base shape
over the lower portion of egg stack where triangles
 align, and glue in place.
13. Position and attach the top flourish layer and
daisy shapes in their positions as shown. 
Here is the completed layered egg medallion.
14. Position egg medallion onto card front centering
 front panel hole punches (egg shape can be imagined
on underside of stack). 
15. If using ribbon accent, cross ribbon ends to
right side, tie knot and bow loops. Adjust bow and
trim ends.
16. Add corner studs or other accents as desired.
Here is the completed card with ribbon, and . . .
. . . without.

Sunday, March 14, 2021

Cross Stitch Tulip Gift Tag


Create a unique gift tag with an “especially made for you” touch. 
Or adorn a seasonal card or embellish a scrapbook page. 
Traditionally shaped gift tag has top panel with ribbon slot 
(accepts .375 wide flat) and reinforcement ring, 
with pair of eyelet accent punch holes 
(shapes also included without eyelet holes). 
Cut and glue together two cardstock cross-stitching 
layers for strength. Cross-stitch pattern needle holes are stitched
 following included CHART to create a Dresden-style tulip design 
for springtime occasions 
(NOTE: only design stitching holes are included). 
Complete the EASY cross-stitch design using 2 ply embroidery floss 
with fine blunt no. 24 tapestry needle with floss color. 
Sample tag uses DMC 721. A stitchery area silhouette cutout buffer layer 
and solid layer are also included as optional layers 
for a more finished final project. 
Cross-stitch count: 108. 
Tag finished size 2.25” wide x 3.5” long.

ASSEMBLY: 1. Identify and cut the shapes:
A main tag with stitching holes (2)
B stitching area cutout backside tag layer
C plain backside tag layer
D contrast tag top panels (2)   E slit reinforcements (2)
2. Make sure the stitching hole openings are free
from cutout waste (chads). One way to do this is
to use the end of a paperclip to push through to backside
then rub/scrape tiny "confetti" pieces away.
3. Position and glue together the two stitching layers,
taking care that all cut edges align as precisely
as possible, including stitching holes, eyelet holes,
slot and tag edges.
Press the glued-up tags under a flat heavy weight
such as a thick book or equivalent wood plank,
flat weights, etc. and allow to dry thoroughly
(for several hours or over night).
4. Position and attach the reinforcement accent shapes
onto the tag top accents, aligning the slot cut outs
of each as precisely as possible.

5. Since this tag is very similar to the Bunny Side View
Medium Cross Stitch Tag, please follow this LINK
to find that tutorial, then refer to Steps 5-14, tying off
instruction in Step 16, Steps 19-21.

The tulip design has some "blank" or open areas that
help define and separate each side leaf from the stem,
and interior detail open areas, as indicated in this annotated 
stitching chart. Follow the stitching chart closely in these areas
to avoid filling in with un-charted stitches.


Here is the completed cross-stitch tag.

Saturday, March 13, 2021

Place Card 3D Tote Candy Egg Holder

Two-part “carrier” consists of base frame box with bottom 
interior platform,  top tote extension arms that interlock together 
to end with bunny ears (optional inner ear accent shape included). 
Platform circles are designed to hold a foil-wrapped 
chocolate Easter egg candy (such as Cadbury creme egg) 
in place for a fun seasonal table place setting decoration. 
Add penned or print-n-cut medallion place card 
attached to front and/or back. 
Optional variation with simple rounded top tabs 
in place of bunny ears is also included. 
Bunny ears tote measures approx. 4” tall 
with 2”x2” base “footprint” when assembled. 

ASSEMBLY: 1. Identify and cut the shapes:
A upper tote handles and ear shaped ends with platform
B lower tote platform with wrap-inward base
C ear inner shapes (2)
D & E optional place card medallion with inner oval
2. Prepare the upper shape by bending back on the two
perforation lines at each side of the nesting circle cutout.
3. Prepare the lower shape by bending back on all
perforation lines that will form the nesting platform
and the wrap-inward interior platform.
4. Prepare to form the interior platform by applying
adhesive along the bottom edge tab as shown, then . . . 
. . . bend the bottom sections inward so that the tab rests
against the opposite platform side wall with the tab's
long edge nestled snug against side wall's bottom bend . . .
. . . and hold there in place until adhesive grabs.
It will be helpful to make this connection accurate
and strong to insert a flat-edged tool such as the acrylic
ruler shown in this image, pressed and held against
the backside of the tab, so that fingertip pressure
can be applied from inside and from side wall exterior.
Here is the side view of this step when completed.
5. Apply adhesive to the narrow inner platform wall
(opposite the tab from step 4), and . . . 
. . . also to the underside/backside of the large end segment
and wrap it around the platform so that it becomes
the "new" bottom panel. (Refer to the images in Step 10
to see the completed lower assembly.)
6. Prepare the ears portions of the upper shape by adding
 a little inward curl  along the upper half using a rod-like
tool such as this 1/4" dowel, or the shaft of a round pencil.
Add the curl only below the narrow neck before ear shape.
7. Insert one ear tip through the platform chamber
underneath the upper platform panel, then . . . 
. . . apply adhesive to the nesting circle platform
area of the upper shape before. . . 
. . . continuing to move it into final position where
the two nesting circle cut out edges will align.
Flex the two shapes so that the narrow tabs slide
snugly into the slots to help hold the upper and lower
panels in position. Apply pressure to help the two
platform panels attach thoroughly.
9. Position and attach the inner ears on the outside
of the ear portion of tote arms, with bottom edge
above the interlock slot upper edge.
10. Bring the arms upward to intersect above the platform,
torqueing each slightly so that the slots can interlock,
and push together completely. 
Here is the completed tote box.
11. The Easter chocolate candy egg can be inserted
into the interior nesting circles, sliding about
halfway down the upper large cutout, being cradled
somewhat by the lower smaller cutout,
resting on the bottom panel. 
The bunny ears tote can be used in this state of
completion without place card, if desired.
12. If using the place card medallion, complete
any personalization desired, including hand-penned
names, or Silhouette Cameo's print-and-cut features.
Position and attach the oval onto the front of medallion shape. 
Medallion side punch holes allow for attachment of
narrow ribbon or decorative twine loops.
13. Position and attach place card, centered, on front
panel, with bottom edges even.
Here is the completed place card tote.

Easter Flourish Card Peace Lilie

Celebrate the Easter season message with this elegant flourish 
5x7 top-fold card with dimensional left and right tipping lilies. 
Leaf and vine flourishes are cut out of front accent card panel 
with subtle sunrise at center top. 
Second front panel layer includes “PEACE” stencil cutout. 
“Easter” script word cut out is layered over stencil cutouts. 
Third front panel provides contrast to show through stencil letters. 
A rolled lily with leaf is placed on diagonal 
attached at each upper corner. 

ASSEMBLY: 1. Identify and cut the shapes:
A card base with horizontal center perforation
B front rounded corner "contrast" panel no. 3
C front accent panel no. 2 with stencil-cut PEACE
D flourish edge front panel no. 1
E "Easter" word cutout
For following lily dimensional bloom shapes,
F-I shapes will be cut as one left set, one right set
(right set shown)
F lily petal shape   G sepal base cone
H stamen accent   I leaf accent
2. Position and attach the panel layers in order,
with narrow offsets all around, except that flourish layer
should be positioned with side and top edges offset with
even margin (bottom edges fall slightly above same margin width.
Here, the flourish/panel no. 2 layered assemblies
are positioned and attached onto panel no. 3, and . . .
. . . finally the front panel three-layer assembly is
positioned and attached to the "front" panel of
the base shape, folded in half at perforation line.
3. Position and attach the "Easter" word cutout,
roughly centered, overlapping the stencil word slightly.
4. Prepare the lily petal by using a very narrow rod-shaped
tool such as this needlework hook handle/shaft to
A) add forward curl to the broad part of the petal, and . . .
. . . B) tightly curl, then roll the narrow end of petal,
curling inward until the bottom notch is reached.
C) unroll, then re-roll in a more upright, vertical position
spiral (shown by the position of the rolling rod, here)
to form the whorl of the blossoming lily.
5. Remove the rod, then continue to work the spiral roll
so that it is as tightly rolled as possible at the bottom tip . . .
. . . with whorl approaching the same tangent as petal tip.
To assist in maintaining this configuration,
add a discrete dab of quick-grab clear adhesive
at the base of the spiral.
6. Prepare the sepal "cone" shape by curling in a pivoting
manner, working the rod tool from bottom center tip
 in a fanning motion to begin the suggestion of cone shape.
NOTE the textured cardstock used for the sample flowers
separated into two "ply's" and only top ply was used
to complete the lily.
7. Add a dab of clear quick-grab adhesive to the tip of lily spiral, 
then position the cone with arched edge upward,
so that the lead edge will fall along blossom center back.
Continue to roll cone around the tip, and glue the cone in position 
as it is wrapped around to back, then . . .
. . . overlap at back.
Trim excess cone neatly along back, and smooth
edge into place as necessary.
8. Add a dab of quick-grab glue to the bottom tip of
stamen strip, then insert into the whorl spiral center
inside the blossom, push downward until top tip is
in desired position, then hold in place until secured.
9. Apply glue along the back "spine" of blossom assembly,
then position and attach along the lower inward edge
of leaf accent, as shown.
Here is the completed right blossom.
(Left blossom is created as mirror image.)
10. Position and attach lilies in place into card's
front panel, roughly in the positions shown.
Here is the completed card.