with its egg-shaped central decoration composed
of 14 built-up
layers and shapes, pairs with narrow offset edges
that suggest gilding, and punch
cut out details.
Two-layer front panels include top layer with shaped corners
to accept pearls or studs if desired, and bottom edge slots
to hold optional
ribbon accent (1” to 1.25” suggested width)
for accent bow around assembled egg.
Number notations cut into largest base egg shapes,
or notations with cut file
assist with assembly order.
Small circle or triangle cut-in symbols assist
with
layers alignment.
Card finishes as side-fold 5x7.
ASSEMBLY: 1. Identify and cut the shapes:
A card base - side fold
B card front accent layer:
contrast rectangle
corner cutouts and bottom ribbon slots
C egg base layer pairs 1 & 2
D egg shaped layer pairs 3 & 4
E shaped layer pairs 5 & 6
F bottom flourish layer pairs
G lower "flower" flourish pairs
H upper "flower" flourish with point base pair
I daisy base "flower", daisy and flower center circle
and creasing crisply. Position and attach contrast rectangle
base shape with narrow offset margin all around.
3. If using the ribbon/bow accent, cut a 22-24" length,
3. If using the ribbon/bow accent, cut a 22-24" length,
locate center, weave under the center portion of card slots
as shown, and attach invisibly in place.
4. Position accent panel with ribbon onto card base
assembly with narrow margin accent all around,
so it is easy to identify glue-up order (number 4 located here).
Also note the center alignment circle cut outs
to help position layers, as well as position on care front.
Position smaller shape (centered) on top of larger shape in pairs,
with very narrow margin all around, and glue layers together.
It is advised to press liquid-glued layers under a flat heavy
weight such as a thick book volume for a period of time
to ensure even drying, and avoid warping and curling.
6. For a couple of the smaller shapes, triangle or small circle
position symbols will help, so these shapes are NOT layered
into their pairs until positioned onto the assembly.
After that, coordinated shapes can be positioned by
gauging the even offset margin, or otherwise centering.

7. Position and layer the two pairs of "flower shapes
by aligning the center punch holes, and also aligning
for the narrow offset margin all around (except where
the tall point is at "north" position, and base rounded
petal "flower" tips are centered between the top layer points.
aligned, with rounded lobes between top layers of petals.
10. Stack and glue together egg paired base layers,
aligning center hole punches, then adjust for centered
vertical orientation. Press under flat weights while drying
if using liquid adhesive.
11. Position the flower medallion assembly on top
of the egg stack assembly with center punches aligned,
and top point aligned upward along centerline,
and attach in place.
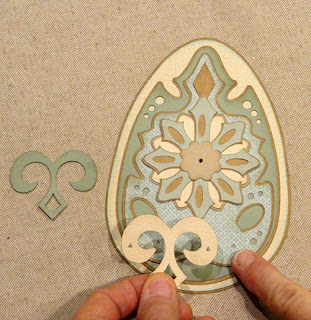
12. Position the bottom flourish base shape
over the lower portion of egg stack where triangles
align, and glue in place.
13. Position and attach the top flourish layer and
daisy shapes in their positions as shown.
Here is the completed layered egg medallion.
14. Position egg medallion onto card front centering
front panel hole punches (egg shape can be imagined
on underside of stack).
15. If using ribbon accent, cross ribbon ends to
right side, tie knot and bow loops. Adjust bow and
trim ends.
16. Add corner studs or other accents as desired.
Here is the completed card with ribbon, and . . .
. . . without.


What a unique egg decoration. Where did you get the SVG/pattern?
ReplyDeleteThe svg pattern for this project was designed by us and is available through Silhouette America's online store.
ReplyDelete