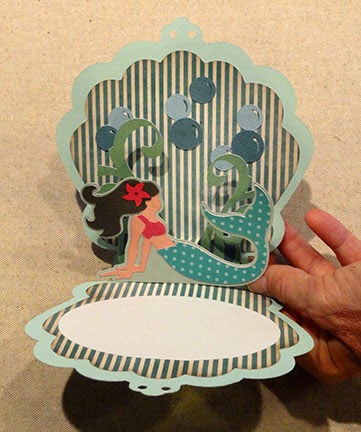
Deluxe box will star at your tropical party
or island-themed event.
Made with removable lid, shaped body and lid side overlays
with square "scales" attached with 72 mini brads,
lush leaf topper, and separate "aloha" word cutout
and tropical flower hanger tag.
(Or personalize with recipient name.)
Measures approx. 10.5" tall x 5" wide.
Also a good choice to convey "welcome" sentiments
as a new house warming gift.

CONSTRUCTION:
1. Identify and cut the pieces.
A center leaf
B first leaf ring
C middle leaf ring
D leaf base ring
E leaf base hex with slots
F leaf crown
G lid base
H base sections (2)
I lid overlays (6)
J base overlays
K base "scales" (54)
L lid "scales" (18)
M tag shapes
Not shown: base hexagon with circle opening & 4-5 full base hexagons

BOX BASE
2. Prepare the two base halves by folding on the perforations as shown. All folds are inward folds.

3. Join the two halves at the center perforation.

4. Join the end wedge seams by overlapping straight edge with the adjacent tab.

5. Form the base section into a tube and join the remaining side edge with the tab.
6. Fold the rim tabs inward and glue in place.

7. Position and glue the base hexagon with circle cutout over the bottom opening, using the circle hole to reach inside and assist with the alignment of tab perf lines with hexagon edges.
It may be helpful to attach one side, then the opposite side first, then adjust the tube to re-position the remaining edges until they align properly and attach to the tabs beneath.

8. Prepare the base overlay sections by adding some curl. This is done by placing thumb and fingers on opposite sides (front/back), then applying pressure while moving fingers in a curve. This is similar to curling ribbon, only gentler.

9. Prepare the "scales" squares for the base overlays. Fold face together in half, unfold, then refold on the opposite diagonal.

Make final shaping by pinching with four corners outward and the areas in between corners being pushed to the inside. The resulting shape is like a squared cup.

10. Apply a little adhesive around the overlay punch hole, position the shaped scale square "on point" and insert the brad through the hole and secure prongs on the back. Make a final position check before glue sets: square's points should be up/down as shown in the next screen.
Repeat for all 9 scale squares on each of the 6 overlay sections.

This image shows one completed section.
(NOTE the latch tab that can be seen here was eliminated from the final design.)

11. Position each overlay over one of the side sections of the base box.
To do this, fold the top overlay tab inward, position centered and even with the fold edge at the box rim fold edge and glue in place.
Next, bring the bottom tab to the box's bottom and align the tab perforation with the bottom angle edge. When done correctly, this will result in curving of the overlay away from base box shape, giving the pineapple it's more realistic shape.

12. Prepare the base by gluing together 4-5 (or more if desired) plain hexagon shapes.
Position over the circle-cutout hexagon on the bottom of the base box, covering the overlay tabs around the edge.

This image shows the completed box base inside and top opening edges.

LID CONSTRUCTION
13. Prepare the lid base shape by folding on the perforations as shown. Most folds are inward folds, EXCEPT for the lower edge rim configuration as shown in the following two images.

14. Fold the rim sections back at the upper perforation line in the bottom sequence, as shown, then forward on the next perf line, then back at the bottom (non-tab) perf line. (See the next image for more clarification.)
Glue the narrow section in place to form the rim. Repeat for each segment of the lid edge except leave the side non-tab edge unattached for 3/8" or so in from edge to allow space for the side seam to be attached.

This image shows the folding direction from profile. Lid outer edge is at the left of the picture, and inner edge with tab as at the right, being helf by thumb/fingers.

15. Insert the inner tab into the body slot, one by one from left to right. As each successive segment is folded and tab inserted into slot, the rim extension edge of the right segment will overlap the segment on the left to form a miter joint.

16. As the overlapping at the miter joint progresses, apply a dot of glue to the mini-tab of the left rim extension edge so that when it is overlapped, it will attach to the corresponding miter edge and join. This helps give the rim some stability and strength.

17. Glue the tabs in place on the outside surface of the lid body.

18. Complete the lid seam by forming the lid into final tube shape and overlapping tab with straight edge. Complete the rim gluing that was previously left un-glued for the side seaming process.

19. Fold the top hexagon shape into position and glue in place. Again, it may be helpful to join the straight edge opposite the fold hinge in place accurately first, then reposition and attach the remaining edges.

20. Prepare the lid overlay sections by adding curl as done previously for base overlays.

21. Prepare and attach the "scale" squares to each lid overlay as was done for base overlays. NOTE: lid scale squares are slightly smaller than base scale squares.

22. Attach the overlays by folding the bottom edge tab back, aligning overlay fold at lid rim fold edge and gluing in place securely.
Next, fold the overlay into position with top tab perf line aligning at top hex edge. When positioned properly, overlay will curve away from lid base face slightly, as was the case with the base body overlays.

Here is a view of the completed lid showing the inside and lower edges.

LEAF CROWN
23. Prepare the leaf ring layers. Form the first leaf ring into a tube and glue the tab to opposite straight edge.

24. Fold the middle leaf ring into a tube and join the tab to opposite straight edge in a seam.

25. Fold the base ring into a tube and join the tab to the opposite straight edge in a seam. Fold the bottom tabs inward.

26. Give all the leaves (except base ring) a slight curl by pulling and curving between fingers.
Shown here is the top leaf pair unit.

27. Insert the top leaf pair end tabs into the "V" slots at the center of the leaf base hexagon.

Fold tabs back on the bottom of hexagon and glue in place.
Apply a glue dot to the interior surface at the leaf pair side edge about half way down, and attach the leaf pairs "loosely" together.

28. Thread the first leaf ring tube over the top leaf pair tips and slide down until tabs can be inserted into hexagon slots.
On hexagon backside, fold the tabs inward and glue in place.

29. Repeat the threading of tube over previously-positioned leaf sections for the middle leaf ring, insert tabs into outer slots, fold tabs back on the underside and glue in place.

30. Apply glue to the backside of the base ring bottom tabs (that have been folded inward), then position leaf crown assembly inside, aligning hex edges with fold angles. Glue in place securely.

31. Fold the leaves of the leaf crown downward slightly, then position over the lid top hexagon, align hex shape perf lines of each, and glue in place.

32. Apply glue generously to the bottom of the leaf assembly, position over top of lid unit, align base hex edges with hex perf lines of crown, etc., and hold until firmly attached.

33. Complete the hang sign assembly, if desired.
Shown here are the completed base section, lid and leaf crown section and decorative sign.
The lid will fit over the opening of the base so that the base rim is covered by the lid rim.
Here is the assembled pineapple 3d box.20. Prepare the lid overlay sections by adding curl as done previously for base overlays.
21. Prepare and attach the "scale" squares to each lid overlay as was done for base overlays. NOTE: lid scale squares are slightly smaller than base scale squares.
22. Attach the overlays by folding the bottom edge tab back, aligning overlay fold at lid rim fold edge and gluing in place securely.
Next, fold the overlay into position with top tab perf line aligning at top hex edge. When positioned properly, overlay will curve away from lid base face slightly, as was the case with the base body overlays.
Here is a view of the completed lid showing the inside and lower edges.
LEAF CROWN
23. Prepare the leaf ring layers. Form the first leaf ring into a tube and glue the tab to opposite straight edge.
24. Fold the middle leaf ring into a tube and join the tab to opposite straight edge in a seam.
25. Fold the base ring into a tube and join the tab to the opposite straight edge in a seam. Fold the bottom tabs inward.
26. Give all the leaves (except base ring) a slight curl by pulling and curving between fingers.
Shown here is the top leaf pair unit.
27. Insert the top leaf pair end tabs into the "V" slots at the center of the leaf base hexagon.
Fold tabs back on the bottom of hexagon and glue in place.
Apply a glue dot to the interior surface at the leaf pair side edge about half way down, and attach the leaf pairs "loosely" together.
28. Thread the first leaf ring tube over the top leaf pair tips and slide down until tabs can be inserted into hexagon slots.
On hexagon backside, fold the tabs inward and glue in place.
29. Repeat the threading of tube over previously-positioned leaf sections for the middle leaf ring, insert tabs into outer slots, fold tabs back on the underside and glue in place.
30. Apply glue to the backside of the base ring bottom tabs (that have been folded inward), then position leaf crown assembly inside, aligning hex edges with fold angles. Glue in place securely.
31. Fold the leaves of the leaf crown downward slightly, then position over the lid top hexagon, align hex shape perf lines of each, and glue in place.
32. Apply glue generously to the bottom of the leaf assembly, position over top of lid unit, align base hex edges with hex perf lines of crown, etc., and hold until firmly attached.
33. Complete the hang sign assembly, if desired.
Shown here are the completed base section, lid and leaf crown section and decorative sign.
The lid will fit over the opening of the base so that the base rim is covered by the lid rim.
(Only 33 steps! That's not too bad, is it?)