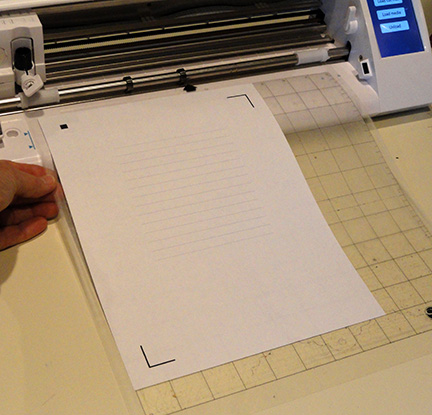
Advanced difficulty design - requires 12x12 cutting
capacity.
Vintage-style lift-lid box with thick structure walls
includes
flip-up front panel, drawer, open top compartment.
This unique gift box can
hold stationery, pens,
stamps, flat labels and more.
Decorate with offset panel
accent shapes.
Prepared to include faux drawer label pull,
brad & paper
"washer" knob (shown with purchased
metal findings and elements).
Measures approx. 6.25" wide x 7.5" deep x 5" tall.

Coordinates with "NOTES Spiral Booklet" design
(to insert and store
in back vertical compartment)
and "Tag 3D Flowers Vine" as front lid decoration.
The engineering tolerances and fit
of this box are based on using heavy card stock
for the construction. Materials selected may affect fit.
ASSEMBLY: (May require up to eleven 12x12 sheets)
1. Identify and cut the shapes:
(NOTE that some of the shapes were changed and
will appear slightly modified in the final cut file, noted with *)
A main base shape (slots to accept side, back, int. walls)
B under-base cover (hides construction tabs)
C* & D* left and right side walls
E back wall


 Side Wall shown here: also bend inner wall
tabs forward. The side wall shape has been changed . . .


 . . . squaring up the corners,
and gluing the rim triangle tab
and side tab flanges in position along
the edge/perf lines of the tabs.
 NOTE that when gluing the sides of the interior
wall shape in place, it will help to insert a flat
narrow tool such as this rigid plexiglas ruler
into the interior to provide a "press against" surface.


 HULL ASSEMBLY: SIDE & INTERIOR WALLS
9. Attach the Interior wall to the left and right side wall
units by inserting tabs into corresponding slots.
On the inside of the Side Walls, bend the tabs back
and glue in place.

 11. Bend outer tab flanges back and out
of the way.
Position the Side/Int Walls unit over the Base
shape and insert the Int Wall bottom tabs
into corresponding slots.
Bend tabs forward and glue in place.

 . . . then bend inward and glue in place.


 14. Bend the Side Wall bottom flange tab around
the Base . . .


 19. Bend back the side rim tabs to the inside
of the drawer box and glue in place.
Bend back the front and back rim tabs
and glue in place.


 . . . also fold back on perf line of the pull portion.

 24. Position and attach the bracket shape on
the backside of the previous assembly.


 26. Prepare the drawer platform shape
by bending back on front tab flange,
side and back panels.
 27. Apply glue to backsides of side and back walls,
then insert the platform inside the front compartment
of the hull assembly, pushing into place
until side wall bottom edges rest against Base.


 30. Bend the end tab flange back, and
side triangle tabs back, apply glue,
then tuck these tabs under corresponding
edges to form a closed box.
NOTE: this is a snug fit.

 . . . placing the "bottom" face on the platform,
and lining up the angle of the "top" face
with the Side Wall angle.
 32. Position the upper wedge form
next to Interior Wall, with angled edges
even with Side Wall angle,
and glue back and sides in place.

 . . . and Upper Front Lid shapes, one by one, taking care
to align edges and punch holes.
 34. Layer and attach Under Lid reinforcement
shapes similar to Lower Front Lid shapes.
 35. Position the Under Lid stack on the backside
of the Lower Lid, aligning upper punch holes,
and keeping side and lower straight edges
parallel to Lid edges, and attach in place.

 37. Prepare the card stock hinges (2) using
the shapes shown here: (l to r) whole base,
upper and lower half reinforcements,
accent shapes.
Bend the whole shape upward in the center.
 NOTE: the pointed part of the hinge is UP.
Position and attach the similar half top or
bottom over the face side of the whole
hinge shape, lining up edges and cutouts.
Position and attach the accents on top.
 38. Position the hinge over the Lid Upper
and Lower Front shapes glue in place, then attach
with small size brads through all holes.

 39. Prepare the knob stack by layering
and attaching the circles (10), one by one,
taking care to align cut edges and punch holes.
Use a contrast top circle, if desired.
 40. Use a regular (large) size brad plus glue
to position and attach the knob at the Lower
Front hole punch.


of this box are based on using heavy card stock
for the construction. Materials selected may affect fit.
ASSEMBLY: (May require up to eleven 12x12 sheets)
1. Identify and cut the shapes:
(NOTE that some of the shapes were changed and
will appear slightly modified in the final cut file, noted with *)
A main base shape (slots to accept side, back, int. walls)
B under-base cover (hides construction tabs)
C* & D* left and right side walls
E back wall

F interior wall
G* drawer platform
H drawer box I drawer front (4)

J front lower lid (4) K front upper lid (4)
L upper wedge cross bar
M lower wedge cross bar (not shown; shorter)
N* front under lid build up (4)

Accent shapes:
O front lower lid P front upper lid
Q drawer front R & S side walls
T back wall U* compartment rim trim
V hinges: base, top & bottom, accents (2 sets)
W drawer pull assembly and label
X knob stack circles (10)

2. Prepare the main hull shapes by bending
back on all perforation and tab lines.
Back wall shown here: also bend inner
wall tabs forward.

tabs forward. The side wall shape has been changed . . .

. . . by separating the top rim and its tab flanges
from the main side wall section (to provide
a larger and more secure attachment at the angle).
Here is an illustration showing the two shapes, left,
and the final location of the add-on shape.
A. Bend the add-on shape's long (outer)
and short (inner) flange tabs back.
B. Position the shorter (bottom) flange under
the corresponding edge (shown by arrow),
overlapping the side panel straight edge
to line up at the perforation line as accurately
as possible, and glue in place.

3. Position and attach the accent panel shapes
onto the main hull shapes
(dry, tape style adhesive recommended;
if using liquid, shapes will need to be
flattened with weight while they dry):
Back Wall shown here.

Side Wall shown here.

4. Prepare the Interior Wall by bending back
on all perforation lines, including side edge
flange tabs, top rim triangle tab, bottom flange tab,
and bottom/side tabs.
5. Bend the wall "box" into shape, bending the two
large wall panels back and away from the rim edge,
side wall strips back while tucking the long side
flange tabs under . . .

and gluing the rim triangle tab
and side tab flanges in position along
the edge/perf lines of the tabs.
***BE SURE to square up the wall during
the gluing process****

wall shape in place, it will help to insert a flat
narrow tool such as this rigid plexiglas ruler
into the interior to provide a "press against" surface.

6. Bend the bottom flange inward
at square angle.
7. Form the Side Wall unit(s) by bending back the inner
and outer walls from the rim.
Tuck the top rim (add-on) flange tab behind the outer
wall edge, align straight edge at tab perf line,
and glue in place.

Use the ruler or other tool to help during
the gluing of this seam.

8. In similar manner, tuck in the lower front
wall rim tab and glue in place.
***BE SURE to square up the wall during
the gluing process****

9. Attach the Interior wall to the left and right side wall
units by inserting tabs into corresponding slots.
On the inside of the Side Walls, bend the tabs back
and glue in place.

10. Apply glue to the narrow side panel of
the Interior Wall unit, then bend into final,
right angle position, and hold in place until
the attachment between Interior and Side Wall
is secure.

of the way.
Position the Side/Int Walls unit over the Base
shape and insert the Int Wall bottom tabs
into corresponding slots.
Bend tabs forward and glue in place.

12. Slide Side Wall bottom tabs into
corresponding slots in Base shape . . .


13. Position Back Wall unit at rear of Side/Int Wall
unit, then insert bottom tabs into corresponding
slots in Base shape. At the same time,
insert Side Wall back tabs through
Back Wall corresponding slots.
Be sure to work tabs through fully,
then bend inward.

NOTE that there is a "miter" edge overlap
at the top back corners where the Side Walls
angle edge of rim overlaps the straight edge
rim of the Back Wall.
These must be arranged carefully or the
back tabs will not fit correctly into slots.
Glue tabs from previous image frames in place.

the Base . . .

. . . tucking the front rim bottom tab under
the Base shape, square up, and glue tab and
flange tabs in place.
Apply inward pressure to make sure that
the tab's angle remains flush with Base edge
all along, until adhesive locks in.

15. Bend the back panel down into position
to wrap and attach the bottom flange tab around Base,
while attaching the Wall to side tabs in
the same operation.

16. Position and attach the bottom cover
to conceal the construction tabs of the bottom Base.

DRAWER ASSEMBLY
17. Prepare the drawer box shape by bending back
on all panel and tab perforation lines.
18. Bend the front, back and side panels back
to form tray, as the straight side edge is
overlapped over the corresponding tab to
perforation line, and glued in place.
Repeat for all 4 corner seams.

of the drawer box and glue in place.
Bend back the front and back rim tabs
and glue in place.

20. Layer the drawer front multiple shapes
(one by one), and glue in place, lining up
all cut sides and punch holes as precisely
as possible (here and throughout).
When using liquid glue, use a flat weight
of some kind placed onto the drying stack
to prevent warping and curling.
NOTE that there is an arrow cut shape
that points to the top of the drawer front.

21. Prepare the drawer front accent shape
by applying adhesive (dry tape-style shown here
and recommended) to the backside. Then . . .

. . . position and attach to the drawer box front,
aligning top and bottom straight edges of both
and punch holes.

22. If NOT using metal drawer pull, prepare
the card stock shapes shown here:
bracket backing (top), full pull shape (middle),
pull tab reinforcement (bottom),
by . . .

. . . bending forward on the
full shape perforation lines . . .


23. Position and attach the pull shape under
the whole pull shape, matching edges
that correspond, and lining up the perforation lines.

the backside of the previous assembly.

OR, use the metal "Label Pull"
from Tim Holtz, or other brand.

25. Position drawer pull, matching
the pull side holes and the drawer front
hole punches, and attach with brads
through all layers.

Insert the label behind window, if desired.

by bending back on front tab flange,
side and back panels.

then insert the platform inside the front compartment
of the hull assembly, pushing into place
until side wall bottom edges rest against Base.

To help the platform walls fit into place
against hull walls, insert the drawer under
the platform. Also remove drawer and apply pressure
as needed to connect walls completely.

WEDGE SIDE-TO-SIDE SUPPORTS
28. Prepare the upper and lower wedge bars
by bending back on all panel and tab perf lines.
(NOTE: both wedges have similar shapes
and construction.)

29. Bend the side triangle panel back,
and the bottom panel back so that
straight edge overlaps corresponding
tab perforation, and glue in place.
Repeat for opposite end.

side triangle tabs back, apply glue,
then tuck these tabs under corresponding
edges to form a closed box.
NOTE: this is a snug fit.

31. With drawer in place, position and attach
the narrower wedge between side walls
and on top at the edge of the drawer platform
(remove drawer to help attach to platform) . . .

and lining up the angle of the "top" face
with the Side Wall angle.

next to Interior Wall, with angled edges
even with Side Wall angle,
and glue back and sides in place.

LID ASSEMBLY
33. Layer and attach the Lower Front
Lid (4) . . .

to align edges and punch holes.
Use weights to keep flat during drying process.

shapes similar to Lower Front Lid shapes.

of the Lower Lid, aligning upper punch holes,
and keeping side and lower straight edges
parallel to Lid edges, and attach in place.

36. Position and attach the accent shapes
to the Upper and Lower Front Lid assemblies.

the shapes shown here: (l to r) whole base,
upper and lower half reinforcements,
accent shapes.
Bend the whole shape upward in the center.

Position and attach the similar half top or
bottom over the face side of the whole
hinge shape, lining up edges and cutouts.
Position and attach the accents on top.

and Lower Front shapes glue in place, then attach
with small size brads through all holes.

OR, use metal hinges by Tim Holtz or other
supplier.

and attaching the circles (10), one by one,
taking care to align cut edges and punch holes.
Use a contrast top circle, if desired.

to position and attach the knob at the Lower
Front hole punch.

OR, use the metal knob by Tim Holtz or
other supplier.
41. Position the Lid assembly over the front
of the hull with the top edge of the Upper
Lid shape flush and even with the rim edge.
(Bottom edge should be even with
the drawer platform, or even a bit beyond.)
Attach the backside face of the Upper Lid
that touch the hull assembly surfaces ONLY,
using strong adhesive, such as Fabri-Tack
or hot melt glue.

FINISHING
42. Add the rim accent strips, beginning
with the end straight cut strips, centered
side to side and top to bottom,
on the rim faces,
then position the long strips in similar
fashion (miter cut ends will give
the appearance of miter cut trim).

Here is the completed secretary box . . .

. . . with working hinge lid and drawer.

Complete the box by adding embellishments
on the box, including the flower tag,
and accessorize with the Notes spiral booklet.