Engineered walls make this box sturdy.
Details make it fun: shaped front
& back lid flaps,
layered accent side panels, dimensional imitation label
pull
(or use purchased metal label pull), hidden magnets
and washer "attraction" closure.

Main lid panel size
suits specialty printed panel paper such as
the "Precious Memories" shown
(prints NOT included as part of the cut file).
Box measures approx. 7.5"x7.5"x2.5" .

Basic box (with accents included in the cut file)
can be decorated in ways that can give
your imagination free rein.
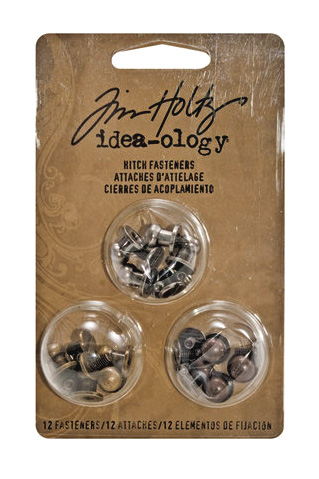
Metal drawer label pull & "foundation" metal feet
are from Tim Holtz "idea-ology" collection.
Crinkle ribbon from "3 Girl Jam".
Buttons, purchased flowers, brads,
studs and more.

And just in case you have this Graphic45
"Precious Memories" specialty paper in
your collection, coordinated cutting shapes
to prepare a text medallion for the front
with miniature 3d butterfly, plus side panels
that use additional panels are available
as free downloads from SnapDragon Snippets.

ASSEMBLY: 1. Identify and cut the shapes:
A main lid with face and front flap accents
B back flap with accent (attached at A back edge)
C under-lid build-up shapes for strength & rigidity (3-4)
D front under-flap build-up to accept magnets (3 or more)
E front plain under-flap "cover"
F front wall interior magnet placement panels (2)
G under-lid "lip" build up shapes (8)
H label pull shapes (card stock; metal used on project)
I box base J box base "cover"
K side walls - left & right
L side walls - front & back
M outer and inner side & back wall accents
N rim accents (modified slightly in final file)

If you are creating a box decorated with
"Precious Memories" paper, the following two
frames show the special decor shapes for
the medallion and side panels.
Lid medallion dimensional accent:
4 base shapes build-up
1 contrast offset shape
2 hand-trimmed precious memories shape
(use the cut shape "window" as a tracing template)

Here are side panel dimensional accents:
base build-up shapes (4)
offset face plate (pink)
face plate "template" and/or base
hand trimmed panel from print

2. Prepare the front, back and side wall shapes
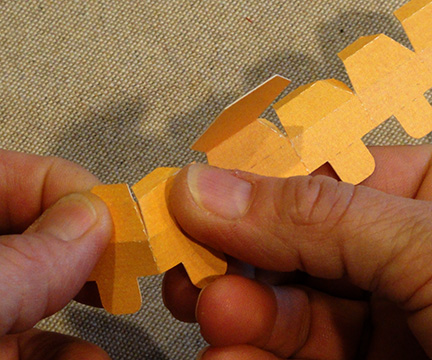
by bending back on all flange tabs, rim panels,
bottom flanges, etc.

3. Layer and attach the two accent offset shapes,
then position (centered) one unit onto the outside
wall panel for sides, front and back.
NOTE: for all layered shapes throughout the construction,
if using liquid adhesive, use a flat weight that covers
the target assembly to press until glue is completely
dry, to help avoid warping or curling.
(See image following step 4.)

4. For magnet attraction closure, layer and
attach the interior magnet position guides.

Use a flat weight such as this fabric-covered
recycled free weight bar to help keep the layered
assembly flat. Many other household objects
may serve for this process.
Use a weight during drying for all layered shapes
in this construction.

5. Identify the front wall shape, which has the
'A' letter plus the down arrow triangle cutout
in the bottom flange tab.

Position and attach the magnet positioning guide
panel behind this FRONT wall panel,
centered both top to bottom and side to side
between the side panels or panel perforation lines.
The positioning guide panel is designed to hold
.75" ceramic disc magnets.
Another alternative is rare earth magnet discs
which are super strong, smaller in size,
such as those shown here.

6. Position and attach the magnets
within the guide cutouts using strong glue
such as the hot melt glue shown here.

7. Begin with the front wall assembly. Identify
the front edge of the box base shape by
locating the 'F' that indicates front.
Position the wall so that the interior wall face
(tabs connected to this face)
is oriented toward the center of the base panel.
(Outer wall with accent panels will eventually
bend over and wrap around to be on the outside.)
Insert the bottom wall tabs into the corresponding
slots. Then . . .

. . . bend the tabs toward the center and
glue in place.
8. Repeat for the back wall, which also contains
the 'A' identification.

9. Repeat the process for the side walls:
position and slide the bottom tabs into slots,
then bend and glue tabs to the backside of base.

10. Join the side and front walls at the interior corners:
Bend walls perpendicular to base, then insert
the side wall end tab flanges through
corresponding slot on front (or back) wall.

11. Bend the flange tab toward the outside
and glue in place on the backside of
front (or back) wall.
Repeat for all four corners.

12. Beginning with FRONT, then BACK walls,
bend the outer portion of the wall to the outside
of the assembly to wrap the bottom flange tab
around the base panel, and glue in place.
NOTE: take care to make sure that the base edge
is tucked snugly into the flange angle,
and remains there during gluing until secure.

13. Repeat the process with the side walls,
wrapping the miter rim edge over the corresponding
rim of the front and back walls (apply dab of glue
under the miter edge if possible) . . .

. . . then tuck the side flange tab under the side wall
edge and glue in place, then complete the attachment
of the bottom flange.

14. Position and attach the bottom cover
to conceal the wall assembly.

15. Position and attach the rim accents.
NOTE that two of these shapes were modified
in the final file to have squared ends.
Position and attach the squared-end strips first,
then position and attach the miter-cut end strips
which will overlap the square ends of prev. strips.

16. Prepare the back flap by bending back on
the flange tab.
17. Position and attach the offset accent shape
on the back flap, also the front flap and
main panel.
(If using a specialty print panel, use the included
accent panel as a guide or template to measure
and trim the print panel to approx. 7.25" x 7.25".)

18. Position and attach back flap at the back/top edge
of the main lid panel, overlapping the main panel
edge over the flange tab.

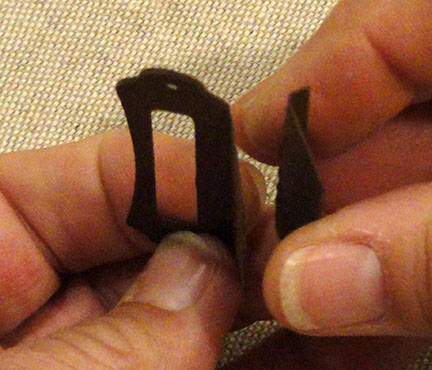
19. If using the card stock label pull,
assemble it by layering the back frame shapes, then . . .

. . . layering the main frame shape
(bottom pull section bent forward)
over that assembly and attaching in place.
Finally, bend the bottom reinforcement shape on
the perforation line, then attach on the bottom
of the pull (attach only the "pull" portion; back tab
remains unattached, to be attached to main panel).
20. Position and attach the label pull over
the front flap, aligning punch holes,
gluing the area around holes, as well as
the bottom back tab.
OR . . .

. . . position and attach purchased label pull.
This project uses the label pull shown here:

This is the completed lid assembly
to this point.

21. Position and layer two under-lid "lip" shapes,
with 4 shapes in each, taking care to align
cut edges as precisely as possible. Use a weight
to keep flat and un-warped during glue-drying.

22. Identify the corner guide marks on the underside
of the under-lid build-up panels.
Layer and attach the panels into one unit,
taking care to align the outer edges precisely.

23. Position and glue the lip build-up units on
the underside with corners positioned precisely
at the guide marks on each side.
(NOTE these 'lip' shapes will help the lid
fit squarely into place between the side walls
as it closes into position.)

24. Determine how many under-flap build-up shapes
will be needed for the metal washers (up to .7 diam size)
being used for the magnet attraction closure
by positioning one inside the hole cutout, then
adding additional shapes as needed until
the top paper surface is even with or slightly above
the top surface of the washer (3 is often enough).

Layer and attach the shapes from above, then . . .

. . . position and attach the build-up on the backside
of the lid front flap, taking care to line up the short
side and bottom shaped edges.
(NOTE the top edge will be set back slightly
to permit the flap from wrapping downward.)

25. Position and glue the washers in place.

26. Position and attach the plain under-flap shape.

27. Position the flap unit at the back of
the box assembly, center the back flap extending
down the back exterior wall, with the flap-to-lid panel
crease perforation at the rim edge. Check for fit
so that the lid will close, and glue in place with
sturdy, good hold glue.

PRECIOUS MEMORIES PAPER DECORATION
DETAILS
28. Use the "Precious Memories" panel outline
template to position the "window" over the print
as shown, adjust so that the offset margin around
print is even and acceptable, then trace with pencil.
Cut out carefully by hand, preserving the surrounding
print elements as much as possible.

29. Cut out the other shapes.
Suggested: A) build up shapes (4-5);
B) top shape in contrast so that the edge margin
will show, and C) cut out traced print panel
30. Layer the shapes, lining up matching edges
of the build up exactly, then attach top two shapes.

31. Add top panel exactly over same portion
of the lid print panel.

32. Prepare the side panels using other left-over
portions of the "Precious Memories" print.
Here, the side panel shape is positioned
over the corner blue on white line floral panel . . .

. . . and traced, then trimmed, straight cutting
the inner edge beyond the dashed guidelines
on the template/base panel.
Position and attach the trimmed portions
on the ends of the base shape . . .

. . . then position and attach over the contrast
offset panel.

32. Trim a selected panel from the print sheet,
build up with layered matching shapes, then
position and glue, centered at the center of
the side panel.

33. Position and attach purchased metal feet.

34. Add fabric or paper flowers, ribbon bows,
button(s), etc., as desired
to achieve the finished project
to match your creative vision.