Miniaturized replica flat-bottom canoe boat is simply constructed
with three hull shapes plus overlay side panels,
rim trim and offset lower side accents.
Optional interior “seat” can provide side-to-side reinforcement.
Dimensional oar accent (with 1/8" wood dowel inside)
can be added for realism.
Consider adding the oval tag from “Tags Pair for Dad” (separate design)
to create a unique container gift for Father’s Day or birthday,
then fill with a measure of Dad’s favorite loose candy.
Canoe measures approx. 8” long, 2.25” wide at center bottom
x 3.125” tall at rim tip.
ASSEMBLY:
1. For the canoe, identify and cut the shapes:
A canoe bottom panel
B base side #1 panel
C & E side overlay panel
D base side #2 panel
F side rims (2) G offset overlay side panels (2)
H optional seat base
(not shown: seat overlays for thickness [3])
I oar/handle main shape (3 for thickness)
J blade overlay (2) K blade top layer with cutout
L blade backside top layer without cutout
M triangle tube for handle
N handle wrap-over bracket
(Treat Topper Assembly begins at Step 25)
2. For the treat bag topper, identify and cut the shapes:O topper base connected front & back
P arch base and offset top layers
Q grab the bait word cuts with
positioning guide cut to match top arch layer
R fish base, body, head
S alternative 'Celebrate!' welded word
3. Prepare the canoe base by adding back curl to the ends where they narrow to point.
4. bend the narrow tabs back all along the edge.
5. Add a little back curl to the ends of the hull shapes.
6. Bend the hull end tabs back on the side panel.
7. Identify the positioning guide mark dash cuts along the edges of the base shape and the lower
edges of the base side panels.
8. Position the base side #1 panel and bottom panel with centers matched up where the hole-punches
can overlap (with side edge under the tabs of
base panel), then . . .
. . . position and glue together. Hold until secure.
9. Continue to push the side panel plain edge into the tab/bottom hull bend as the bottom panel is
shaped to match side panel edge - glue and attach
the tabs to the face of side panel.
The guide mark hash cuts should match.
Continue to position, shape and join until the final tabs are joined at the tip.
To help apply pressure where the tabs need to grab
and join, invert the assembly on a flat surface
and press fingertips around the seam.
10. Repeat for the second half of the same side of canoe.
11. Repeat Step 12 for the second base side panel.12. Push the two side panels together at upper half of curve, plain edge under the tabs, then bend tabs
over the edge and glue in place.
NOTE if there is any "extra" of either side panel
at the tip, carefully trim even and taper to rim edge.
13. Assemble the two decorative side panel overlays by positioning and attaching the rim piece with outer
edges even with full-size side panel.
Then position the lower overlay with upper edge abutted to trim lower edge, and attach in place.
While liquid adhesive is still pliable, add a little back curl to end portions.
14. Position the first dec overlay assembly over the first canoe base side, align outer edges
all around, and attach in place.
Repeat for the second side.
NOTE it may be best to use quick-grab strong adhesive
to attach sides. Apply fingertip pressure along
front and back edges where sides come together.
15. Prepare the optional seat strip by bending in a 'C' shape as shown, with bottom tabs
bent inward.
16. Layer the seat shapes and glue into a stack. Position on top of the seat strip between perforation lines and with side curved edges aligned,
and glue in place.
Press with a heavy flat weight until dry.
17. Apply glue to the bottom of tabs, and to side panels then slip into interior at center, or . . .
. . . to one side of center. Apply pressure to join
sides of seat to inner sides of canoe walls.
18. Layer the oar/handle shapes and glue into a stack.
Position and attach the blade shapes at frontand back of assembly with edges aligned.
Position and attach the colored blade with cutout onto the front and whole
colored blade without cutout onto
the back.
Press the oar assembly flat on a flat surface using a heavy flat object such as this
muslin-covered free weight or a heavy book
until completely dried, a few hours or
overnight.
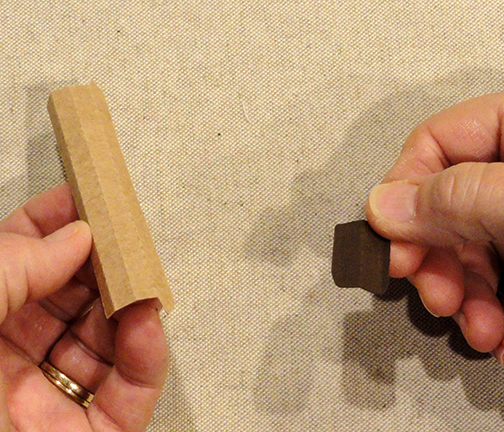
19. Prepare the triangle post wrap shape by bending back on the long perforation lines.
Prepare the bracket shape by bending back
along the center perforation (crest) and forward
at edge tabs.
20. Form the strip into a tube, with long side flange tucked under the opposite plain side edge
and glue in place.
NOTE that it may be helpful to insert the 1/8" dowel into the tube to provide a "press-against" surface
while joining the seam.
It will also be helpful to place the seam face flat on work surface and press down all along
to help secure the seam.
21. Push the dowel so that one cut end is even with the tube end, then mark the opposite end of tube
length onto the dowel. Cut to side and sand end
flat if necessary.
Re-insert dowel. Bend triangle ends down into place and glue to dowel ends.
22. Position the triangle tube/post onto the front of the oar with downward end fit into the cutout,
and end of tube at end of cutout, and glue in place
with post centered up the handle portion.
23. Position the bracket over the post with the crest angle of bracket snug over the crest over the peak bend
of the post, bottom ends of post the bracket even,
and glue side tabs to blade where they touch.
24. Determine preferred position of oar on side of canoe assembly, taking care that bottom of oar does NOT
extend beyond bottom of canoe. Use quick-grab glue such
as Fabri-Tack to attach center of oar handle to canoe side.
TREAT TOPPER ASSEMBLY 25. Prepare the topper base by bending along
center perforations, allowing curve extension to
stay flat as shown.
26. Assemble the topper front decorations:
A) position and attach center arch onto arch base; B) position and attach separate welded words onto
the positioning guide (which is cut match the
background against which it will be positioned);
C) position and attach head and body overlays onto
the whole fish base. Add painted details along
side of fish as desired.
D) center and attach the words arch onto the arch.
27. Position and attach the arch onto topper base, with top curve edge even with the cut curve of base front,
and centered from side to side.
28. Position and attach the fish below, or
the alternative 'Celebrate' word below.
29. Fill cello bag top as desired, then wrap topper over and staple in place.
Here is the canoe project with the treat bag with