
Change up the Ornament Tree
(Egg ornaments or Star ornaments) by substituting
the layered Sunburst Finial (with modified arm in cut file)
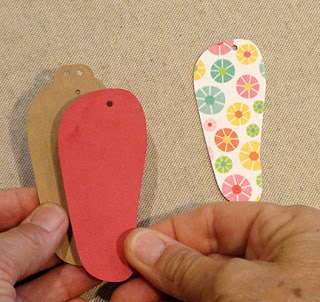
and four versions of summer flip flop ornaments:
bow, layered flower, simple (offset) and layered star.
Left and right sandals are included in each separate file,
so you can make pairs, some left and some right,

or prepare a double ornament for each
of the twelve tree hanging positions.
Use the Ornament Tree file (either Stars Ornament Tree
or Egg Ornament Tree) and follow the tutorial
for that project (click here).
Then use some brightly patterned papers
to make the flipflops extra fun.
Flipflops measure approx. 3.125" (plus hanger top) x 1.5" wide.
ASSEMBLY: 1. Identify and cut the shapes
for the sunburst finial that can be added
to the top of the Egg Ornament Tree.:
A sunburst base (2)
B modified back arm for tree (with alignment center hole)
C pole top hexagon
D sunburst accent base
E & F sun centers
G sunburst rays for contrast

 3. Position and attach the assembled sunburst
over the base shape with edges offset as shown.
4. Position (centered) behind the modified arm shape
with punch holes aligned . . .


 Here is what the tree looks like with
sunburst finial in place.


 11. For the "pair" version, repeat the layering
for the base shapes (no punch holes for twine),
accent shape and offset contrast shape.
 12. Optional: Score the ends of strap shape a scant 1/8"
in from end, then . . .


 14. Position the strap over the flipflop assembly
with punch holes aligned, and attach the center
tip in place.


 18. Curl the side loops to position tabs over
the center punch hole and glue in place.
 . . . then wrap knot shape over center, and end tab
around opposite end, and glue in place.

 20. For other ornaments, position and attach:
two stars and tiny scallop, two flowers, etc.

for the sunburst finial that can be added
to the top of the Egg Ornament Tree.:
A sunburst base (2)
B modified back arm for tree (with alignment center hole)
C pole top hexagon
D sunburst accent base
E & F sun centers
G sunburst rays for contrast

2. Layer the centers, smallest over larger,
then position and attach at sunburst center,
aligning cut edges and punch hole.
Also position and attach contrast ray shapes.

over the base shape with edges offset as shown.
4. Position (centered) behind the modified arm shape
with punch holes aligned . . .

. . . and base edges aligned,
and attach in place.

5. Position and attach the tree's top arm built-up shape
over the top of the pole, center marks of arm
lined up with post crease ridges,
bottom of arm shape aligned at pole's alignment dash.

6. Position and attach the top back bracket strip
as instructed in the tree display tutorial . . .

. . . and position and attach the hexagon
cap on top of the pole.

sunburst finial in place.

Following are basic assembly steps
for the flipflop ornaments.
7. For the single flip flop, either left or right,
cut 3 base shapes (includes top punch holes
for hanging twine), accent base shape,
offset accent shape (this shape is included
in the "Simple" flip flop design file,
but is interchangeable with the other designs),
strap.
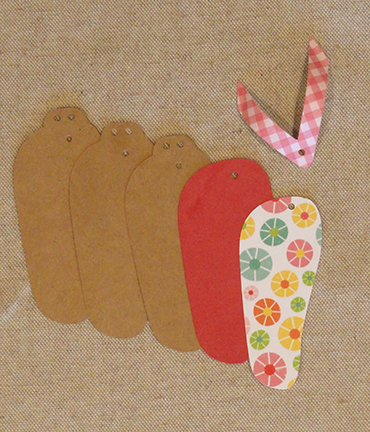
8. To prepare the "left & right pair" version,
cut the shapes listed above (shown left), plus also
cut the left accent shape (no top punch holes) to match
the base paper of the left sandal (kraft brown in this sample),
accent shape and offset bases.

9. Position and attach the base shapes together
with all edges lined up as precisely as possible
to prepare base build up.
10. Position and attach the accent base
with corresponding cut edges lined up,
then position and attach the offset interior shape,
taking care to line up the strap punch holes of all.

for the base shapes (no punch holes for twine),
accent shape and offset contrast shape.

in from end, then . . .

. . . bend forward slightly to provide
a gluing surface.

13. Add some downward curl to the strap ends
using a rod-style tool such as this spatula.

Also add a little upward curl at the center point.

with punch holes aligned, and attach the center
tip in place.

Also position and attach the ends
at the edge of the flipflop shape.

15. Position and attach a contrast
regular size brad at punch hole.

16. For the "pair" ornament, position
the left (or right as your design suggests)
"no holes" shape under-lapped and tipped
as desired for best presentation.
Glue the overlapping edges.

Here is the left single, and "left" pair ornaments.

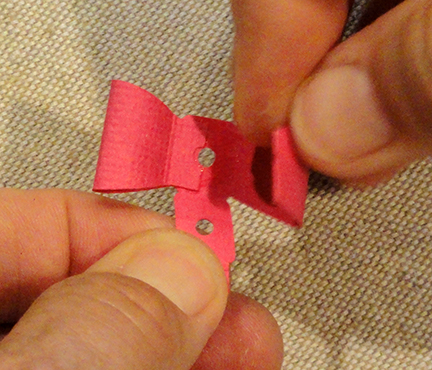
17. To prepare the dimensional bow, bend side tabs
back, also center knot wrap shapes and tab, then . . .

. . . add some downward curl at the center
of the loop portions of shape.

the center punch hole and glue in place.
around opposite end, and glue in place.

19. Position the bow over the strap
and glue in place, then attach decorative brad.

two stars and tiny scallop, two flowers, etc.

No comments:
Post a Comment