
to create an
"echo" heart,
attach to reinforced hanger center
strip.
Tie a ribbon bow and loop a hanging string
to provide fun and unique
decoration for
Valentine's Day or Christmas.
Measures approx. 4.75" wide x
5" tall x 1" deep.
ASSEMBLY: 1. Identify and cut the shapes:
NOTE this project will work with card stock
that has a single or double printed side(s)
(providing the backside is acceptable) or
using printed paper weight (65 lb or less)
where a front and back for each strip is cut,
which is what this sample project has used.
Large strips: front & back for each left, right
Middle strips: two pair as for large
Short: two pair as for large
Center front & back face strips
Center reinforcement strips (2-3) (cut from
card stock or heavy card stock)

 3. Identify the bottom end of each
strip length as the rounded corner end.


 5. Prepare the center "stem" strips by
layering the reinforcing layers together . . .


 Also identify the dash guide marks on the
long strips that show the glue-to level.

 . . . then position that end against the stem,
aligning punch circles, and making sure
side edges match up.


 11. Apply decorative nail heads over the
guide mark circles at bottom and at center,
as desired.


 . . . then thread knot end through loop.

NOTE this project will work with card stock
that has a single or double printed side(s)
(providing the backside is acceptable) or
using printed paper weight (65 lb or less)
where a front and back for each strip is cut,
which is what this sample project has used.
Large strips: front & back for each left, right
Middle strips: two pair as for large
Short: two pair as for large
Center front & back face strips
Center reinforcement strips (2-3) (cut from
card stock or heavy card stock)

2. If using lighter paper, (liquid) glue the front
and back shapes together, for each
of the strip length pairs, taking care
that edges and punch holes line up
as accurately as possible.

strip length as the rounded corner end.

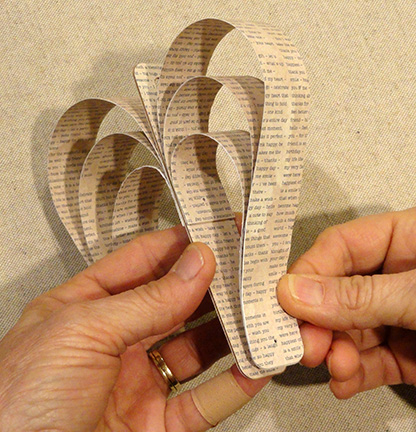
4. Before the glue dries completely (if layering),
or as this step in the assembly, add
some curl to the top half of each strip by
running strip over a rod tool (such as this pen shaft)
while applying finger or thumb pressure.

Here is the completed curled strip.

layering the reinforcing layers together . . .

. . . then attaching the face strips on
each side.
While the gluing cures place a flat weight
on top to help flatten and avoid warping
or curling.

6. Prepare a heart layout with the three
strip lengths on each side, center stem strip
in the middle.

7. Assembly each of 2 heart arch halves by gluing
the bottom ends of the sequence together,
matching up the bottom guide mark punch holes.
NOTE: apply glue at end and upward only
to barely above the punch hole on each strip.

Here is one arch half with bottom ends glued.

8. Bring the top ends together, aligning
the edges and punch holes, and glue
together as for bottom ends.
Complete this step for both arches.

9. Identify the center punch guide mark
on the center stem.

long strips that show the glue-to level.

Apply glue to the inside/underside surface
of the long strip of the first arch assembly
front end to the guide marks ONLY . . .

aligning punch circles, and making sure
side edges match up.

Repeat for the second arch on opposite side
of stem, then apply finger pressure until secure.

10. Curve each arch bottom end down into
position, then attach each in place, lining up
side edges and punch holes.
Apply finger pressure until both arch bottom ends
are secure. OR, use clips to hold in place.

guide mark circles at bottom and at center,
as desired.

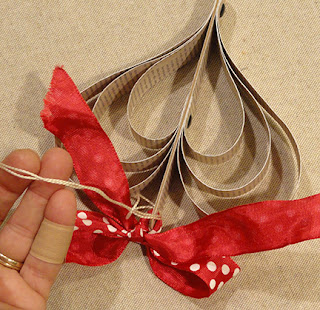
12. Tie a length of ribbon (18" approx.)
through the stem's top hole.

To hang, create a loop of twine with tied ends,
and loop through the end hole . . .


Here is the completed Heart Echo ornament.

No comments:
Post a Comment