
Customize this tall, light up cottage to be
spooky, wintry,
spring-like or patriotic, with lots of scope in
a myriad of
details and style points. Hull
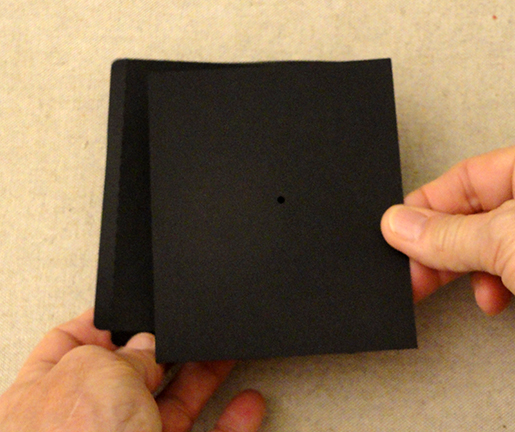
two joined shapes which include roof base.
Attach house to the
short platform base, or use
the optional bottom insert to make it free-standing.
Dimensional details include thickened attached roof and
two side gables, all with
layered ‘shake’ shingles.
A separate chimney structure with recessed top has
contrast brick mortar overlays. House front and side panels
have imitation
‘coins’ corner stone look, with door and
window cutouts and grid.

Opaque liners behind window and
door openings allow 1.5” diam. base LED
tea light candles inside to shine through.
Access candles through back panel trapdoors.
Make it spooky by adding on separate cut file designs
of Ghost Shapes Trio Layered, or
Tree Spooky Layered Tall.

House measures approx. 12.25” tall
x 3.75” wide x 4.5” deep.
Platform measures approx. 5.75” x 6.5”x .375”.
ASSEMBLY: 1. Identify and cut the shapes:
A main hull front/side B main hull back/side
C front overlay D & H side overlays
E back overlay
F & G overlay excess shapes with tab trap doors
I - L window grids with opaque window/door liners
M window shutters with contrast underlays (4 ea.)
N gable structure (2)

O roof base P roof build up panels (2 sets of 4 pcs)
Q roof shake strips (2 sets)
NOT SHOWN: roof ridge strip
R gable roof base (2) with shakes (2 sets
of 3 pieces left, 3 pieces right)
S hull interior roof triangle support
T chimney U brick mortar overlays (2 ea of 2)
V chimney top recess W chimney cap stones (4)

X platform upper (lid) Y platform base
Z collar strip (2; modified in final cut file)
AA interior tealight platform and reinforcement
BB tealight cup (2)
CC side fence with build up (2 sets)
DD front/back fence sections with build up
(2 sets left & right)

for the main hull and also the two gables:
these can all fit onto one 12x12 sheet of card stock
if that is your desired coloration.

2. Prepare for later assembly by first identifying
those shapes that will include layering for build up
thickness and strength, and assembling those
(fence long sections, roof build up panels, interior platform;
NOTE for short fence sections, first trim away the duplicate,
build-up layers of the tabs, leaving only the face paper tabs).
NOTE for short fence sections, first trim away the duplicate,
build-up layers of the tabs, leaving only the face paper tabs).
A. here the long fence section is layered with face shape
and two bottom layers, glued together with accurate
alignment, then . . .

. . . placed under a flat weight such as this re-purposed
fabric covered free weight and allowed to dry
for a few hours. This will help minimize warping or curling
when using liquid adhesive that will need to dry.
when using liquid adhesive that will need to dry.

B. Roof build up sides are also layered, with the top layer
being the shape that includes the top edge alignment
dash cuts indicated here.

Layer roof sections, taking care to align all cut edges
as precisely as possible, then place under a weight
until completely dry.

C. Here, the interior platform shape is first prepared
by bending back the edge flanges, then . . .

. . . the reinforcement layer is positioned and
glued in place, within the flange perforation lines.
Weight this shape and allow to dry.
4. Prepare the main hull shapes bending back
on all section and tab perforation lines.
Then position and attachthe overlay shapes with
approx. .1" edge offset, with BOTTOM EDGES aligned.
This frame shows the front/side hull;
the back/side hull is similar, except the trap door
panel attachment tabs will need to be inserted
under the overlay, so wait to attach the BACK
shape 'til those are in place, OR leave that portion
UNGLUED until the flange tabs can be placed.

5. Prepare the back trap door covers by retaining
the cutouts from the back/side overlays.
Prepare the trap doors by bending forward at the long
side tabs (for attaching) and the short finger tabs.
Position overlay shapes on top of the door shapes
and glue in place with edges matching where they can.
the cutouts from the back/side overlays.
Prepare the trap doors by bending forward at the long
side tabs (for attaching) and the short finger tabs.
Position overlay shapes on top of the door shapes
and glue in place with edges matching where they can.

6. Position the door assemblies into their openings . . .

. . . and slide the tab of the base under the overlay edge,
then attach tab to hull, and overlay to tab.
Repeat for the second door.

7. Position and attach the opaque (vellum) liners
behind the round front window and door
and the side windows.

8. On the front of the hulls, position and attach
each of the corresponding window or door grids,
lining up the inside edge of the grills with window
opening edges.

9. Position and attach each contrast liner shape
behind each shutter shape.
(This image of shutter is shown upside-down.)

10. Position and attach each shutter unit at
the side of each rectangular window, overlapping
the grid slightly, and entered top to bottom.

11. Align the two hull units side by side, overlap
the straight edge over the adjacent flange tag to
perforation line, make sure bottom edges match,
and glue this first hull seam.

12. Form the hull into a tube to align and complete
the side seam #2 in the same manner.

13. Bend the attached roof base portions back,
with the flanges bent back as shown, to align
the perforation edge with the roof angle edge,
adjust and glue the seam.
Repeat for the opposite seam on the same side.

14. Prepare the roof ridge triangle support by bending
back on all perforation lines.
NOTE that the panel with the circle hole is the BOTTOM.

15. Form the strip into a triangle, with the flange
tucked under the side panel, align edge to perf line,
and glue in place.

NOTE it may be helpful as the seam is glued
to insert something as a "press against" rigid form,
such as this skewer, or a Popsicle stick.

16. Position the triangle form inside the roof,
next to the roof side that is attached to angle,
center, and align the top straight edge of roof
with the top angle perforation line, and glue in place.

17. If you plan to have your house light up,
you will need to obtain two of these style LED
battery-powered tea lights. The 1.5" base will fit
in the candle cups included in this design file.
IF YOU ARE NOT USING TEA LIGHTS,
you can skip forward to step ___.

18. Prepare the two candle cup shaped by
bending back on all perforation lines as shown,
except bend the "top" set of tabs in this shot forward.

19. Bend the base octagon shape down into
the interior of the cup form, then . . .

. . . form the cup into a tube, to bring the straight side edge
to overlap the tab perf marks, opposite, and join.

20. Bend the bottom tabs inward, then push
the octagon base down into position . . .

. . . and glue in place to tabs. Assist the attachment
process by pressing from the inside with fingertip.
Complete two cups.

21. Position one cup centered on the interior platform
and glue in place securely.
(NOTE that the center punch holes of cup and panel
will line up with centered.) Set aside the second cup
for positioning and attaching on the bottom platform,
in step 52.
Later, the LED tea light will be placed in the cup as shown.

22. Bend the side flanges down, then insert the platform
through the open room into the interior space . . .

. . . and fit it down into the level just below the circle
window, as shown, making sure that it is level
all around. Glue flanges in place to the walls.

23. Bend the second roof base into position
to align the angled edges and top edges
with corresponding flanges or triangle support,
and glue all in place.

24. Prepare the gable shapes by bending back on
all perforation lines, except edge flanges which
are bent forward. Bend the "top" edge flange back
(where fingertips are in this image).

25. Position the opaque panel behind the gable
opening, and glue in place.

26. Position the window grid trim over the front
of the window opening, align inner edge with
window opening, and glue in place.

27. Bend the gable into its form to bring the top
straight edge and flange perf lines together,
and join the top ridge seam.

28. Position and glue the front angled edges
to the front flange tabs, aligning straight edges
with flange perf lines.
Complete two gable units.

29. Prepare and attach the main roof "shake" rows:
a. position the bottom row over the roof build up
with the bottom corners and side edges aligned,
and glue in place.

Also align the bottom of the gable opening as shown.

b. position the second strip with top straight edges
aligned at the dash guide marks on the roof top layer,
and also with the gable "window" cut out edges aligned,
and glue in place.

c. position each of the third row side portions in
similar manner, aligning top edges at guide marks,
with inner edges aligned with gable window edges.
d. position and attach the fourth row in similar manner.

e. position and attach fifth row as with previous rows.
f. position and attach final top row with top edges
and corners aligned.
Complete two roof/shake units.

30. Position the completed build up roof/shakes unit
on one half of the connected roof base, aligning
side and bottom edges, and taking care that
gable openings align as exactly as possible.
31. Repeat for the second roof/shakes unit on
the opposite side of the roof base.

32. Position the first gable unit so that it will
fit from the backside of the roof . . .

. . . and be pushed through the opening, with
the edges flanges perforation lines seating snugly
at the opening edges.
Glue the flanges each to the roof backside.
Complete the attachment of second gable unit.

33. NOTE that the back portion of the roof assembly
does NOT have a few shake division cuts.
This is the area where the chimney will be attached
and the shake details would be hidden.
Position the roof assembly over the hull roof,
with the "blank" shakes portion toward the BACK
of the house (where trap door openings are).
Center it from front to back so that the same amount
of overhang is at the front and back of the hull roof,
and glue in place.

34. Prepare the roof ridge strip by bending
back on the center perforation line.
Position it across the top of the roof assembly,
center front to back (end will align with roof)
and glue securely in place.

35. Prepare the roof units for the gables in similar
manner to the main hull roof shakes.
Bend the roof base back at the middle perforation.
a. position the bottom shake even with the lower
edge of the roof line.
b. position the middle shake with the top edge
at the perforation line.

c. position the top shake even with the perforation
line and with the middle shake top edge.

d. repeat for the opposite side.
Here is the completed gable roof.
Complete two units.

36. Position and attach a gable roof unit over
the gable structure, with ridge angles aligned,
and with the angled edge as snugly fit into
the main roof as possible.
Repeat for both gables.

37. Prepare the chimney structure by bending back
on all section lines, and all tabs or flanges.

38. Position and attach each of the brick "mortar"
overlay shapes within the matched shape section,
with bottom straight edges aligned, and sides
with the tiniest of offsets. NOTE that there will be
a space at the top for the cap stone accent shapes.

39. Position and attach the capstone shapes
above the mortar accent shapes, at the perf lines.

40. Form the chimney into a tube to align and
complete the side seam.

41. Bend the top tabs inward, bend the square top
down into position to align edges with the tab
perforation lines, and glue in place.

42. Prepare the top recess "tray" shape by bending
the top tabs forward, other tabs and section lines
back.

43. Bend the square bottom panel forward down
below the bottom tabs, then . . .

. . . form the shape into a tube to complete
the side seam.

44. Bend the bottom flanges inward, push
the bottom square back to perpendicular,
and glue in place to tabs.

45. Insert the tray tabs end first into the bottom
opening of the chimney and through the tube until
the recess square fits under the square opening
at the top. Adjust, then secure in place as tabs
attach around the square opening.

46. Bend all the bottom tabs inward, apply glue,
then position on the back top of the roof ridge,
approx. 1/2" in from back of roof
(even with the back wall of the hull),
and hold firmly in place until secure.
NOTE: quick dry glue such as Fabri-tack
is a good choice here.

47. Prepare the upper platform shape by bending
the side walls down, end tabs inward,
opening tabs downward.
Prepare the bottom platform in similar manner,
bending walls up, corner tabs back.
Join the corner seams of each to form shallow trays.

49. Prepare the collar shape that will help support
the platform, and also provide a glue-to surface
for the bottom of the hull.
NOTE: the collar shapes were re-designed after
the prototype was constructed to have long
flange tabs on the bottom to attach to the bottom
platform, and also an indent that is the FRONT.
Bend back at the center and tab perforation lines.
Join end to end, and also . . .

. . . join the second seam to form a ring.

50. Fit the collar into the platform top shape
center opening (this will be snugly fit) . . .

. . . and push down so that when on a flat surface
the bottom of the collar (as well as the bottom of the flanges
in the opening) reach the surface.

Glue in place. It may be helpful to turn the assembly
bottoms-up to apply fingertip pressure along the flanges.

51. Insert the bottom platform up into the bottom
of the upper platform to close this shallow "box",
and glue together all around between the side walls.

52. Position and attach the LED tea light cup in
the center, on the bottom platform backside.

53. Join the hull to the platform by applying
glue to the collar outer exposed surface, then
carefully fitting the hull over the collar, orienting
so that the collar indent corresponds to front door,
and pushing down until the bottom of hull rests
on the top of the platform. Hold in place until secure.
NOTE: if using the optional bottom insert,
it should be prepared as a tray, then inserted at this point
up into the bottom of the hull, in place of the platform.

54. Bend the fence tabs back, then . . .

. . . position on the front platform at each end,
with the tabs turning the corner where they will
attach to the long side fence sections.
Bottom edges of fence sections should be even
with the platform bottom edges.
Repeat this step for the two short fence sections
at the back of the platform.

55. Position the long fence sections along the side
platform edges, with ends overlapping and joining
to the tabs, bottom edge even with platform bottom.

56. Open the trapdoors and place the lighted
tea light candles into their cups,
then close the doors.

Here is the completed house.

Use other accessories to create your own
seasonal of other holiday versions.

Make the house spooky by adding the layered
spooky tree at the back, gluing it to the
platform and fence for support.
The ghost pair can be added at the opposite side,
with the bottom "tail" pointing at the gable window,
and the "wing/arm" of the top one overlapping
and attaching at the chimney near top, as shown.

No comments:
Post a Comment