
Pierced face panel includes only the needle
holes needed
to hand-stitch a fancy uppercase initial
to hand-stitch a fancy uppercase initial
and folk-style half poinsettia.
Embroidery cross-stitches used include
straight stitch outlines, and
colonial/french knots.
Stitching chart is shown in the cut file.
Reinforcement
layers (front frame, solid back,
interior stitching buffer layer, punch hole
ring)
make this a sturdy tree decoration, swag embellishments
(spell out short
seasonal words),
or as a keepsake gift decoration.
Each tag measures approx.
3.25” x 4.65” long
from top of punch hole extension.
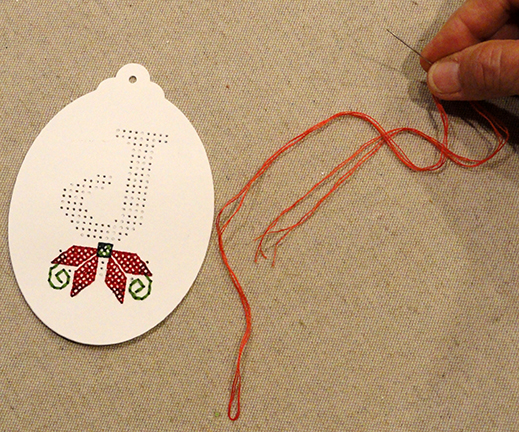
The letter 'J' ornament sample shown here
will be used to demonstrate how the half blossom
is stitched, with explanation of the cross-stitch
technique to complete this and other letters
in the set.
ASSEMBLY: 1. Identify and cut the shapes:
A hole punched stitching layer(s) - 2 for sturdiness
B stitching area "buffer" for stitching thickness
C solid accent ornament back
D accent ornament front frame
E hang hole accent reinforcement ring

2. Prepare the two layers of stitching hole panels by
pushing out any remaining cutout "chads" that would
interfere with needle insertion or litter the project.
Create a tool by bending out the end of a standard
paper clip, then pushing through each hole.
For the tinier holes at the half-cross stitches at
blossom edges, use a darning needle to avoid
enlarging the holes. Brush away any paper crumbs.

3. Apply liquid adhesive to backside of front layer,
adequately but not excessively, with particular care
at ornament edges, then layer the two shapes,
and align all outer cut edges. Also take special care
that all punch holes align as perfectly as possible.


 4. Embroidery of monogram and poinsettia motif

To assist with needle hole alignment, it may be
helpful to push the "clean out" tool paper clip end
through a number of edge hole to ensure they match,
pushing into alignment or otherwise adjusting as needed.

Immediately press the glued-up layers under a heavy, flat
weight such as this thick book (even placing something
else heavy on top of book) and leave in place until
the layers are completely dried (up to several hours)
to help prevent warping or curling, and help the panel
to remain flat.

follows Step 3 above. Skip forward to
Step 9 to review stitching instructions. Then return
to this step to complete ornament assembly.
5. Position the "buffer" layer behind the stitched panel . . .


of the stitching layers assembly, aligning
edges precisely.
 7. Position and attach the whole back panel to

backside of the assembly.
 8. Position and attach the accent reinforcement ring

at hang hole to front (and optionally to back as desired).
Press the complete glued-up assembly under a heavy
flat weight until completely dry.


10. Below are the DMC floss colors used for the sample.

EMBROIDERY STITCHING INSTRUCTIONS
9. Study this diagram for the poinsettia half blossom,
tendrils and "berries" to understand where the various
stitch styles will be used. Particularly NOTE that the diamond
shaped "petals" have half cross-stitches which are composed
of a regular 'long' diagonal stitch and a short 'half-diagonal'
stitch, using a tinier mid punch hole in the punched panel.

Select similar colors as desired for your own project.

Red 498 & burgundy red 814 for poinsettia petals
Bright red 350 for colonial knot berries
Bright green 905 & dark green 895 for flower center,
905 for tendrils
11. Cut a 24-30" length of 6-strand floss, then separate
11. Cut a 24-30" length of 6-strand floss, then separate
one strand . . .

(or alternately the loop) through eye of a blunt tip darning
needle size 24/26 (recommended). Pull the two ends
part-way down - the loop will remain as the long end
and will be used to "tie on".


 14. Locate the top left hole of the designated first stitch,

12. Study this diagram to understand how to form
the cross stitches for uniform appearance
and tension.
NOTE that the RIGHT SLANT stitches are generally
placed across the row first, followed by the LEFT SLANT
stitches placed coming back across the row.

13. Since the poinsettia is the most involved
portion of this design, instructions will be presented
first for this. Using a print out of the stitching diagram, or
referring to it on screen, choose a place to begin
the first stitch.
For these instructions, the stitching will begin at
the left top diamond 'petal', inner-most point.
This is a half cross-stitch, with the RIGHT SLANT
being the first stitch completed.

and insert the needle back-to-front through that hole.
Pull the needle and thread partially through, leaving
a 3-4 inch long "tail" at the loop end, before . . .
 . . . moving the needle diagonally downward,

passing up the smaller half-stitch entry hole to
insert through the bottom right hole that defines
the first stitch's bottom.
Push the needle and thread through to backside . . .
 . . . then insert through the loop and . . .


. . . pull the thread
taut against the panel backside.
This process constitutes the tie-on process.

directly above the end of previous stitch to begin
the next RIGHT SLANT stitch. Follow by moving
diagonally to insert at the bottom of the second stitch.

the RIGHT SLANTS of the 5 top row stitches.
 17. Begin the return across the row moving

to the left, with the first LEFT SLANT stitch being
made as a half cross-stitch, including
the tiny hole at right end of row - where needle
is being inserted in this shot.
 Then continue toward left to complete the full

LEFT SLANT stitches across the row until . . .
 . . . the final stitch that is another shorter,

half cross-stitch
 18. Begin the second row below the first row,

inserting needle in same hole that completed
the first RIGHT SLANT of previous row.
 Work second row in similar manner to first,

EXCEPT that the final half cross-stitch is worked
with the darker burgundy petal tip color, so it remains
unstitched until that color is tied-on a little later.
 19. Follow the chart to complete the third row,

leaving the last full and half cross-stitch holes
open for darker floss. Then move down to begin
the lower right diamond petal.

 . . . needle and thread drawn through completely,

When the current thread on needle has been used up,
or the end of a stitching run has been completed,
the needle will be pushed through to backside in
the regular stitching progression, then the needle will
be passed under several adjacent stitches on backside . . .

then trimmed close to the panel backside.
NOTE: when thread needs to be continued onto
another area, the thread can be passed along backside
under selected stitches in similar manner, to keep
backside neat, and avoid long loose thread lengths
(referred to as "floating").


20. Follow the tie-on procedure to attach darker tip
floss and complete the tip stitches.
NOTE: All diamond petals can be completed
before completing tips, if desired.

Here the right side diamond petals with tips
have been completed.
(Continue to complete the left side.)

21. Tie on bright green floss to complete the three
whole cross-stitches for the blossom center 'square',
then "float" the thread to the end of nearest tendril.
Instead of cross-stitches, tendrils are double straight
stitched. This means that needle will be inserted
up and down through stitching holes, as regular or
back-stitches . . .

. . . to complete the tendril design once, then . . .

. . . the same tendril holes are re-stitched so that
four strands of floss create thicker appearance.
22. Either "float" existing floss, or tie off and tie-on
again with new length of floss to complete
the other tendril.

23. Tie on darker green floss, and complete the upper
corner dark whole cross-stitch of blossom center.
Then . . .

. . . complete straight (forward or back-stitches)
to stitch the 8 outlining stitches around
the center 'square'. Tie off.

24. Tie on the main red floss and complete
similar straight outlining stitches along the blossoms
ONLY along the edges where the half cross-stitches
DO NOT already provide the 'outlining' effect.
That is, the horizontal edges of upper diamonds,
and the vertical edges of the lower diamonds.

25. Prepare the complete the colonial (or french ) knot
'berries' by threading TWO doubled lengths of floss
onto the needle.
Attach the berries floss by passing needle under 2-3
stitches on backside (near first berry location),
pulling thread nearly even with
panel surface, then . . .

. . . moving back behind where thread exits
passed-under stitches to slide under last passed-under
stitch again to anchor the floss.

26. Study this diagram of how the colonial knot is
formed, creating a Figure 8 around needle shank and tip
with the floss near panel surface, inserting needle tip
into same hole, pulling floss tight next to panel surface as
needle is pulled through to backside, with floss being
pulled through in controlled manner to form
uniform knot remaining on surface.
TAKE CARE not to pull to hard.

27. Insert needle into first berry hole, then . . .

. . . follow the diagram to complete the first colonial knot,
beginning the bottom of Figure 8 with floss around
needle shank . . .

. . . swinging floss around, over needle to form
the top part of Figure 8, pull tight around needle
while slipping the needle tip into same hole,
holding the floss tight while needle is pushed through . . .

. . . to backside and pull floss through to form knot.
28. Float the needle and floss to next berry position
to complete remaining berries, then tie off neatly on back.

29. Complete the monogram letter with all whole
cross-stitches, beginning at bottom of layout,
working RIGHT SLANT stitches across rows,
followed by . . .

. . . LEFT SLANT stitches, changing thread color
according to stitching chart.

30. Return to the ornament assembly steps
shown at the beginning of this post to complete
ornament, then attach a decorative hook or
ribbon loop to finish the ornament.

No comments:
Post a Comment