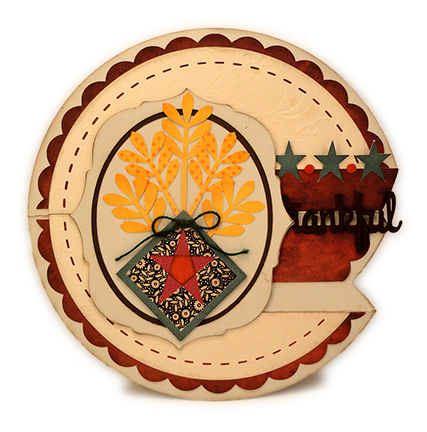
Round-edged rocker-style cards, each available
as separate design files, have either
right side
bends that create a pair of “steps”
on one side, or single steps on both sides
for a more symmetrical look .
Scalloped doily and faux-stitched overlay
panels
add interest to base. Upper half-circle of card bends back
to form a
self stand. Double layer bracket frame panels
displays either folk art wheat stalks
with
layered quilt star hanger ornament or
pair of wheat stalk curls.
“Thankful” or "Gather" welded word cut card fronts.
Each card measures
approx. 7x7 flat.
Gather Wheat Curl design will be described first,
followed by the Thankful Quilt Block design at Step 11.
GATHER WHEAT CURL CARD
ASSEMBLY: 1. Identify and cut the shapes:
A card base B front scallop shape C front faux stitch shape
D back scallop shape E back faux stitch shape
F & G left and right side scallop and faux stitch shapes
H frame whole base I frame accent J frame front
K Gather word cut L wheat curl base silhouette
M shorter wheat curl overlay
N optional additional Gather word cuts for layering

 . . . following the diagram.
 Arrange and adjust folds so that the card is folded into
its roughly half-circle form.
Use folding tool or finger tips to ensure crisp folds,
including those beneath the top layer.


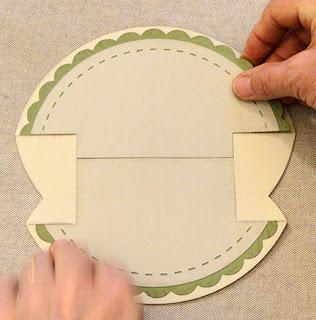 . . . and the side assemblies as shown.
NOTE that the side pieces should be snug up against
the back shapes at cut edge which will allow
folding space at the valley folds.


 . . . then adding the back whole layer behind.
Secure all layers together.


 9. Prepare the wheat curl layered shape by
positioning and attaching the shorter overlay
on top of the base silhouette, aligning cut edges.


 . . . according to the diagram as shown.
 NOTE that it is a little tricky to fold in different directions
on the same round shape, and will require a little
manipulation to allow portions not being folded to extend
away as the folds are bent.
 With folds started, force the side steps into their finished
positions . . .
 . . . and apply pressure with a folding tool or
finger tip pressure to ensure crisp folds.
Here is the "arial" view.


 15. Position and attach the side contrast shapes into
corresponding step panels, using upper cut edges
to align with panel perforation or cut edges.

 . . . position and attach to the whole frame base.
 17. Assemble the wheat stalks unit by layering
and attaching the middle unit on top of the base unit
(with square) and then the front unit . . .
 . . . using straight
edges to position and align.


 19. Position and attach the quilt square over
the square base of the wheat assembly.
 20. Thread thin twine or perle cotton thick thread
through the punch holes, and tie a knot and bow.
21. Position and attach the wheat/quilt square assembly
over the center of the frame unit.


 23. Position and attach the stars and circle punches
onto the back step edge where the accent panel
indicates with cut outs.
 24. If you have chosen to use a built-up "thankful"
word cut, layer and attach the shapes into a stack
and press under a flat weight until dry.


 . . . end 'l' does not extend beyond the side edges.
 Here is the completed card in its rocker folded shape.


followed by the Thankful Quilt Block design at Step 11.
GATHER WHEAT CURL CARD
ASSEMBLY: 1. Identify and cut the shapes:
A card base B front scallop shape C front faux stitch shape
D back scallop shape E back faux stitch shape
F & G left and right side scallop and faux stitch shapes
H frame whole base I frame accent J frame front
K Gather word cut L wheat curl base silhouette
M shorter wheat curl overlay
N optional additional Gather word cuts for layering

2. Prepare the card base by bending back at "mountain" folds
perforation lines across center portion, side back
and side front, and bending forward at
"valley" fold lines at mid sides . . .


its roughly half-circle form.
Use folding tool or finger tips to ensure crisp folds,
including those beneath the top layer.

3. Layer the contrast scallop shapes with corresponding
faux stitch shapes: front, back and sides.
Use straight edges to align layers then join.

4. Position the front layers onto the front portion
of the card base, aligning the top straight edge
at the top fold, side cut edges, and lower side
fold lines, then attach in place.

NOTE: it may be easier to accomplish this positioning
while the card base is open and flat on the work surface.

5. Repeat to position the back accent assemblies . . .

NOTE that the side pieces should be snug up against
the back shapes at cut edge which will allow
folding space at the valley folds.

This is how the card assembly will look at this point.

6. Prepare the frame assembly by layering
the front frame with the accent margin middle layer . . .

Secure all layers together.

7. Position and attach the frame assembly on card front,
centered side to side, and just high enough that
the side edges being indicated will still hide
the corner of the first step.

8. If you have chosen to use multiple layers of
the "Gather" word cut, stack, carefully align,
and glue those together at this point.
If using liquid glue, consider using a flat weight
to press during the glue-drying process.

positioning and attaching the shorter overlay
on top of the base silhouette, aligning cut edges.

10. Position and attach the wheat curl unit on top
of the frame, then position and attach the Gather
word cut on top.

Here is the completed card, in folded position.

Here card is shown in its flat position to slide into
an envelope for mailing or giving.

THANKFUL WHEAT SIDE STEP CARD
11. Prepare the card base by carefully folding along
perforation lines as shown, bending back as
"mountain" folds on the left side center fold,
at the top, bottom and center left folds.
Bend forward as "valley" folds on the remaining two lines . . .


on the same round shape, and will require a little
manipulation to allow portions not being folded to extend
away as the folds are bent.

positions . . .
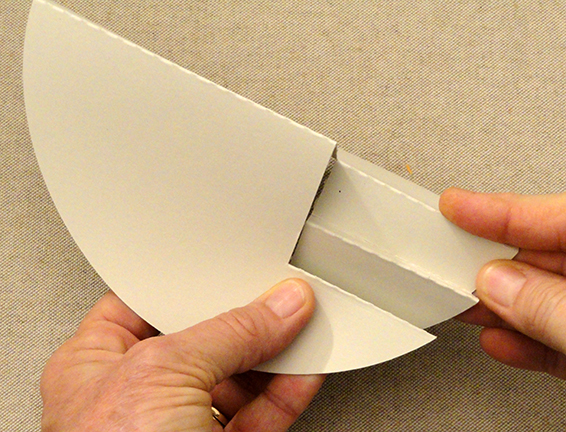
finger tip pressure to ensure crisp folds.
Here is the "arial" view.

12. Layer and attach the front and back contrast scallop
shapes with corresponding faux stitch shapes, using
straight cut edges as alignment guides

13. Position and attach the front assembly onto
the front panel of the case base, using straight
cut side edge or perforation lines to align accurately.

NOTE it may be easiest to position and attach
these assemblies as the card base is flat on work surface.
14. Position and attach the back unit in similar manner.

corresponding step panels, using upper cut edges
to align with panel perforation or cut edges.

16. Assemble the frame by layering the front frame
over the contrast margin middle layer, using
outer edges to align, then . . .


and attaching the middle unit on top of the base unit
(with square) and then the front unit . . .

edges to position and align.

18. Assemble the quilt square by layering and
attaching the star cutout shape over the base shape . . .

. . . with the frame on top. Take care to align
the hole punches of each layer.

Position and attach the pentagon shape
over the star cutout.

the square base of the wheat assembly.

through the punch holes, and tie a knot and bow.
21. Position and attach the wheat/quilt square assembly
over the center of the frame unit.

22. Position the frame assembly over the card front
with the side tip aligned at the mid fold
on the left, and . . .

. . . the lower right curved edge barely hiding
the step-to-cut corner on the right, and glue in place.

onto the back step edge where the accent panel
indicates with cut outs.

word cut, layer and attach the shapes into a stack
and press under a flat weight until dry.

25. Position the word cut onto the front step . . .

. . . aligning it so that the drop portion of the 'f'
clears the front fold and . . .

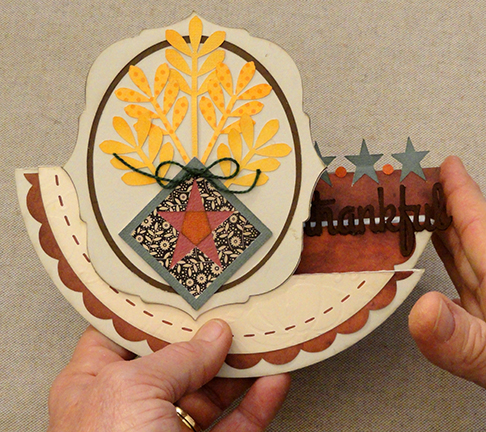

Here the card is shown in its flat position for
inserting into an envelope for sending or giving.