
Hanging decoration for St. Patrick’s Day is composed
of head/torso under which arms and legs can be attached
(either permanently or
with temp adhesive to facilitate
disassembly and storage.) All components are
assembled
of multiple shapes that are glued together and pressed
under flat
weights for sturdy thickness then fit together.

for features and clothing.
Figure measures approx. 15.5” wide x 16.2”
long
when fully assembled.
ASSEMBLY: 1. Identify and cut the foundation shapes:
A torso/head main shape (4)
B torso/head "bottom" layer with post triangle cutouts
C torso/head underneath layers (with arm & leg insert areas)
D post triangles: 4 sets of 5 each
E & F right & left arm shapes (4 each)
G & H right & left leg shapes (4 each)
NOTE: the sample was created with layered beige solid
papers from more than one paper pad, where dye lots
were obviously slightly different; when layered and
glued up, only the outside layers are visible.

components should probably follow here, but since
the layering and glue up requires possible "overnight"
multiple hours to be assembled and pressed for complete
drying, it is suggested that assembly SKIP to Step 6.
to complete those steps.
2. Select and cut the shapes for the torso/head:
vest with collar, face base, beard, eyes and brows,
nose, mustache, mouth (inner) and lower lip
not shown: pants waist/crotch semi-circle

 4. Select and cut the shapes for the arms/hands:

 Once multiple shapes are stacked and glued, press each
 9. Prepare the triangle post stacks by layering and
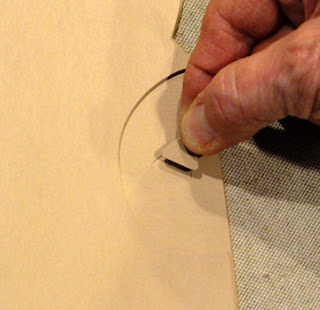 . . . here with broader view; press with weights

3. Select and cut the shapes for the hat and bowtie:
shamrock base and top shaped layer,
hat crown, band, brim and buckle,
bowtie base, bow loops and knot.

hand base (show-thru for hand contrast),
hand overlay, cuff with button, sleeve.

5. Select and cut the shapes for the legs and feet:
pants with buttons, hose/leg, bootie top, band with buckle,
bootie bottom, heel stack and show-thru underlay.

6. Layer the multiple shapes for leg and arms
and glue together, taking care to line up as precisely
as possible all cut edges and post cutout windows.

stack under a flat, heavy object such as this thick book volume
(or several), wood planks, fabric-covered re-purposed free weight
bars, etc. Leave under the weight until liquid adhesive is
completely and thoroughly dried to avoid or minimize
curling or warping that will otherwise occur.
The drying process may require several hours or over night.
NOTE: this pressing process is recommended for ALL steps
where large shapes are layered and glued together
with liquid adhesive, including stacks and accent assemblies.
 7. Repeat the stacking and gluing process for the head/torso

shapes: A) back built up layers with cutout shaping to
accept arm ends and tops of legs;

 . . . bottom layer with triangle post position cutouts.
 8. When the above A and B stacks are completed,

B) main torso/head layers and . . .


pressed and dried, position the back stack onto
the backside of the main torso/head stack
(on the post cutouts layer), attach in place
and press to allow for final thorough drying.

gluing 5 triangle cutouts into each of 4 stacks,
carefully lining up cut edges; press stacks until dry.
10. Position each stack and securely glue in place
in each of the four triangle cutouts on the torso/head
assembly, shown here in closeup, and . . .

to help secure in place.
 11. Assemble and glue together the torso/head

accent clusters:
A) position and attach beard on top of face base;
B) position lower lip shape under mouth opening,
centered, with corresponding edges aligned;
C) position and attach nose onto mustache base
then position and attach above mouth cutout;
D) position and attach collar along top edge of vest
E) position and attach eyebrows above eye cutouts
NOTE: some shapes will be saved to attach in place
once the assemblies are attached to built-up base:
eye circles; inner mouth, vest buttons

12. Assemble and glue together the hat and bowtie units:
A) layer shamrock shaped layer onto base;
B) layer hat crown with band on top aligned at
lower edge, brim aligned at lower edge over band,
buckle fit into place near center with lower edges
abutting brim;
C) bowtie base with loops shapes on top, knot
roundish shape over center where edges align.

13. Assemble the torso/head accent shapes onto
the built-up base:
A) position and attach pants semi-circle at bottom,
centered, with offset margin along curve edge;
B) position and attach vest/collar unit overlapping pants shape,
centered, with side edges of vest offset in from stack side
edges where the shaping matches; add vest buttons;

C) position and attach hat unit at top of stack,
with hang hole matched, even offset margins
around sides and top;

D) position and attach head/face unit centered, with top edge
snugly abutted under hat brim edge, beard overlapped
onto collar/vest unit;

E) position and attach bowtie unit;
F) position and attach eyes into socket cutouts,
inner mouth into mouth socket cutout;
G) position and attach shamrock onto hat.

14. Pre-assemble arms and hands units:
A) layer hands overlay over contrast base layers
(NOTE: the model cardstock base contrast layer
was hybrid-ed to conserve the contrast selected paper
by cutting a different [non-showing] cardstock and
joining the contrast with abutted ends; normally one piece)
B) position and attach cuffs snugly against hand overlay
straight edge, and add button;
C) position and attach sleeve snugly against cuff straight edge.

15. Complete the arm/hand units by centering
the unit from step 13 onto the layered arm base,
with post hole edges aligned, and even offset margin
all around, and gluing in place.

16. Pre-assemble the bootie units by layering
onto the base show-thru shape the bootie bottom,
band, bootie top shape, snugly abutting and aligning
edges at each addition; add buckles.

17. Complete leg assembly by positioning and attaching
onto the built-up stacks:
A) pant leg with adjacent straight edges aligned exactly
with corresponding straight edges of built up stack,
triangle post opening aligned, and even offset margin
at inner and outer leg edges as shown; add buttons;

B) hose shape abutted snugly along pant lower edge
with offset margins at sides;
C) bootie assembly under hose shape with
shaped edges abutted snugly, offset margins
around bootie edges;

D) heel stack snugly abutted under bootie edge.

18. Prepare to assemble the figure by positioning
arms (thumbs up) behind torso edge . . .

. . . with rounded inward end oriented to fit triangle opening
over post of torso. Other members fit similarly,
with leg straight edges snugly abutting the torso shaped
cutout edges and each other at centerline.

Legs and arms will probably NOT stay in place without
adhesive assistance. If storage of the large format is NOT
an issue, glue or permanently join the member in place.

If disassembly is desirable, use a "temp" tape adhesive
(NOT SHOWN) to keep legs and arms in place during display.

Here is the figure fully assembled.
If desired, attach a ribbon or string loop
through top hang hole, or simply insert over a wall nail.

St. Patrick's Day Greetings and Happy Hijinks!


