
All
the components you will need to create and assemble
this memorable “action”
card. Interior folded square
opens wide when the card front is lifted.

Layered
offset shapes fill top and bottom squares
(with optional round window cut out
to feature
a cameo paper motif, selected portion of photo, or message),
with
layered offset triangles on each side corner.
Front panel can be cut from multi
color print paper or
card that sets the color scheme.

Add other decorations to
the front panel
(not included with this design).
A few to consider that are
sized to fit:
“Happy Birthday Welded Words”,
“Happy Mother’s Day Hearts Word Art”,
“Thinking of You” phrase cut out from
“Tag Thinking of You Daisies Trio”
(separate design).
ASSEMBLY: 1. Identify and cut the shapes:
A card base B offset interior accent base 1
C offset interior accent base 2
D offset front panel accent
E lacy arch accent (2)
F interior pop up square with folds
G & H pop up offset square accent
with circle photo cut out (top) and
opt. solid square cut out; heart sentiment accent
I pop up offset triangle accent base and
offset accent (4 each)
J optional front panel word cut phrases:
Happy Birth Day; Happy Mother's Day;
Thinking of you (from other design cut files)

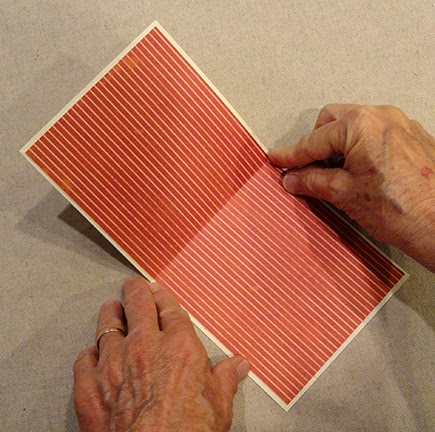
center cross fold: for main base, create a "mountain"
fold by folding back sides together
(so that 'right' side will be on outside of card);
for interior accent bases, create "valley" fold
by folding face sides together.

Carefully align offset accent base 2 on top of
accent base 1 so that perforations are exactly
aligned, and that panels are centered side to side.
Then while glue is still adjustable . . .

possible, and smooth with bone folder or equivalent.
Allow the interior panel to adjust slightly so that
the layers can lay flat.
 4. Repeat step 3 to position and attach the interior

accent base assembly onto the inside surface of
the main card base. Then folding assembly . . .
 . . . and smoothing to allow folding adjustment.

Set crease with bone folder.

contrast 'top' accent triangles, centered, onto
base triangle accents.
 6. Also prepare square accents of choice, either

the photo circle cut out accent shown here,
or the solid accent. NOTE: that if you are using . . .
 . . . a photo accent, this point in assembly is

when the photo can be positioned and trimmed
to size, then attached behind the circle cut out accent.
 7. Prepare the pop up panel by folding and creasing

the square as "mountain" fold along the diagonal
perforation line. Then . . .
 . . . folding and creasing as "valley" fold along

the squared 'north/south' and 'east/west' perforations.
 8. With the panel face toward you, and positioned with

corners top-to-bottom and side-to-side,
fold the square into its "closed" position by directing
diagonal mountain folds inward toward center . . .

shape with all folds between upper and lower squares.
Use bone folder to crease perforation lines if desired.
 9. (*See note in Step 11, below, regarding leaving

top and bottom corners unattached for
attachment of lacy arches.)
Apply adhesive strips (or glue) to backside of
the bottom square ONLY of pop up panel,
then position onto center
of bottom half of inside face of card base.
 Make sure the top multi-folds point is exactly at

the center perforation line, and that side points
are centered side-to-side of card base.
Apply pressure to ensure adhesion.
 10. Apply adhesive strips (or glue) to exposed top

square (backside), then bend the card base assembly
top panel down into position to align with bottom
half of base.

Apply pressure to area where pop up
will attach underneath.

inside panels, it will be necessary to leave top tips
of pop up square unattached to tuck arch under slightly.
Square points may also be "lifted" to un-attach
briefly, as needed.
Position arch so that 'cut' ends abut angled square
edges at bottom ends, with top center lace motif
centered at top square corner. Attach in place,
and reattach pop up square tip if necessary.
 13. Position and attach triangle and square accents

on opened pop up square as shown.
 As desired, position and attach heart interior lower

sentiment.
 14. Position and attach offset front card panel

onto card base front.
 If desired, position and attach word phrase

cut out to front of card.
 15. To close the card, make sure the pop up square

sides are folding inward (this should happen
more or less automatically) as the top/front of card
is folded downward . . .
 . . . until pop up and interior decorations are all

enclosed and hidden inside card.
 NOTE that when the card is fully opened,

the pop up crosswise folds may prohibit the card
from remaining open on its own. To correct this . . .

flex into 'valley' folds temporarily.
This will cause a self-easel effect.
 Here is the completed 'Happy Birthday Card' version

with a word-processed sentiment that was fussy-cut
to show through the lower circle cut out panel.
NOTE that this card should fit into a regular
6x6 envelope.


