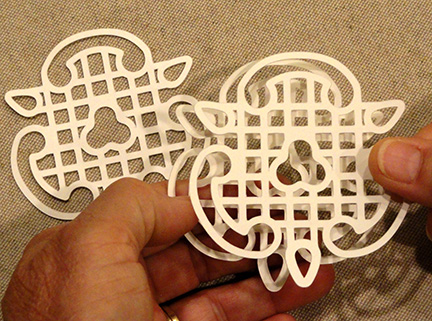
Celebrate
highland influence with this decorative container
that can deliver the “Twelfth
Day of Christmas” gift,
conveying the “Pipers Piping” as Scottish bag pipers.

the “round” shape, with box measuring
approx. 7.5” wide x 7.5” long
x 2.25” tall/deep when closed. Base features two optional
interlocking cross-divider which provide added strength.
Lid features delicate
holly swirl cutout decoration
with contrast underlay and insets for leaves and
berries –
be sure to use a fresh, sharp cutting blade.

Raised center column has thistle cut-out decoration
with leaves and berries (omit dome effect, if preferred;
simply position and glue within
circle cutout of holly ring.)
Optional tie-on number 12 tag is included to
attach at
dome boxing variation that includes punch holes pair.
Pairs well with
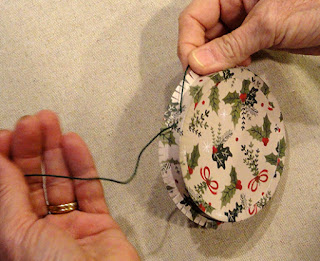
separate designs “Tag Piper Piping”
and “Tag Scottish Pleated Kilt”.
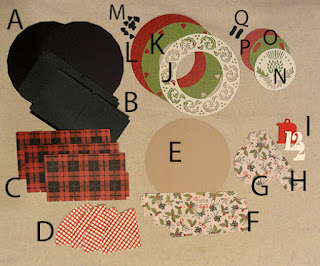
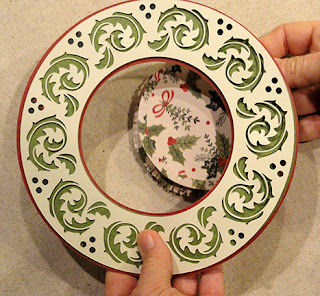
ASSEMBLY: 1. Identify and cut the shapes:
A BASE box base "circles": 1 - exterior; 1- interior
B optional interlocking interior dividers
C BASE wall shapes (2 diff shapes supply 3 segments)
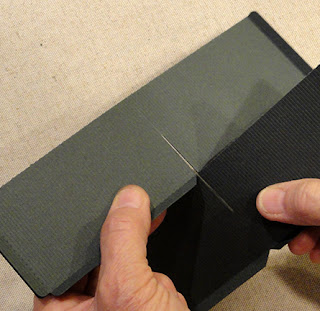
D optional interior floor accents, if dividers are used
E LID roof interior "circle" shape; NOTE that model also
uses a print 'E' shape on top exterior
F LID walls (2 diff shapes supply 3 segments)
G dome interior roof circle
H dome walls (2; with or without twine attachment holes)
I number "12" tag: base, "12" base, "2" overlay
J holly swirl ring LID overlay
K contrast holly ring underlay
L contrast edge trim ring underlay
M berries contrast inset shapes (10)
N dome thistle disc
O thistle disc contrast underlay
P dome rim edge accent underlay
Q berries contrast inset shapes (1 l, 1 r)
NOTE that the BASE floor "circle" and the LID's
ceiling "circle" can be differentiated from each other
by locating and identifying the 'L' symbol cut into the LID.

all perforation lines for panels, top fold-over interior walls,
bottom tabs and side attachment flanges.
 3. Join the three strips (2 long, 1 short) together by
overlapping the left straight edge over the right edge
flange of adjacent strip, adjusting top to bottom
for proper alignment.
 4. Form the walls into a ring to align and join
the final side seam.
 5. Fold the top interior wall segments to
the inside of the BASE and glue each in place
to wall backside.
 6. Bend bottom tabs inward, apply glue to the backside
of each tab, then insert the interior bottom "circle",
rotate so that each edge facet of circle aligns with
a wall segment, and glue in place, applying fingertip
pressure all around to ensure that each tab attaches
thoroughly.
7. Position and attach the exterior second floor "circle"
to the bottom of the BASE assembly, adjusting so that
the edge facets align with wall segments' bottom edges.

8. Prepare the LID's wall strips in manner similar to
the BASE walls by bending back on perforations for
segments, fold-over bottom interior wall segments,
top tabs and side connection tabs.

9. Position and attach the three LID wall strips
(2 long, 1 short) into one length by joining side seams
in manner similar to what was done with BASE walls.

10. Form the wall strip into a ring to position and
join the final side seam.
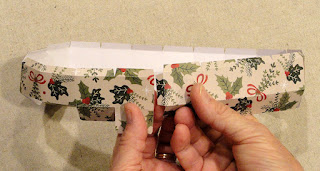
11. Bend the interior wall tabs inward and attach
in place to backside of wall segments.

12. Bend top tabs inward, then place LID walls ring,
tabs edge down on work surface, and apply glue
to the underside of tabs. Insert the LID interior "circle"
into walls ring, adjust so that each edge facet aligns
correctly with walls segment, then . . .

. . . press in place to attach completely and securely.

13. As with BASE second exterior "circle" reinforcement
shape, position and attach the second LID exterior
circle shape on top of LID assembly, aligning
wall segment edges with circle facet edges.

14. Position the contrast holly ring (green here) over
the LID's contrast rim shape (red here), adjust so that
the inner margin and consistent all around, as well
as the outer margin (these are not the same width),
and attach in place.

15. Position and attach the berries contrast inset shapes
into the cutout recesses in contrast ring.
NOTE if rim contrast color is desired as berries "show-thru",
the inset shapes may NOT be necessary.

16. Position the holly swirl accent ring over the top
of the previous rings assembly, then rotate so that
contrast insets show thru the triple berry cutouts
properly, adjust so that the (green) contrast ring
edges remain concealed behind the swirl accent ring . . .

. . . then attach in place. NOTE that the (red)
accent ring should remain visible as narrow trim
evenly exposed - though different widths for
outer edge and inner edge.

17. Prepare dome wall strips by adding slight back curl
to each, using a rod tool such as this dowel to
run each strip over while applying thumb or
finger pressure (think curling ribbon). Then . . .
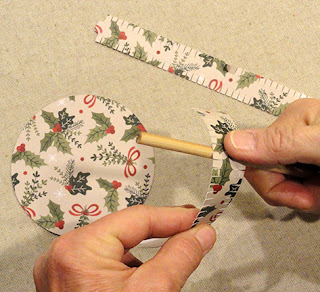
. . . align and join the ends by overlapping straight
side edge over adjacent tab (NOTE that the END tabs
of the wall strips DO NOT bend back - perf cuts are
for edge alignment ONLY) and attach.

Form the walls unit into a ring to align and attach
second side seam.

Bend the top tabs inward . . .

. . . and bend the bottom tabs outward.

18. Apply glue to the underside of TOP tabs, then . . .

. . . insert the "roof" circle inside the ring, assist it
to settle with the cut edge snugly against the tabs perf
bends, and . . .

. . . apply fingertip pressure all around to ensure
a complete and thorough seam.

19. Prepare the dome's support strut strip by
bending back on each segment division perf line,
also at end tab, and top edge tabs.
Bend the edge tabs outward.
20. Form the strip into a triangle and join end seam.

21. Apply glue to the underside of the edge tabs,
then position, centered, within the dome recess (backside)
and glue in place.

22. If you plan to have your project include
the twine-attached number 12 tag, cut a length of
twine and insert inward and outward through
the punch holes pair in wall at this point, and
loosely tie the ends into a slip bow (holes will soon
not be accessible during the assembly process).
23. Position and attach the thistle accent assembly
on top of the dome assembly.

24. Apply glue to the outward-bent dome tabs,
then position and insert the dome up through
the opening of the swirl ring, then . . .
. . . apply fingertip pressure all around to ensure
that the seam is fully attached.
25. (Not illustrated with an image)
Position - centered -
the swirl ring/dome assembly on top of the previous
LID assembly and attach in place.

26. Prepare the optional interior divider walls
by back bending in half, then bending bottom edge
flanges forward.
NOTE that the dividers were reconfigured in final file
to NOT include the end attachment flanges.

27. Apply glue to the backside of one long half
of each divider strip, then fold and glue together,
leaving bottom edge attachment flanges unattached.

28. When fold-in-half glue is dried, slot the two strips
together at center (NOTE that the TOP strip has
a tiny "bite" half circle cut out along one flange edge).
Slide the two strips together fully, until top edges align.

29. To complete the box, insert the divider assembly
into the BASE, then position the LID, align
the facets and slide into place.

30. Assemble the no. "12" tag by layering the separate
"2" onto the "12" base (if you wish to have complete
definition between the two numerals), then . . .

. . . position onto contrast base, with offset margin
even all around.

31. Thread twine through tag hole and attach
with knot and bow.
NOTE that the sample project has a ribbon cockade
threaded through top hole prior to attaching.

Your "Twelfth Day of Christmas" container is complete!