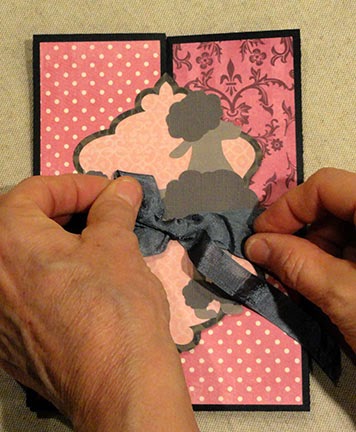
Here's a unique and colorful card
that celebrates "french influence"
in the form of a poodle dog.
Card measures approx. 5x7 when closed.
Front medallion "placard" extends across the gap
as the two side folds meet at the middle.
Front, interior sides and back panels offer
scope for using your favorite paper prints.
Back outside includes smaller placard with heart
to attach ribbon that wraps and ties at front
for closure.

ASSEMBLY:
1. Identify and cut the shapes.
At top of this image, the left main and right side (black) card base shapes have the rectangle accent panels in their finished positions. NOTE that the tall inside side panel, second in from the left, is a matched shape (full rectangle) like it's twin on the right side panel. The medallion cutout extension is shown overlapping it.
2. Prepare the card base panels by folding as shown: vertical side perforations folded as "mountain" folds, inward vertical perforations - including the right panel tab - as "valley" folds.
3. Overlap the center panel straight edge over the right side panel at tab perforation line, adjust top to bottom, than glue in place.
This image shows an "over view" of how the main panel will fold, with the medallion cutout extension remaining unfolded and extending straight from the same plane as the left card front.
4. Glue each of the decorative panels in place, adjusting to create the offset margins as shown.
5. Assemble the poodle "floofs" and tiny nose shapes on the main poodle body shape. Layer the inner and outer medallion decor shapes. Center and attach the poodle assembly on the medallion.
6. Position and attach the medallion assembly over the left card front medallion cutout with corresponding cut edges lined up exactly.
7. On the card backside, find the center of optional ribbon length (approx. 15-18" long) and attach to the center of the back medallion underside.
8. Determine the finished position of the medallion according to the level on the card FRONT where you want the ribbon to overlap, then center and attach the medallion to the card back (with ribbon between).
Position and attach the heart accent shape.
To secure the card in the closed position, bring the ribbon ends to the front and tie in a bow.
At the end of the assembly process, the first time you tie the bow you can adjust and trim the tail ends to the desired length.
Here is the completed card,
open to reveal the fun interior accent panels.


I love the gorgeous papers you used on this card! I can see this card base used for so many other occasions. I love how the ribbon is attached on the back.
ReplyDeletethanks for the instruction link. this card will be perfect - hope you don't mind if I pink and bling it up for a little girl. :)
ReplyDelete